The Best iPad Sketching Accessories for iPad Artists: My 2016 Gear List Pt.2

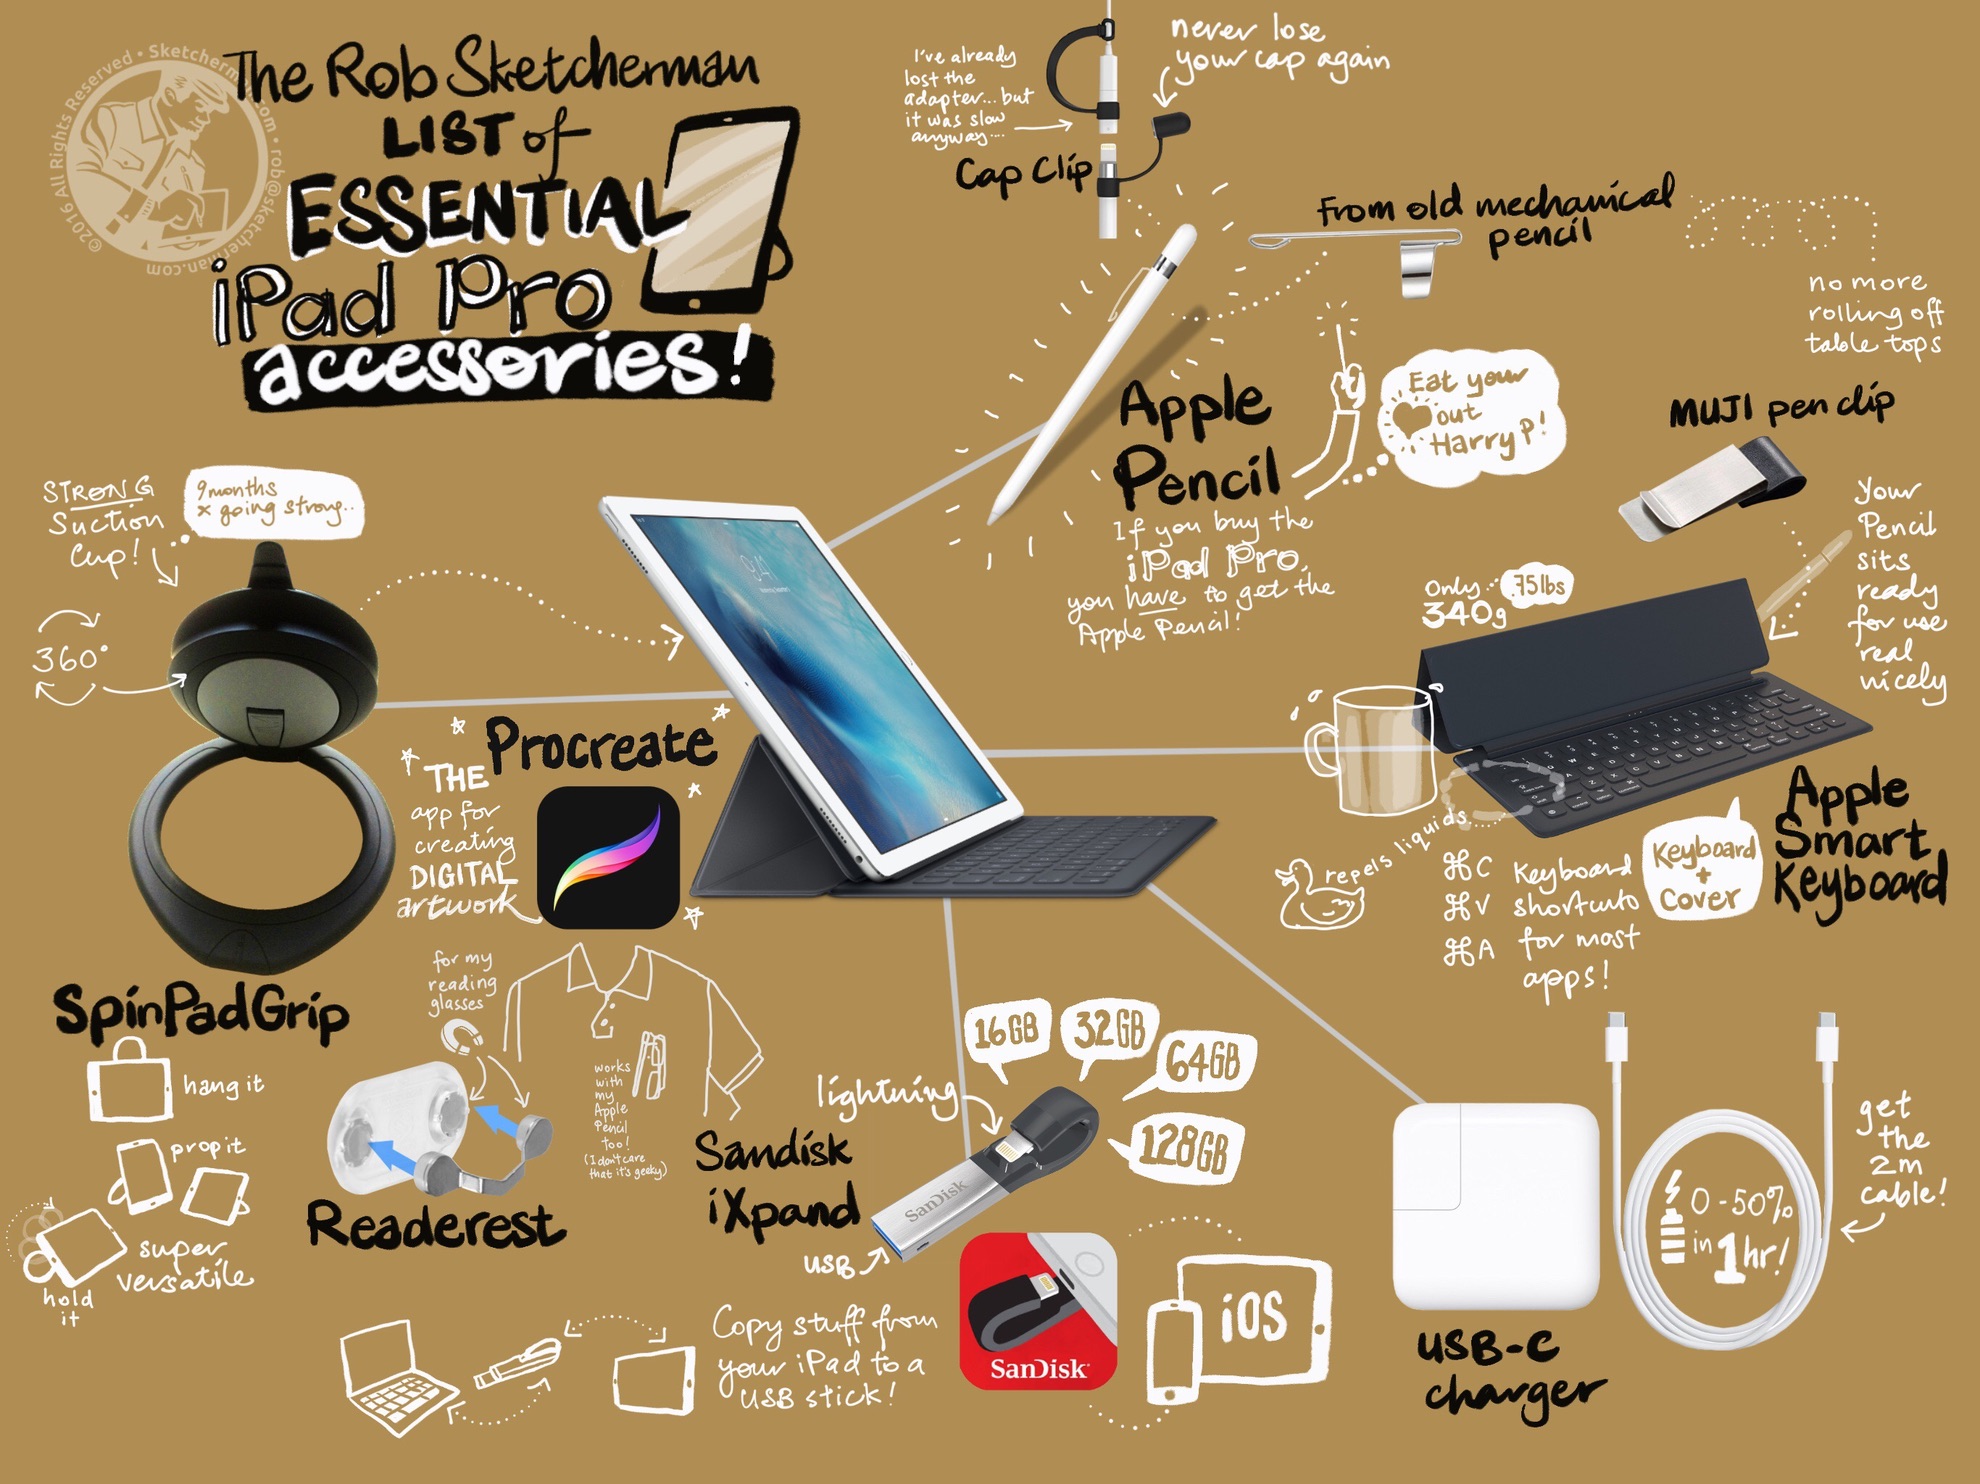
I made this chart in Procreate for a recent workshop on iPad Pro Creative Workflows, which lists all the gear I use daily with my iPad Pro. Details below!

I made this chart in Procreate for a recent workshop on iPad Pro Creative Workflows, which lists all the gear I use daily with my iPad Pro. Details below!

I talked about tablet holders recently and today, will discuss other gear I've discovered and consider essential. This is what I have with me when I'm out with my Jumbo Pro. Some items are really simple, and you probably already have options lying around your home, like the clip I use for my Apple Pencil. My most recent discovery on the other hand, has been in the market for a couple years, and I am so glad I finally stumbled across it!

Full disclosure: I have Amazon affiliate links in this post. (...and thank you if you support me through the links!)

Right! Let's jump straight into things then...

Keep your Apple Pencil from rolling away

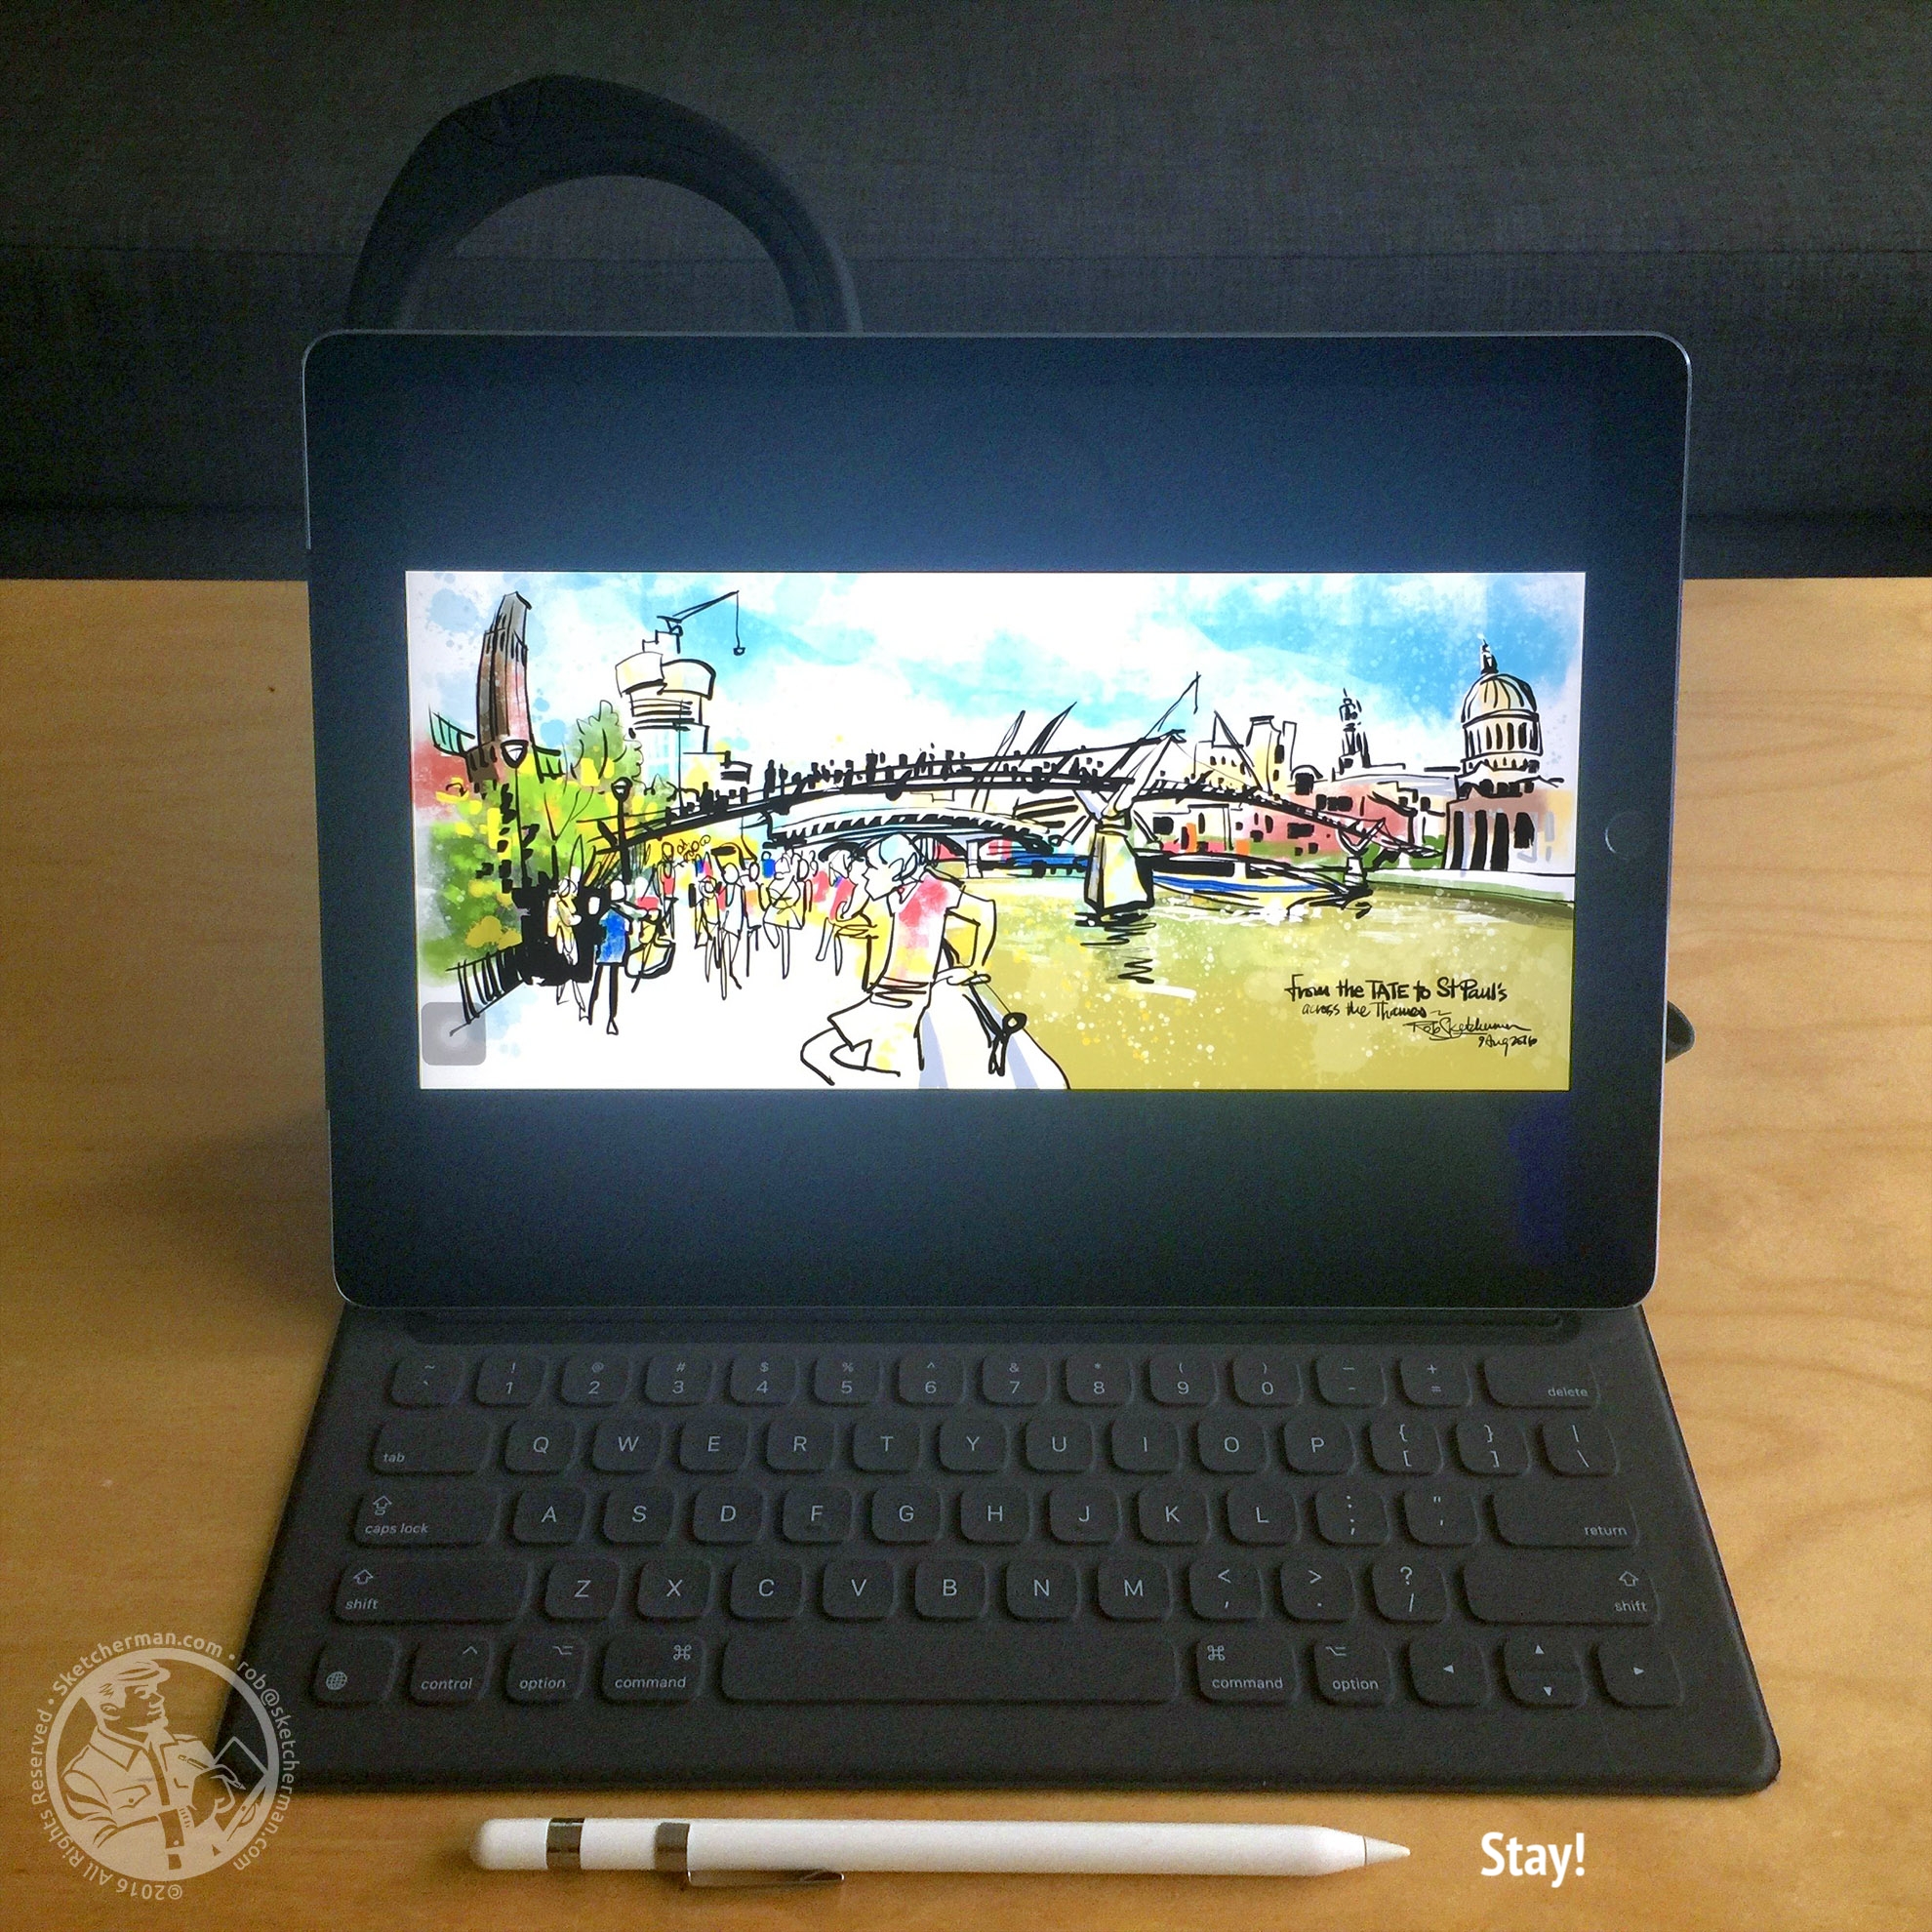
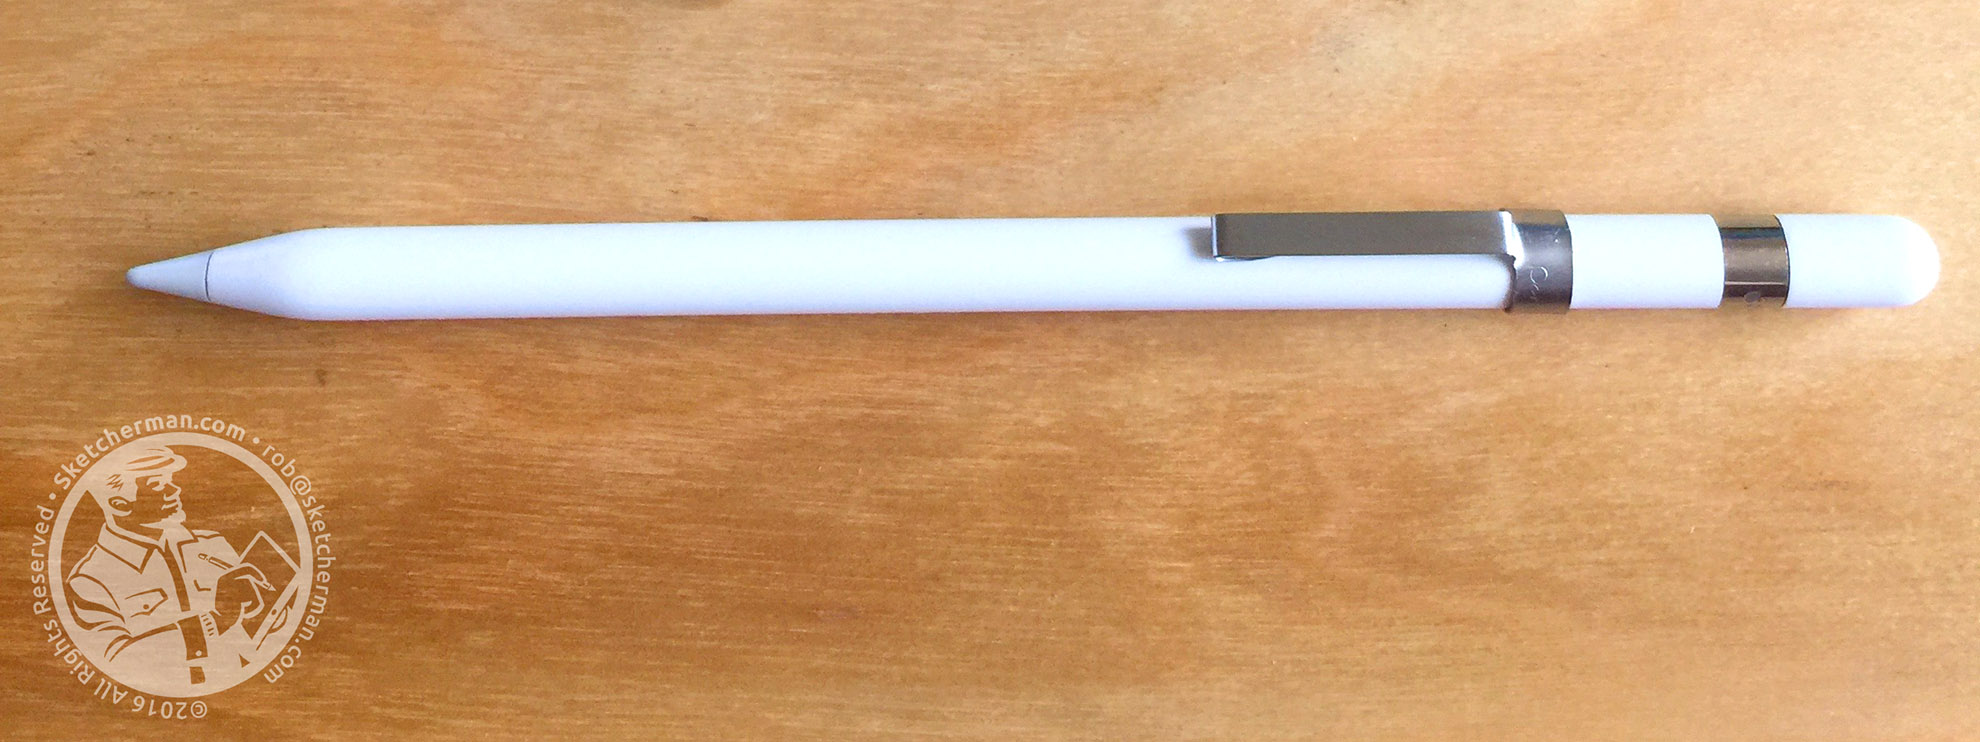
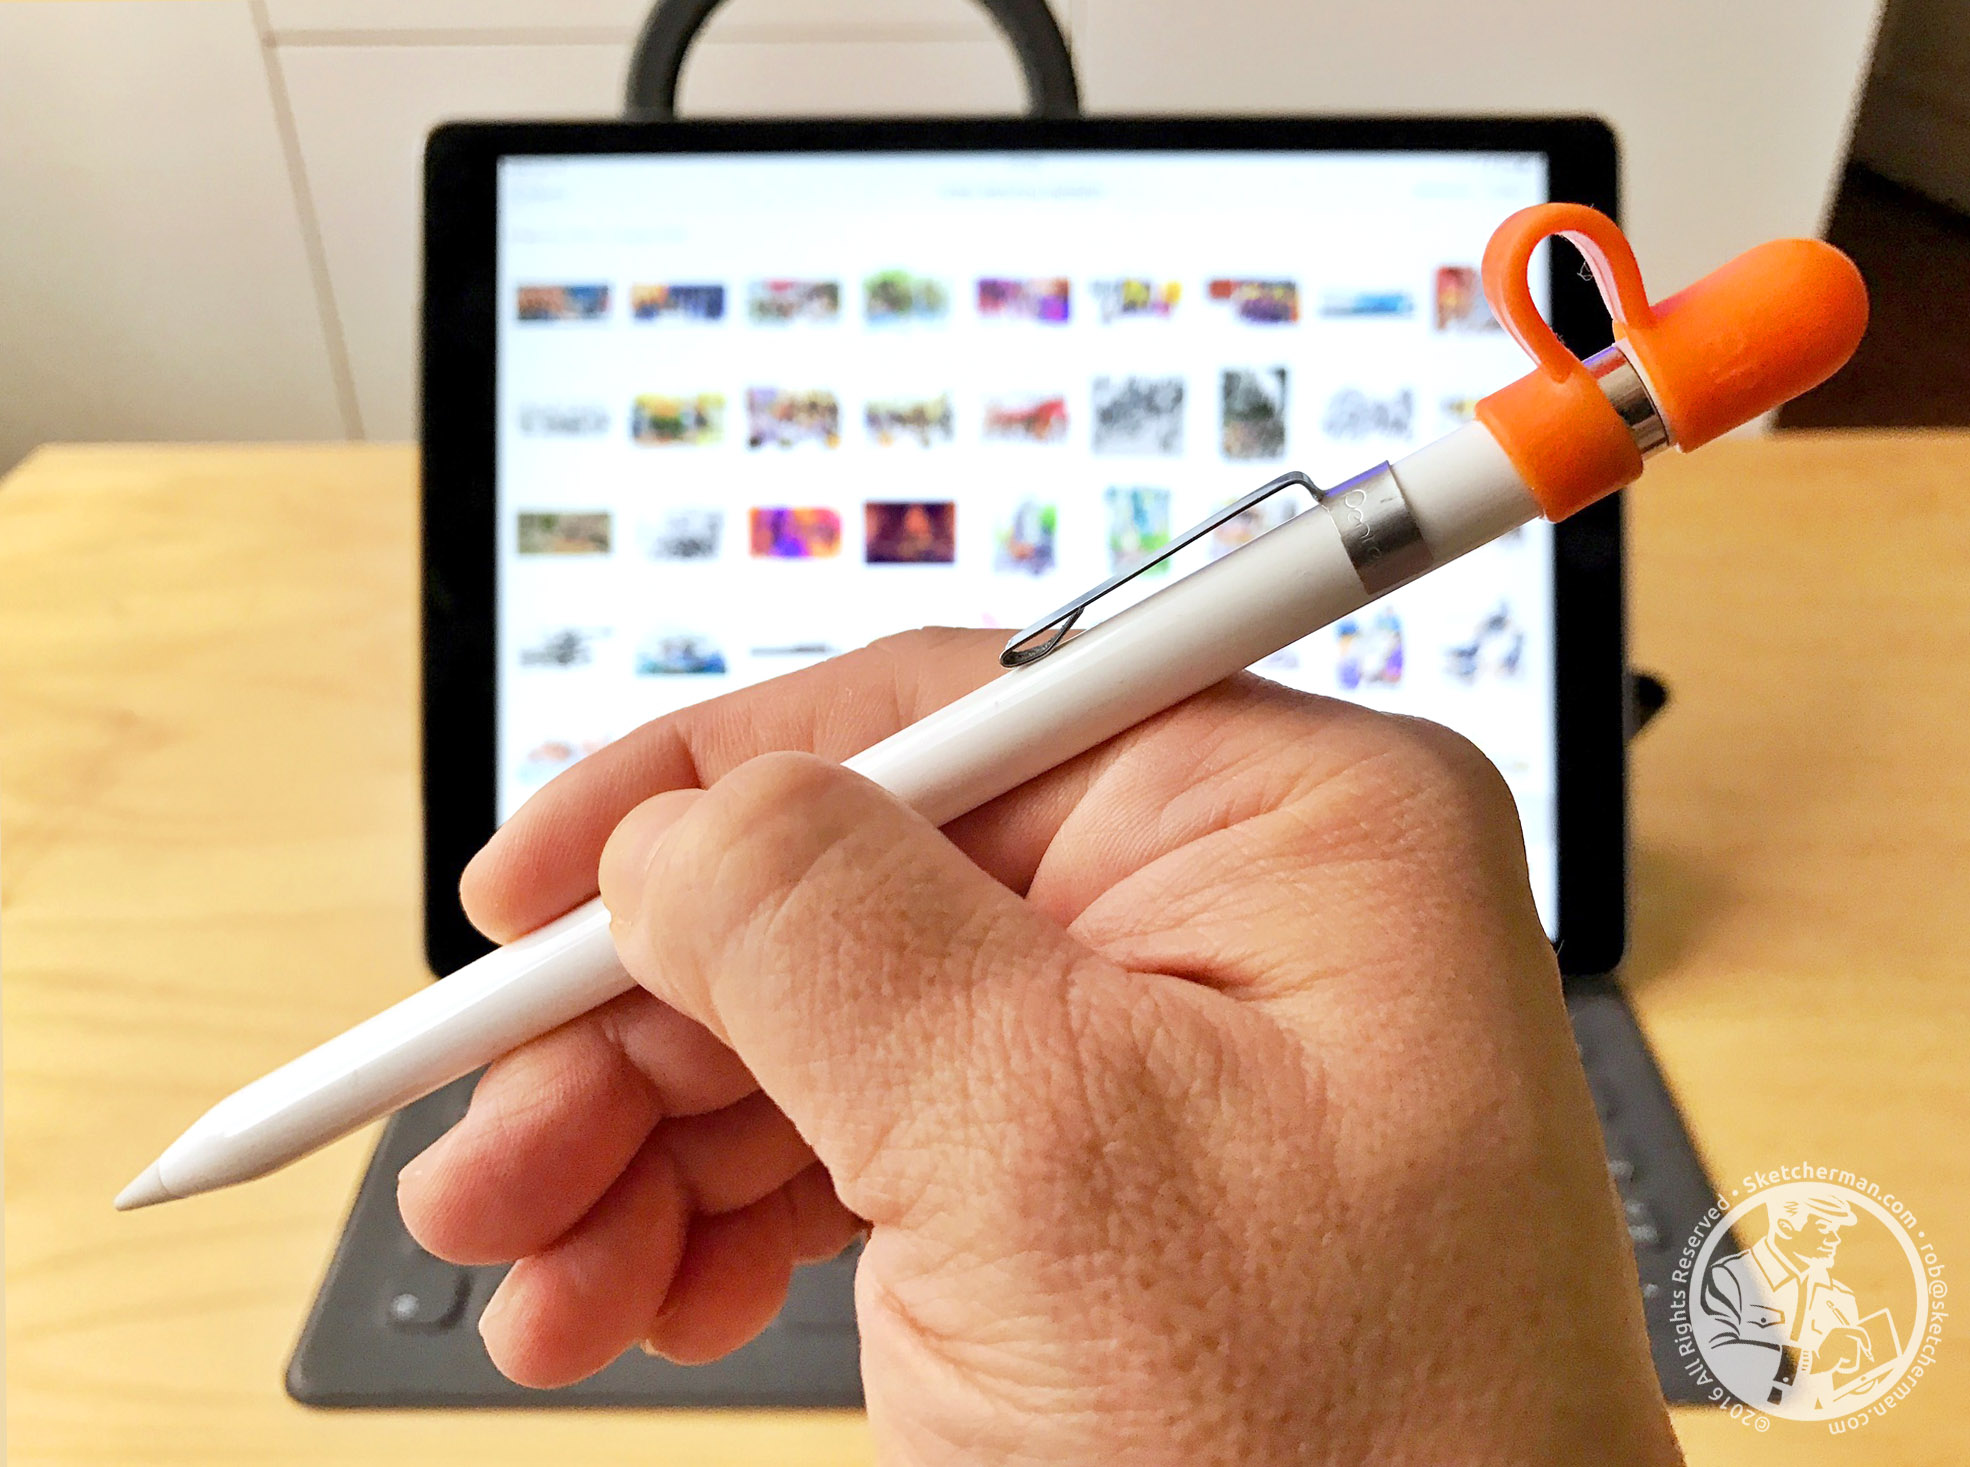
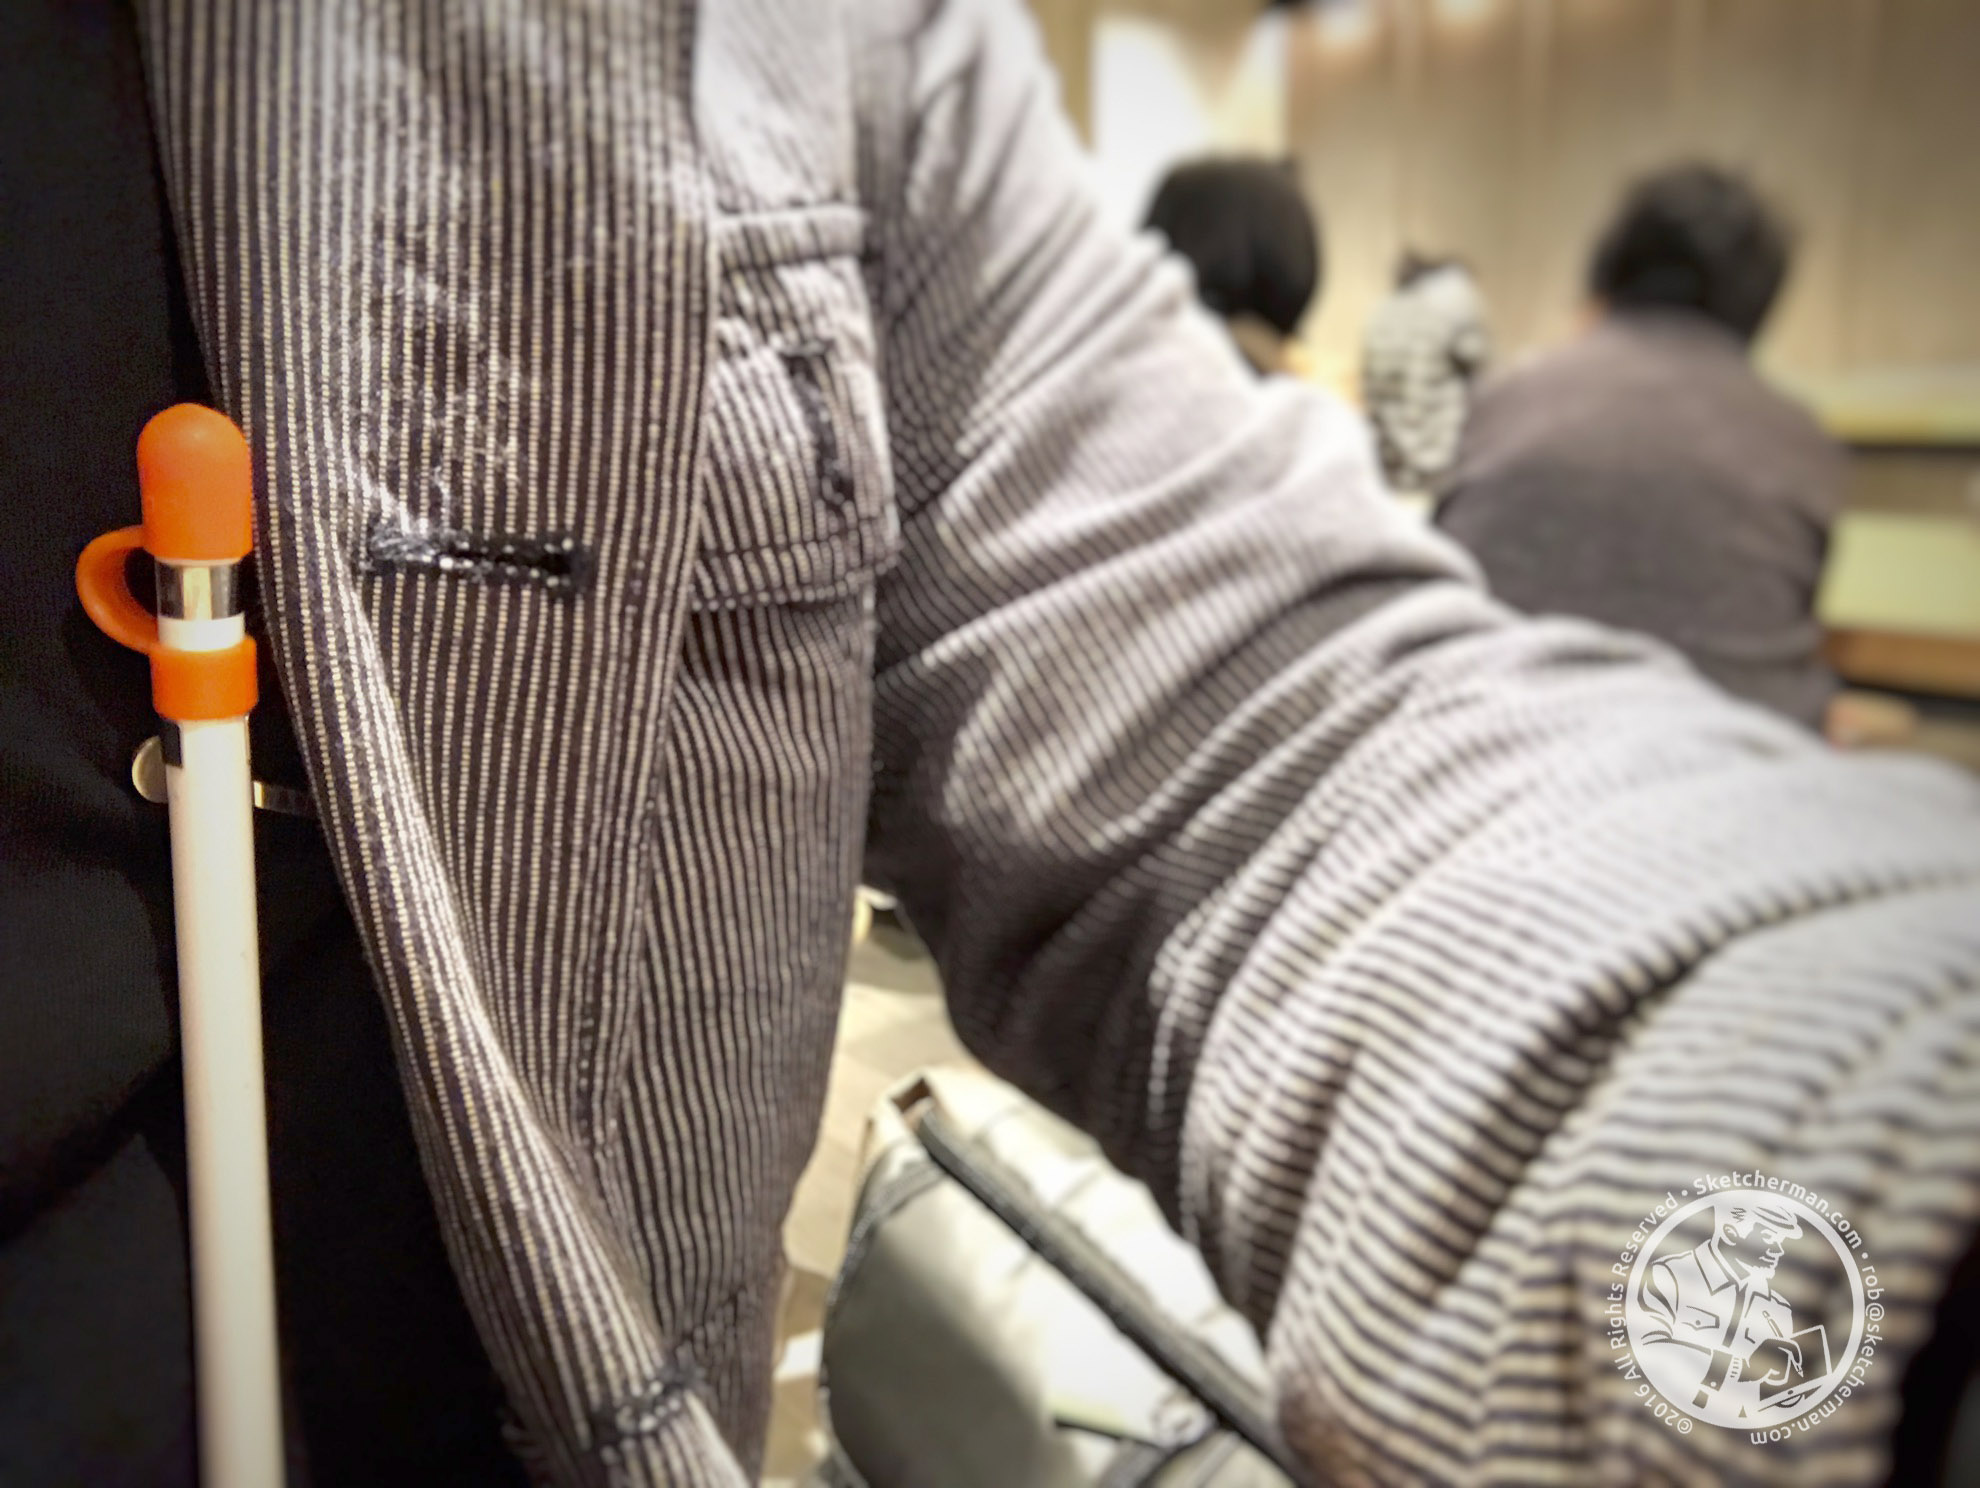
The Apple Pencil is a wonderful stylus but I got tired of it threatening to roll off every surface. Here's my cheap, low-tech solution. First thing I recommend you do is see if you have an old mechanical pencil hidden in a drawer somewhere. Found one? Great. Remove the pen clip that comes with it and stick it on your Apple Pencil. I also found this handy for clipping my Pencil to the inner pocket of my jacket when I'm out and about. 

Keep your Pencil within easy reach

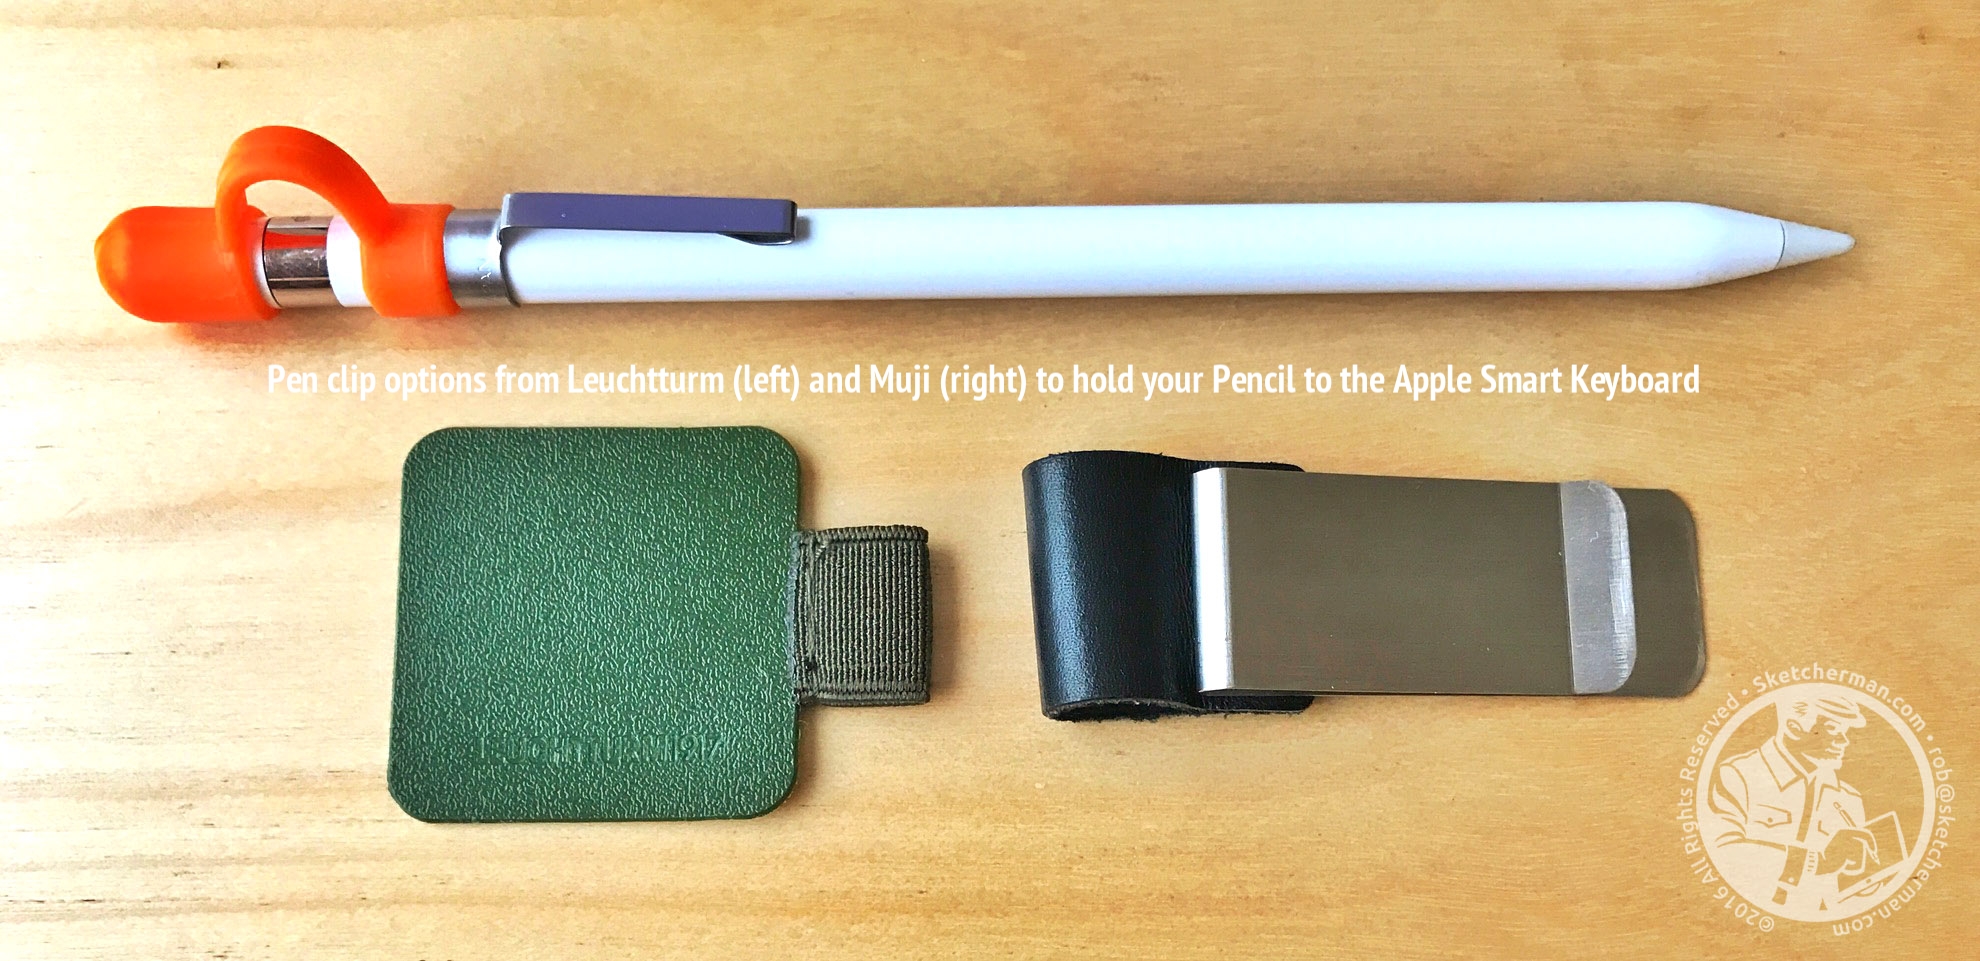
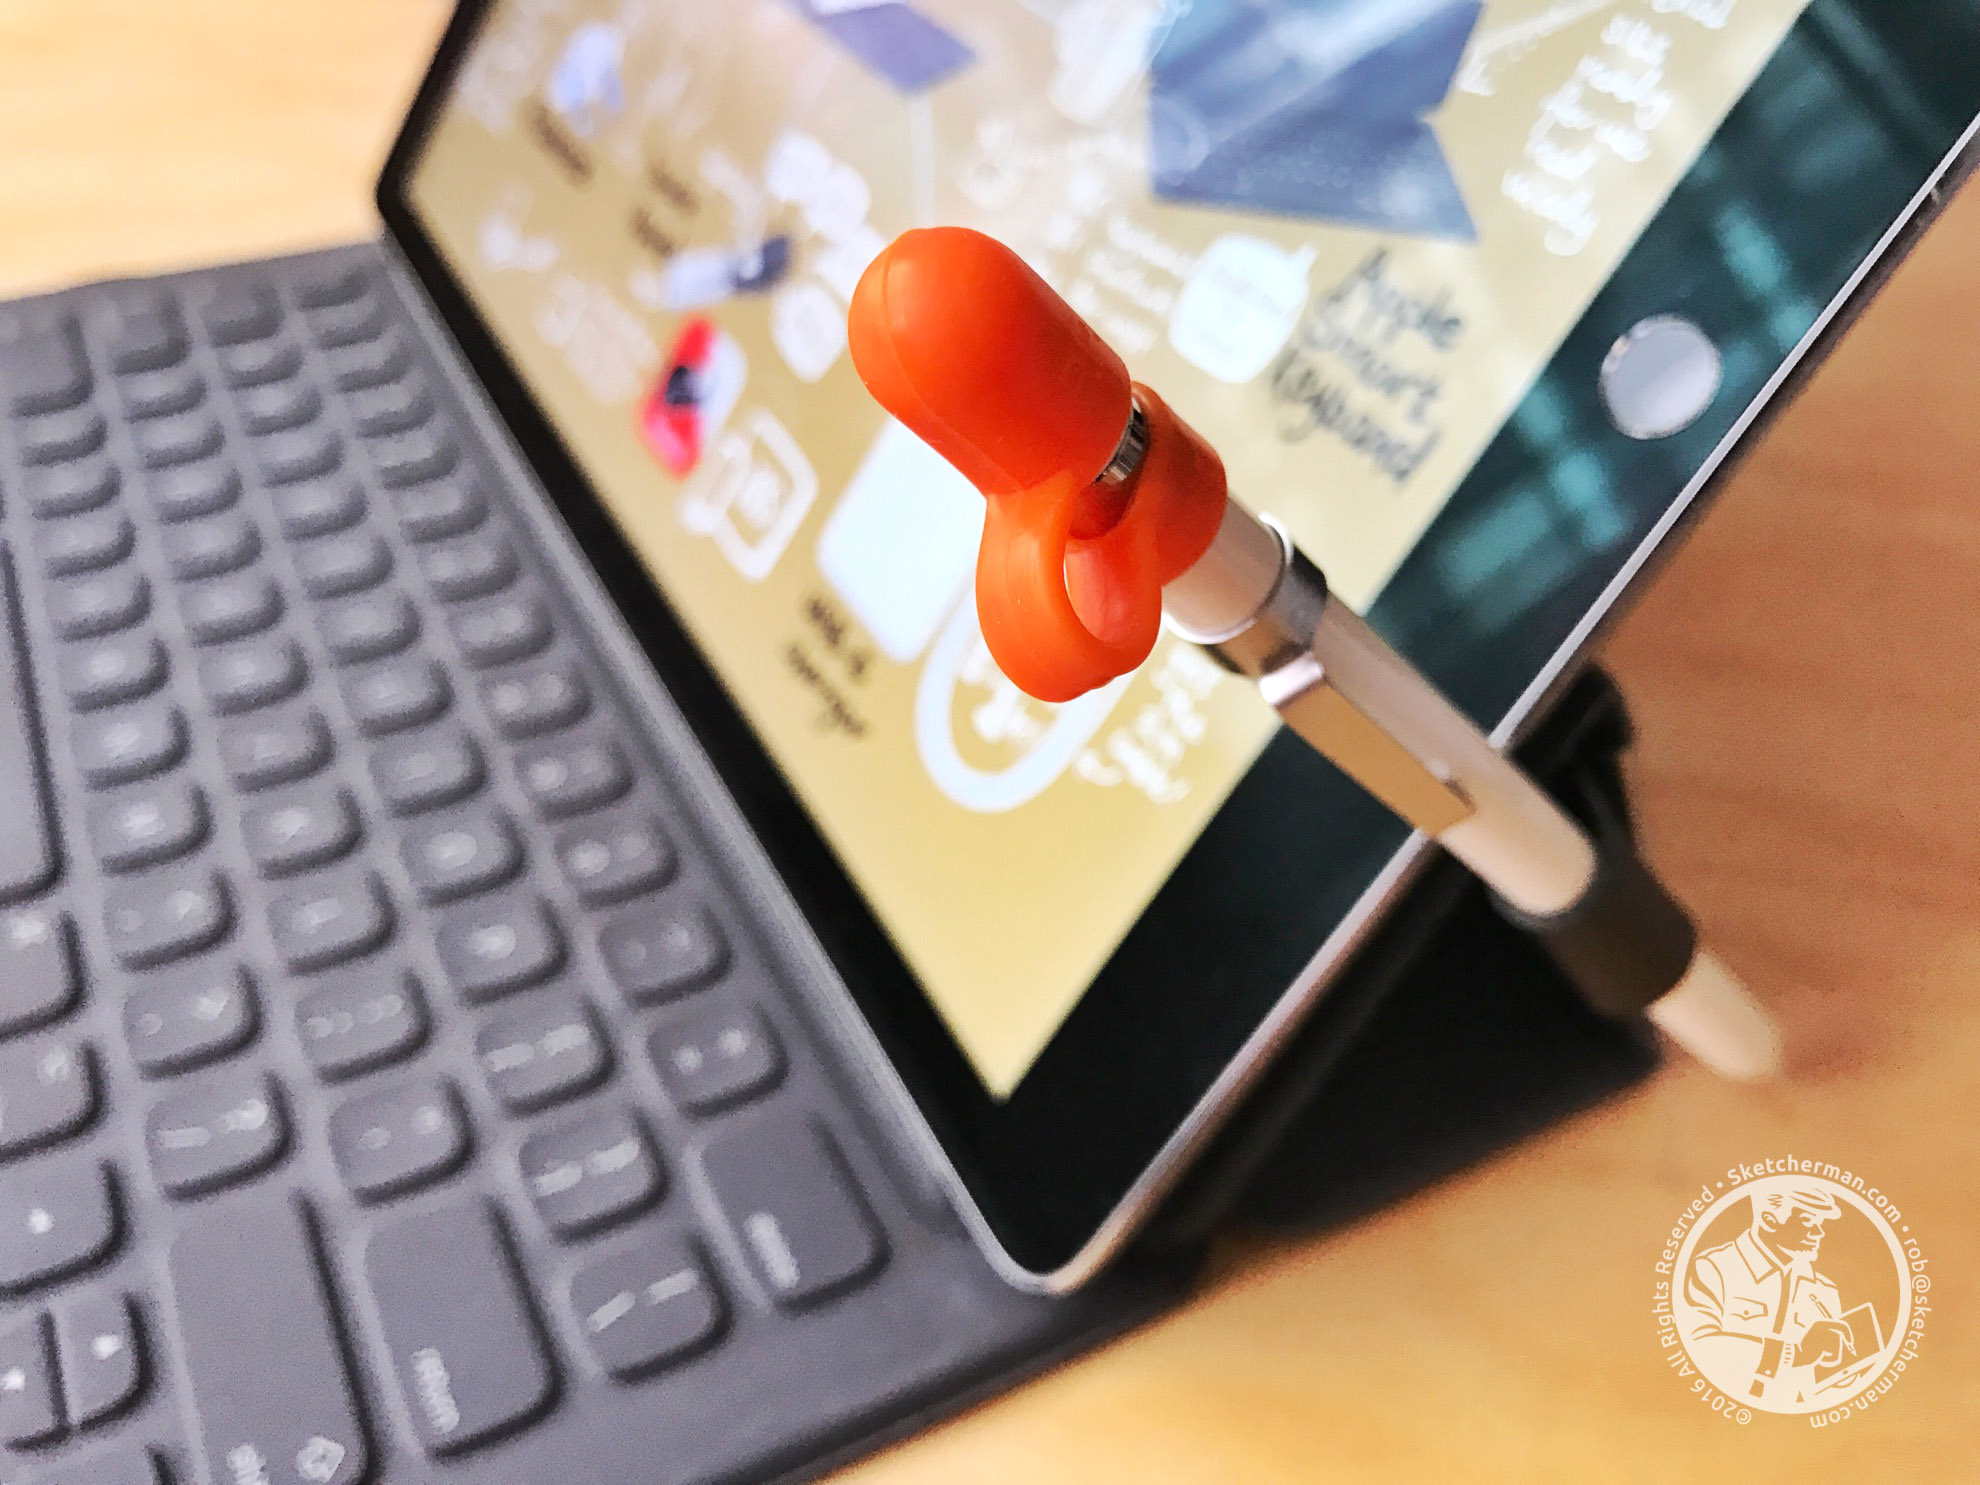
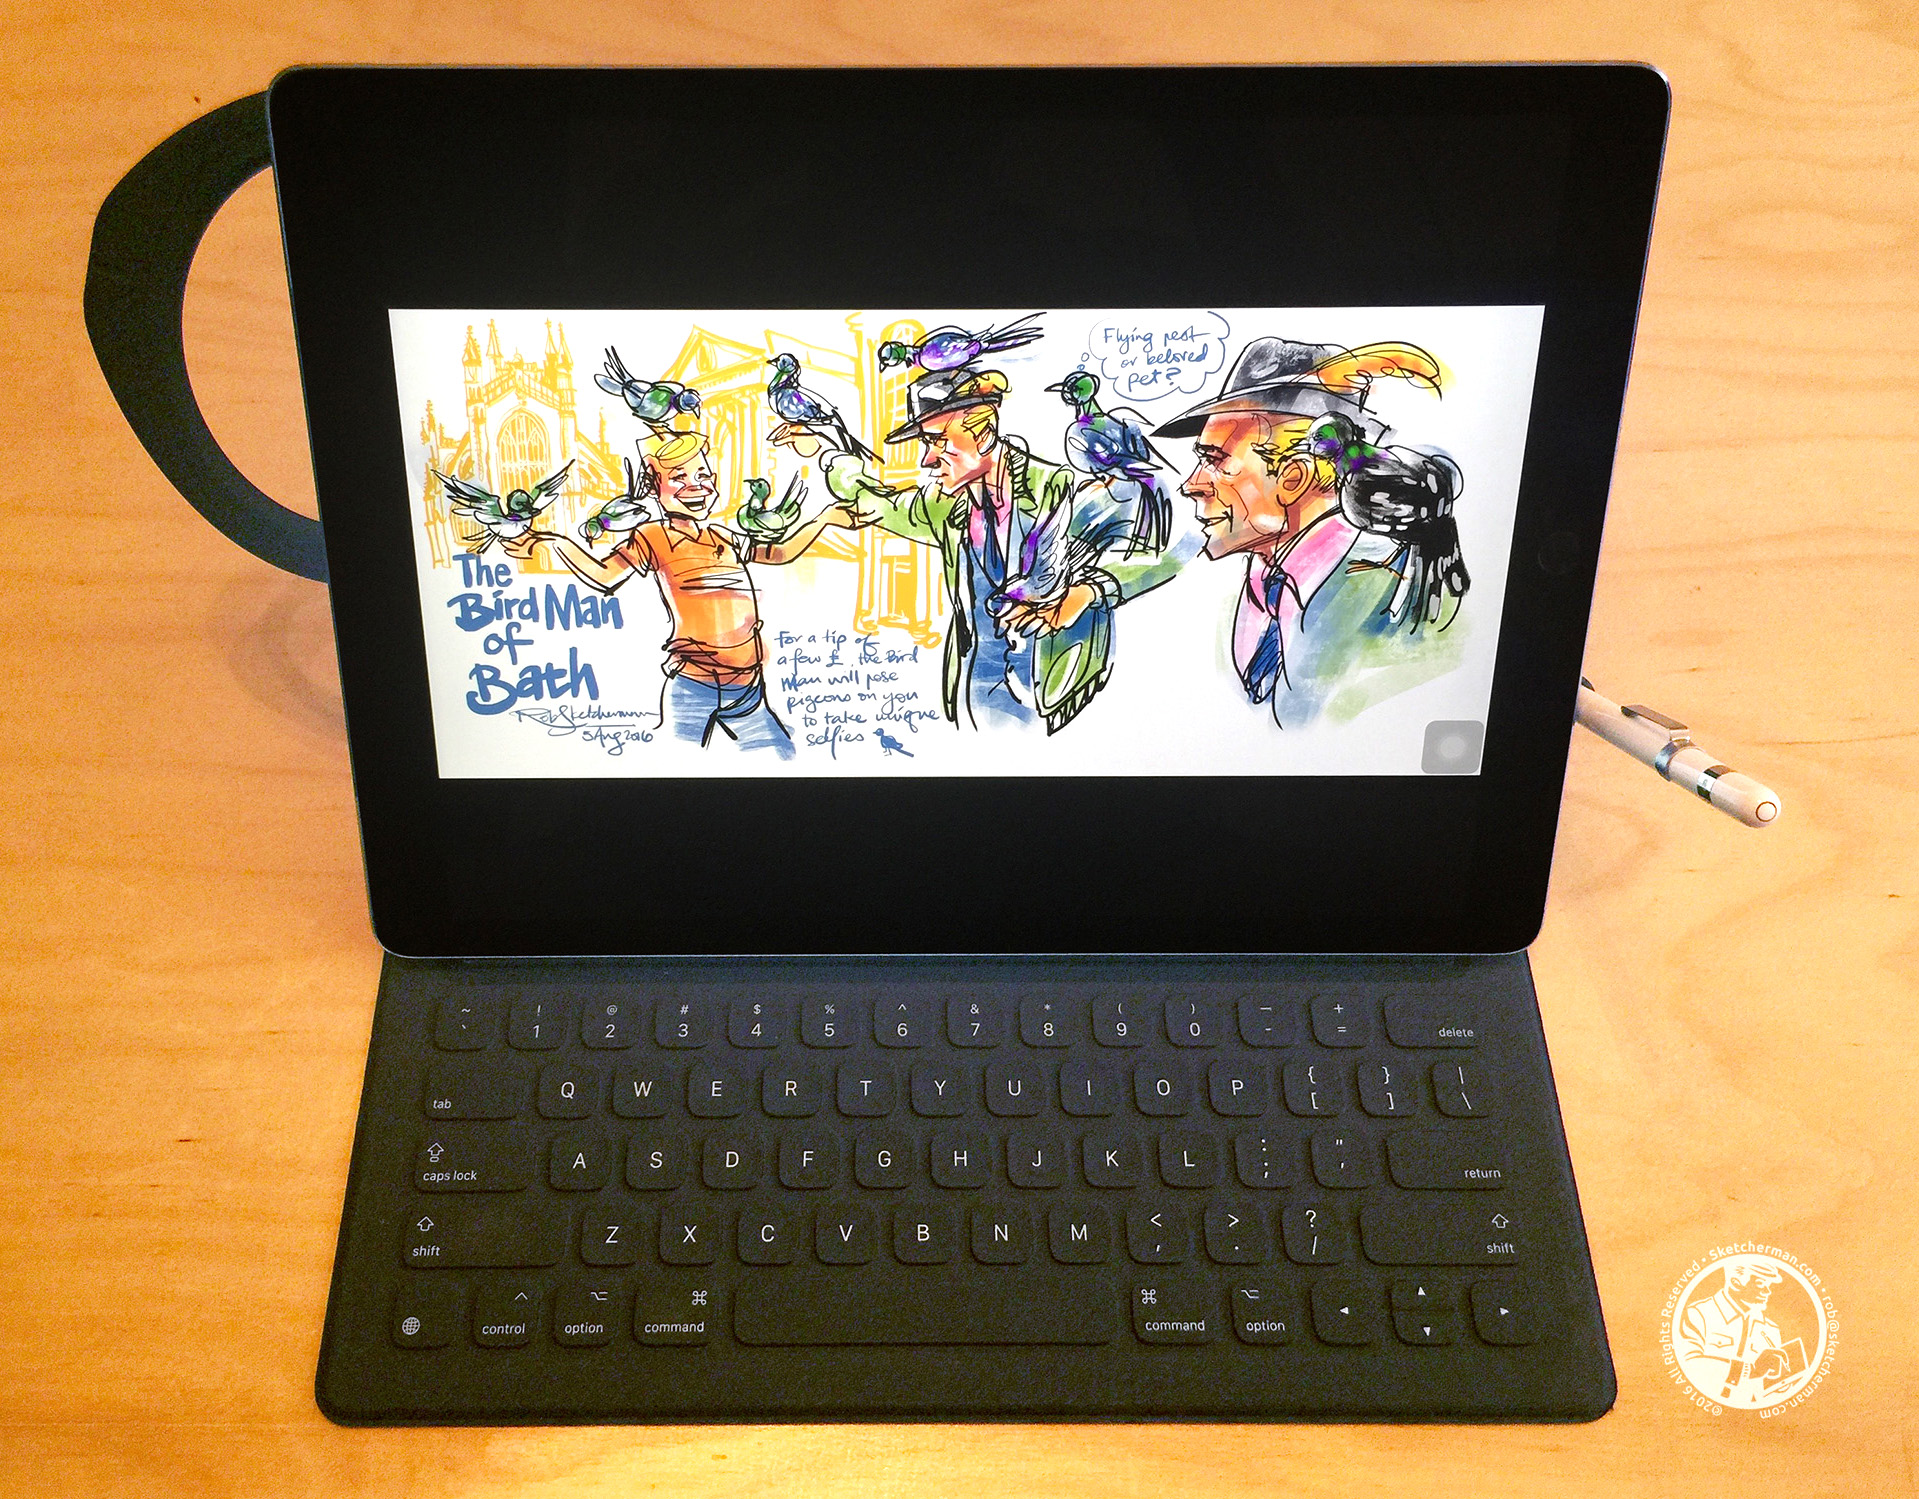
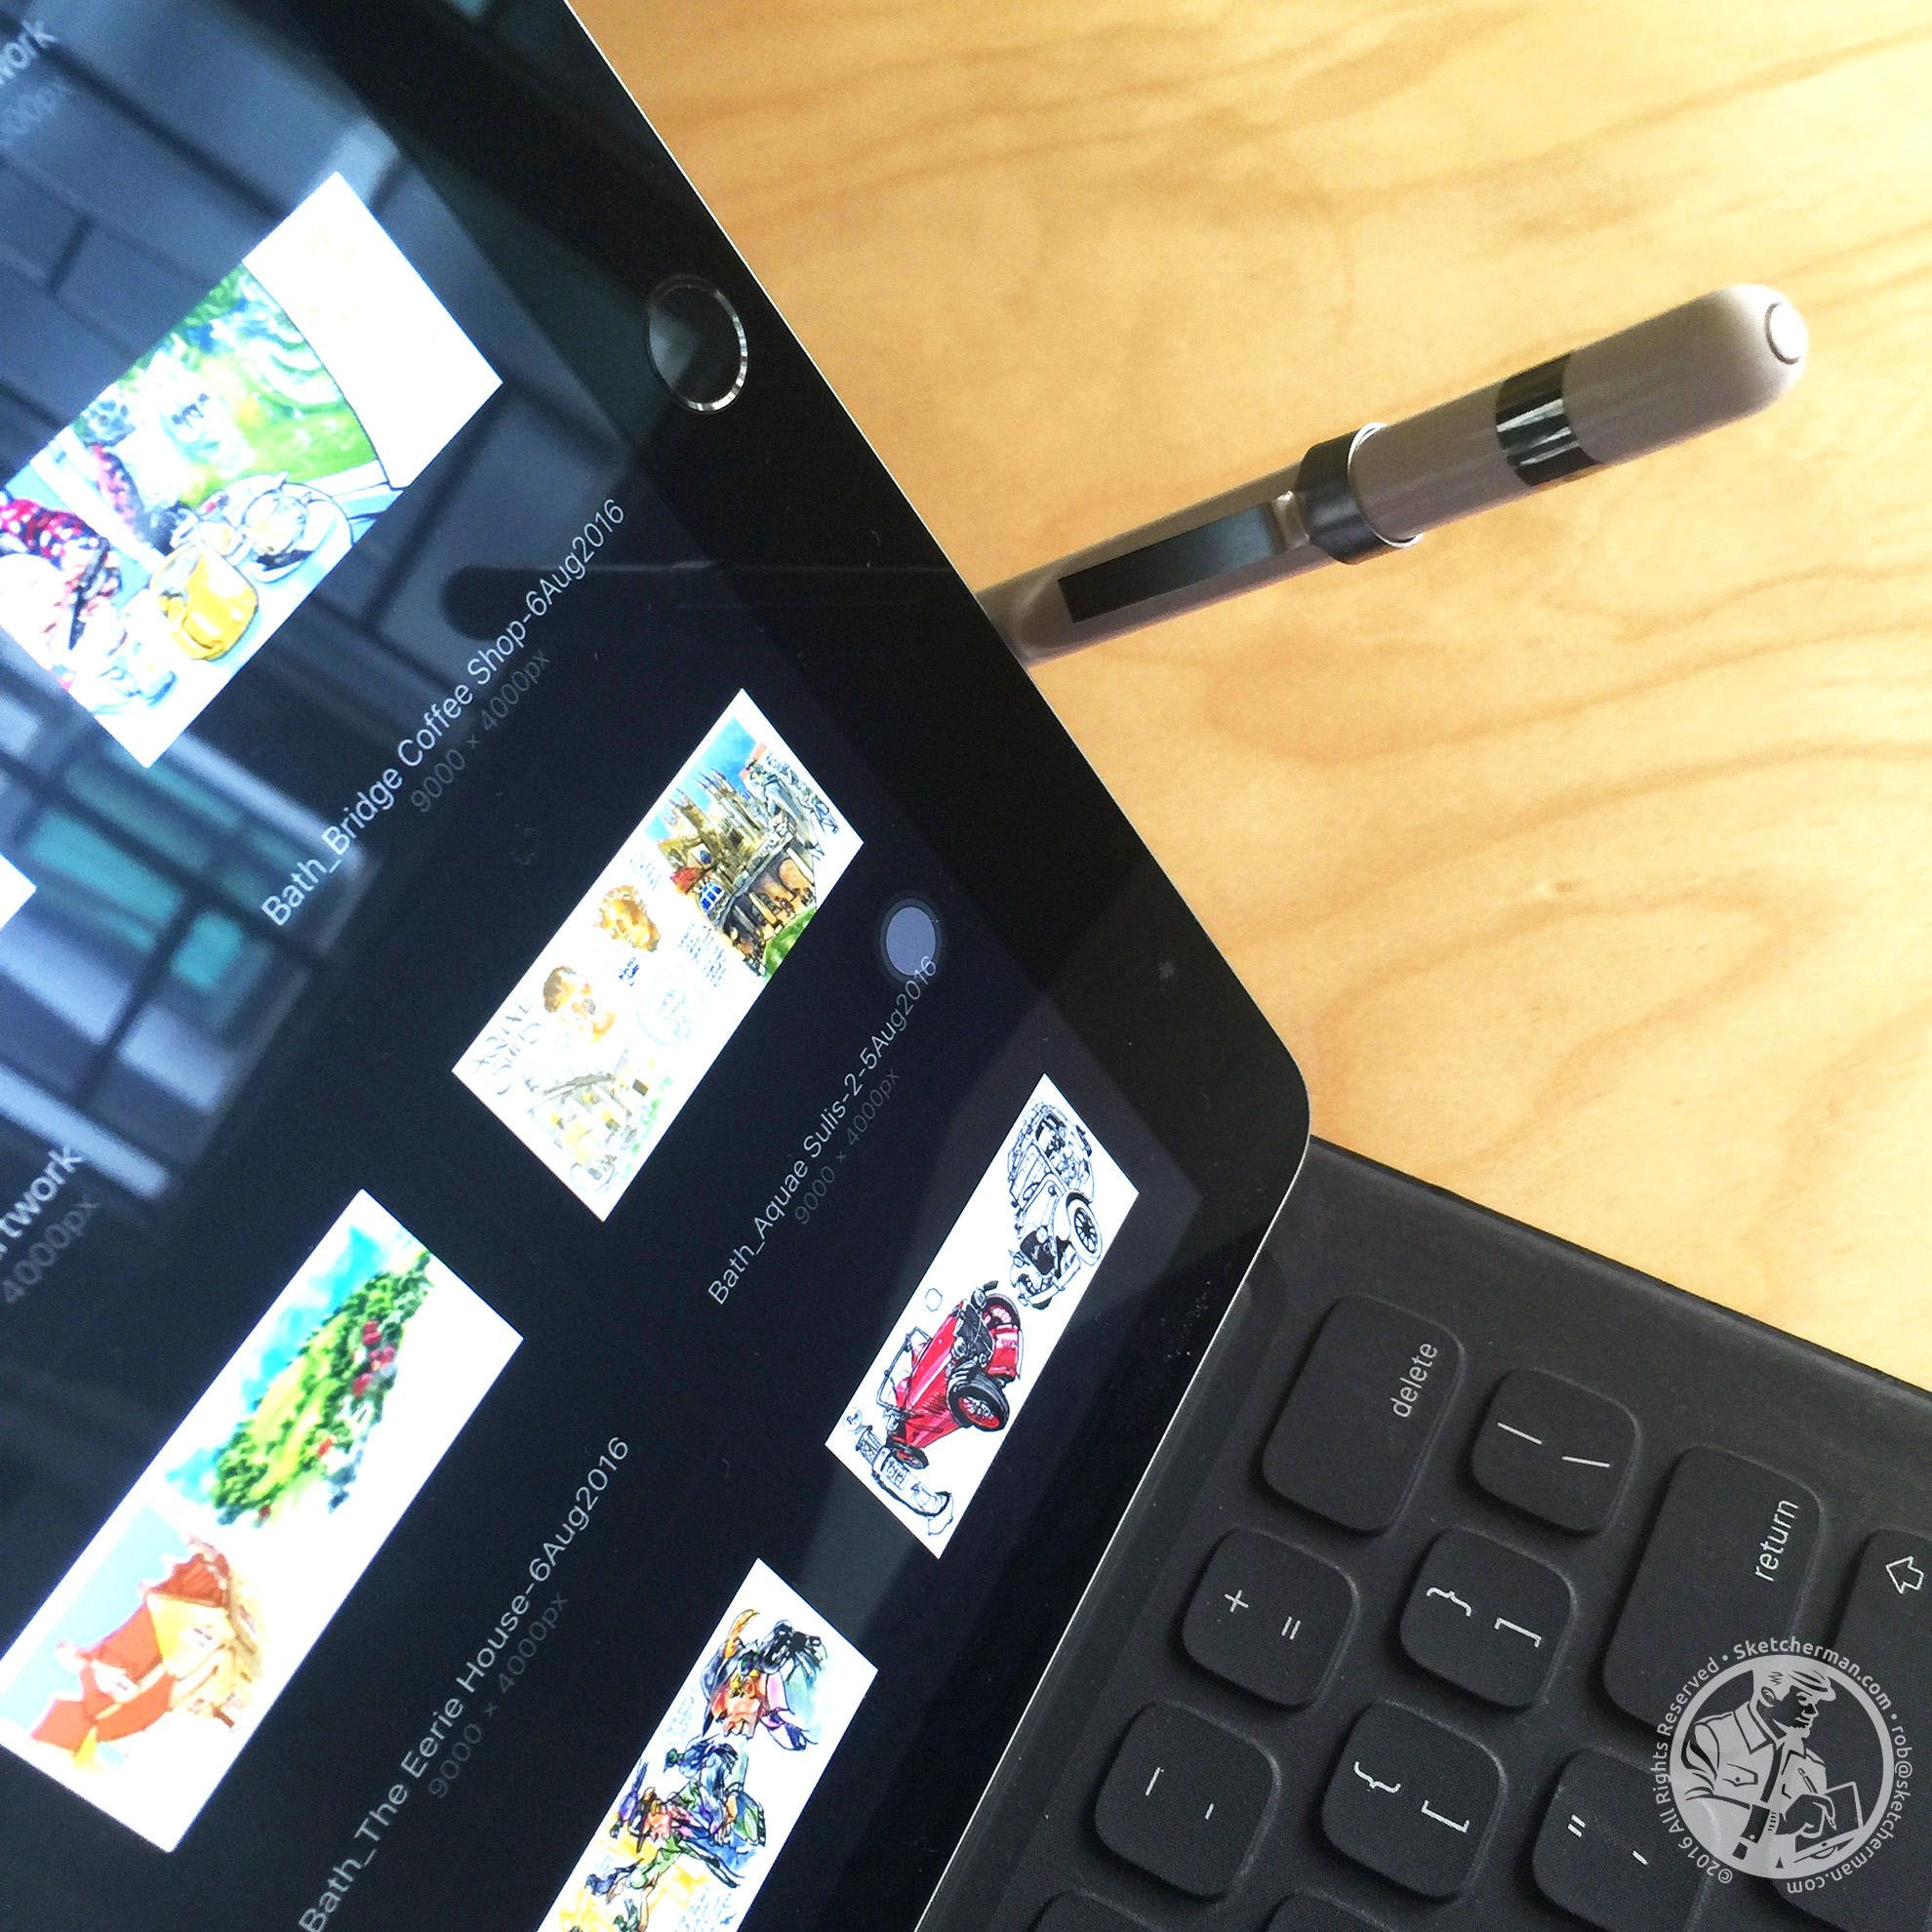
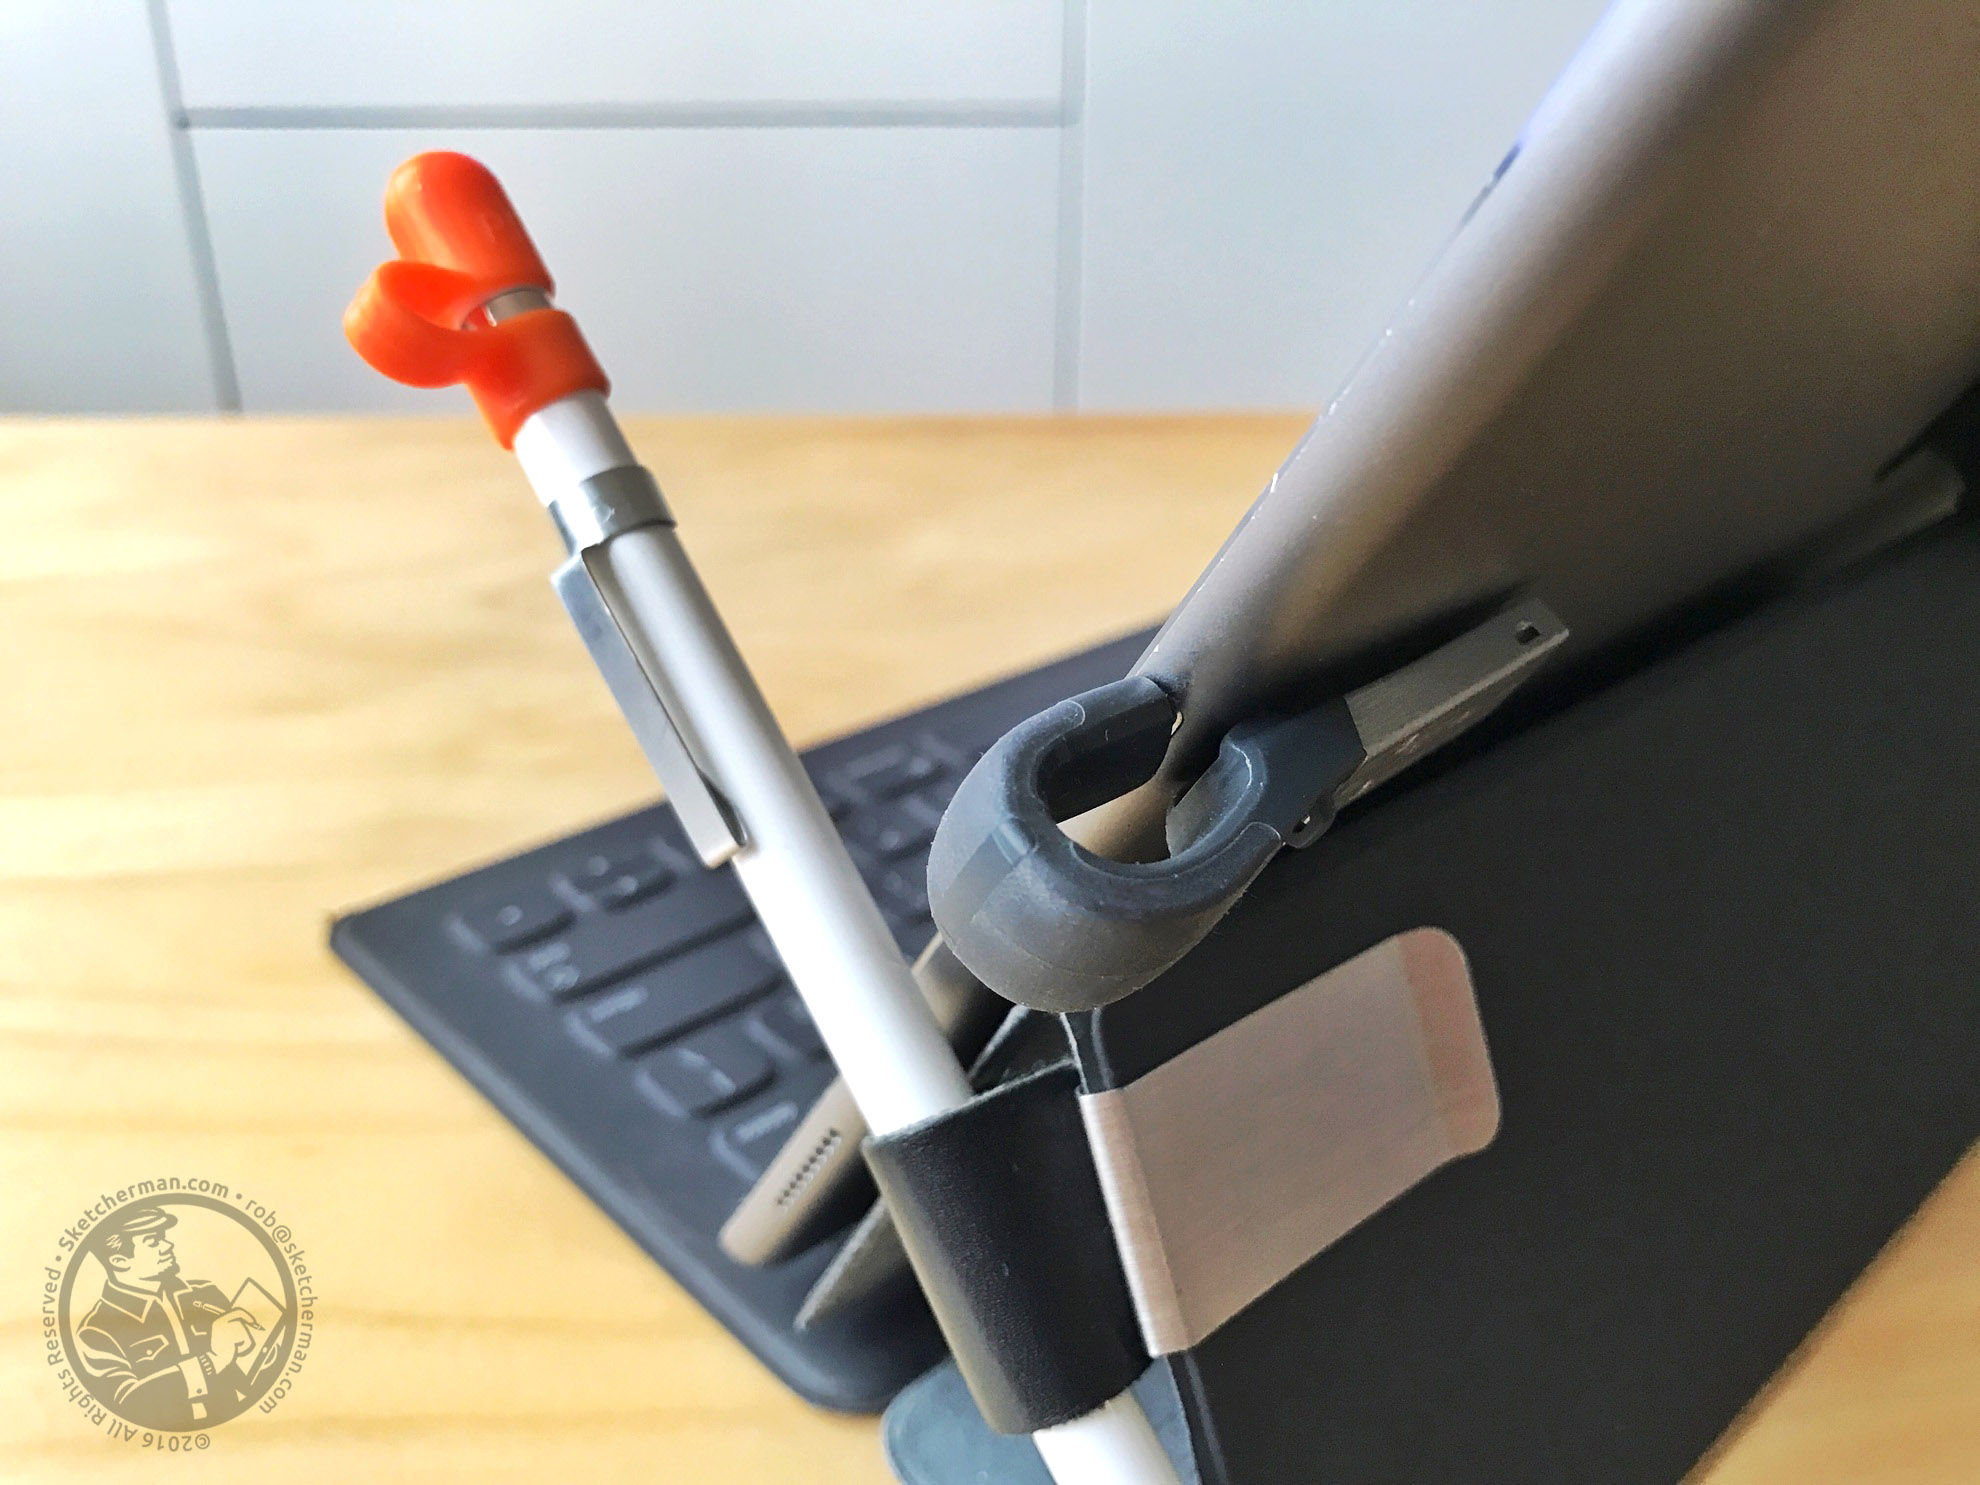
The Muji MoMA pen clip I use to clip my Pencil to my Smart Keyboard

The Muji MoMA pen clip I use to clip my Pencil to my Smart Keyboard

As I pieced my gear together over months, I also found I wanted a way to easily attach my Apple Pencil to my kit when walking around. The Smart Keyboard serves double duty as keyboard and good screen protection. When walking around, I would slip my hand into the loop of the SpinPadGrip so my grip on my Jumbo is secure. I began testing ways for my Apple Pencil to fit my kit. One day, I saw a sketcher using a pen clip to attach brushes to her sketchbook cover, and that inspired me to look for something similar. 

If you know the clean lines of the Muji brand, you'll know that they also have very practical, non-branded stationery items. I got 2 pen clips from the store and tested both to see which would work better. The Muji MoMA pen clip, with a faux-leather strap, is the one that has endured, primarily because it's kinder to my keyboard and iPad. (The other clip I found was all-metal)

The MoMA clip slips onto a section of my Smart Keyboard, where the metal bit will not scratch my screen. The clip is nestled conveniently in the folds of the keyboard during transportation. The bonus is that this solution makes a perfect Pencil rest for when I'm typing, making it a cinch to use my Pencil or stick it back in its holder when not needed. I'm sure you can easily find something similar in a stationery store near you. 

In case you're wondering, yes, I was also curious about magnetic solutions that snap Pencil to iPad Pro like those offered by Moxiware. Someone actually gave me a Moxiware sleeve, but after testing it, I found that I did not like the bulge of the magnet. More importantly, I found that the Pencil would only stick to certain parts of the iPad Pro/keyboard cover, occasionally sliding off if you got placement wrong. Too much hassle and risk. 

Apple Pencil Cap protection

The other issue is the cap at the end of the Apple Pencil. When you charge the Pencil, the cap has to be detached, and the chance of loss can be pretty high if you're clumsy like I am. I've dropped my Pencil a few times and seen the cap fly under cabinets, bouncing and rolling off into all kinds of yucky dark corners. (Fortunately, I've been able to retrieve the cap each time, and my Pencil seems absolutely fine.)

During one of my workshops at the Urban Sketchers Symposium, I saw Mike Daikubara with one of these cap holders on his Apple Pencil, and thought, "Ha! What a clever idea!" Cheap, effective and no more flying Pencil caps. You see what I mean in the images below. You can also see how my Muji clip fits on the Smart keyboard.

Get the Apple Pencil Cap: Amazon.com | Amazon.co.uk | Amazon.ca | Amazon.de | Amazon.fr
Secure your Glasses...or Apple Pencil!

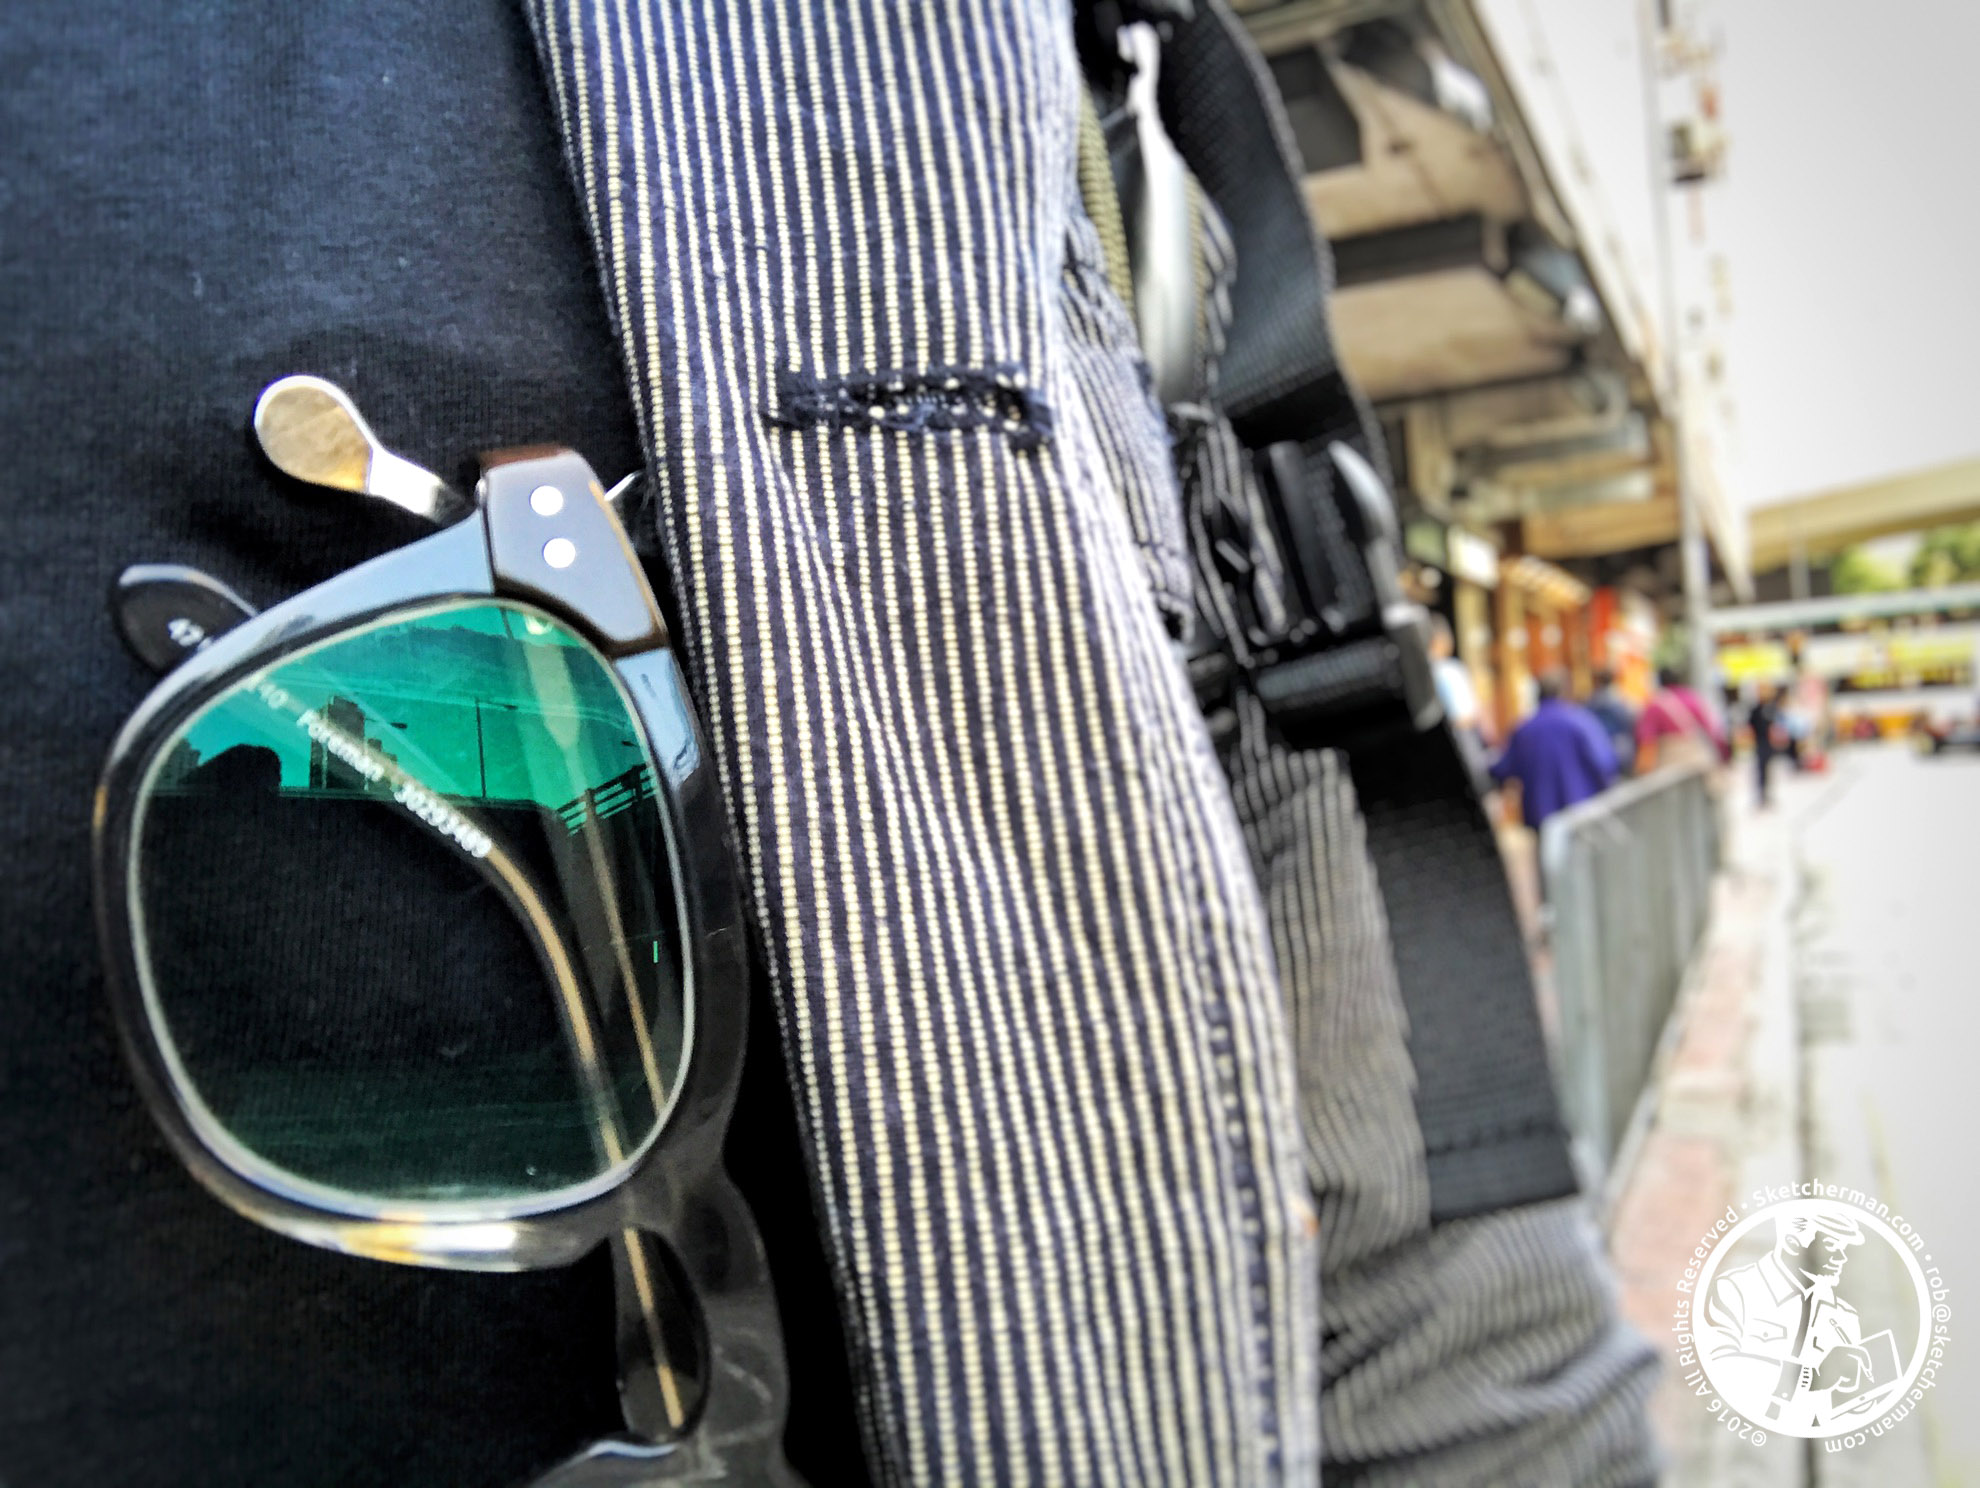
I need reading glasses. In fact, I'm one of those guys who'd constantly buy cheap drug store pairs because he'd misplace/break them all the time. A couple years ago, I discovered the Readerest. (Yes, I'm a Shark Tank fan.) This is a clever magnet device that clips onto any clothing, and you hang your glasses on them when not in use. The design is so clever that even when you bend over, the glasses stay in place! I've had many questions about them and can highly recommend these. Much better than coping with glasses flying out of pockets at inopportune moments. Just remember to take them off before doing the laundry!

An accidental happy discovery is that my Readerest is also a convenient temporary parking spot for my Pencil. When trying to clip my Pencil to my pocket one day, it stuck to my Readerest, and I was actually annoyed by the effort needed to pull it off the magnet when a light suddenly went off in my head. So... as I work now, I often stick the Pencil to the Readerest that's always on my shirt. When commuting, it stays safely in a dedicated slot in my backpack. Although I'm a self-confessed geek, having my Pencil constantly dangling off the front of my shirt as I walk around is a bit much, even for me!

Get a Readerest: Amazon.com | Amazon.co.uk | Amazon.ca | Amazon.de | Amazon.fr
Power for the Pro on the Go

The iPad Pro at full brightness pulls power from the battery really quickly. On my first sketchcrawl with my Jumbo Pro, I went from 100% to 13% in only 5 hours. I was sketching under direct sun, which causes iPads to jack brightness to the max. Pair that with a data-enabled iPad, the Jumbo's size and processing power, and you have a recipe for battery drain.

There 2 main ways to conserve battery power:

  • Work in airplane mode. When I know I'll be out all day, that's my default and makes a big difference in battery life. (That same 5-hour span would still leave me with between 50-75% battery life, depending on location and complexity of work.)
  • Turn off unnecessary notifications. Even if you're on occasional data or wifi, the iPad talking to all kinds of services on the internet still draws power.

Once I realized this, I began looking for a power bank that would be powerful enough to charge my Pro quickly. My criteria for purchase: the iPad Pro's battery level had to go up even during use, which didn't seem much to ask. Hunting high and low, I saw eager confidence die in many a salesman's eye. No luck anywhere. A year later, I now know that even the iPad Pro's bundled 12W charger can't charge my Jumbo up while in use, let alone power banks (even those I tested ones in the 20,000+ mAh range).

Enter Apple's 29W USB-C charger (and the separately sold USB-C to lightning cable). It was made for charging the latest MacBooks, and released March 2016. This is now essential equipment for me and takes my iPad Pro battery from 0-50% in a little under an hour, which means that I can take a break for a bite while juicing my Pro up enough for many more hours of sketching. Bonus: the adapter + cable are a lighter than a brick of a power bank!

I'll admit though - it's not cheap to add these to your gear, as both adapter and cable are sold separately. BUT if you already have an iPad Pro, use it primarily and are often on the move, I'd say it's an essential investment. And you might as well shell out the extra for the 2m cable - it's much handier.

Get a USB-C Charger:  Amazon.com | Amazon.co.uk | Amazon.ca | Amazon.de | Amazon.fr
Get a USB-C Cable: Amazon.com | Amazon.co.uk | Amazon.ca | Amazon.de | Amazon.fr

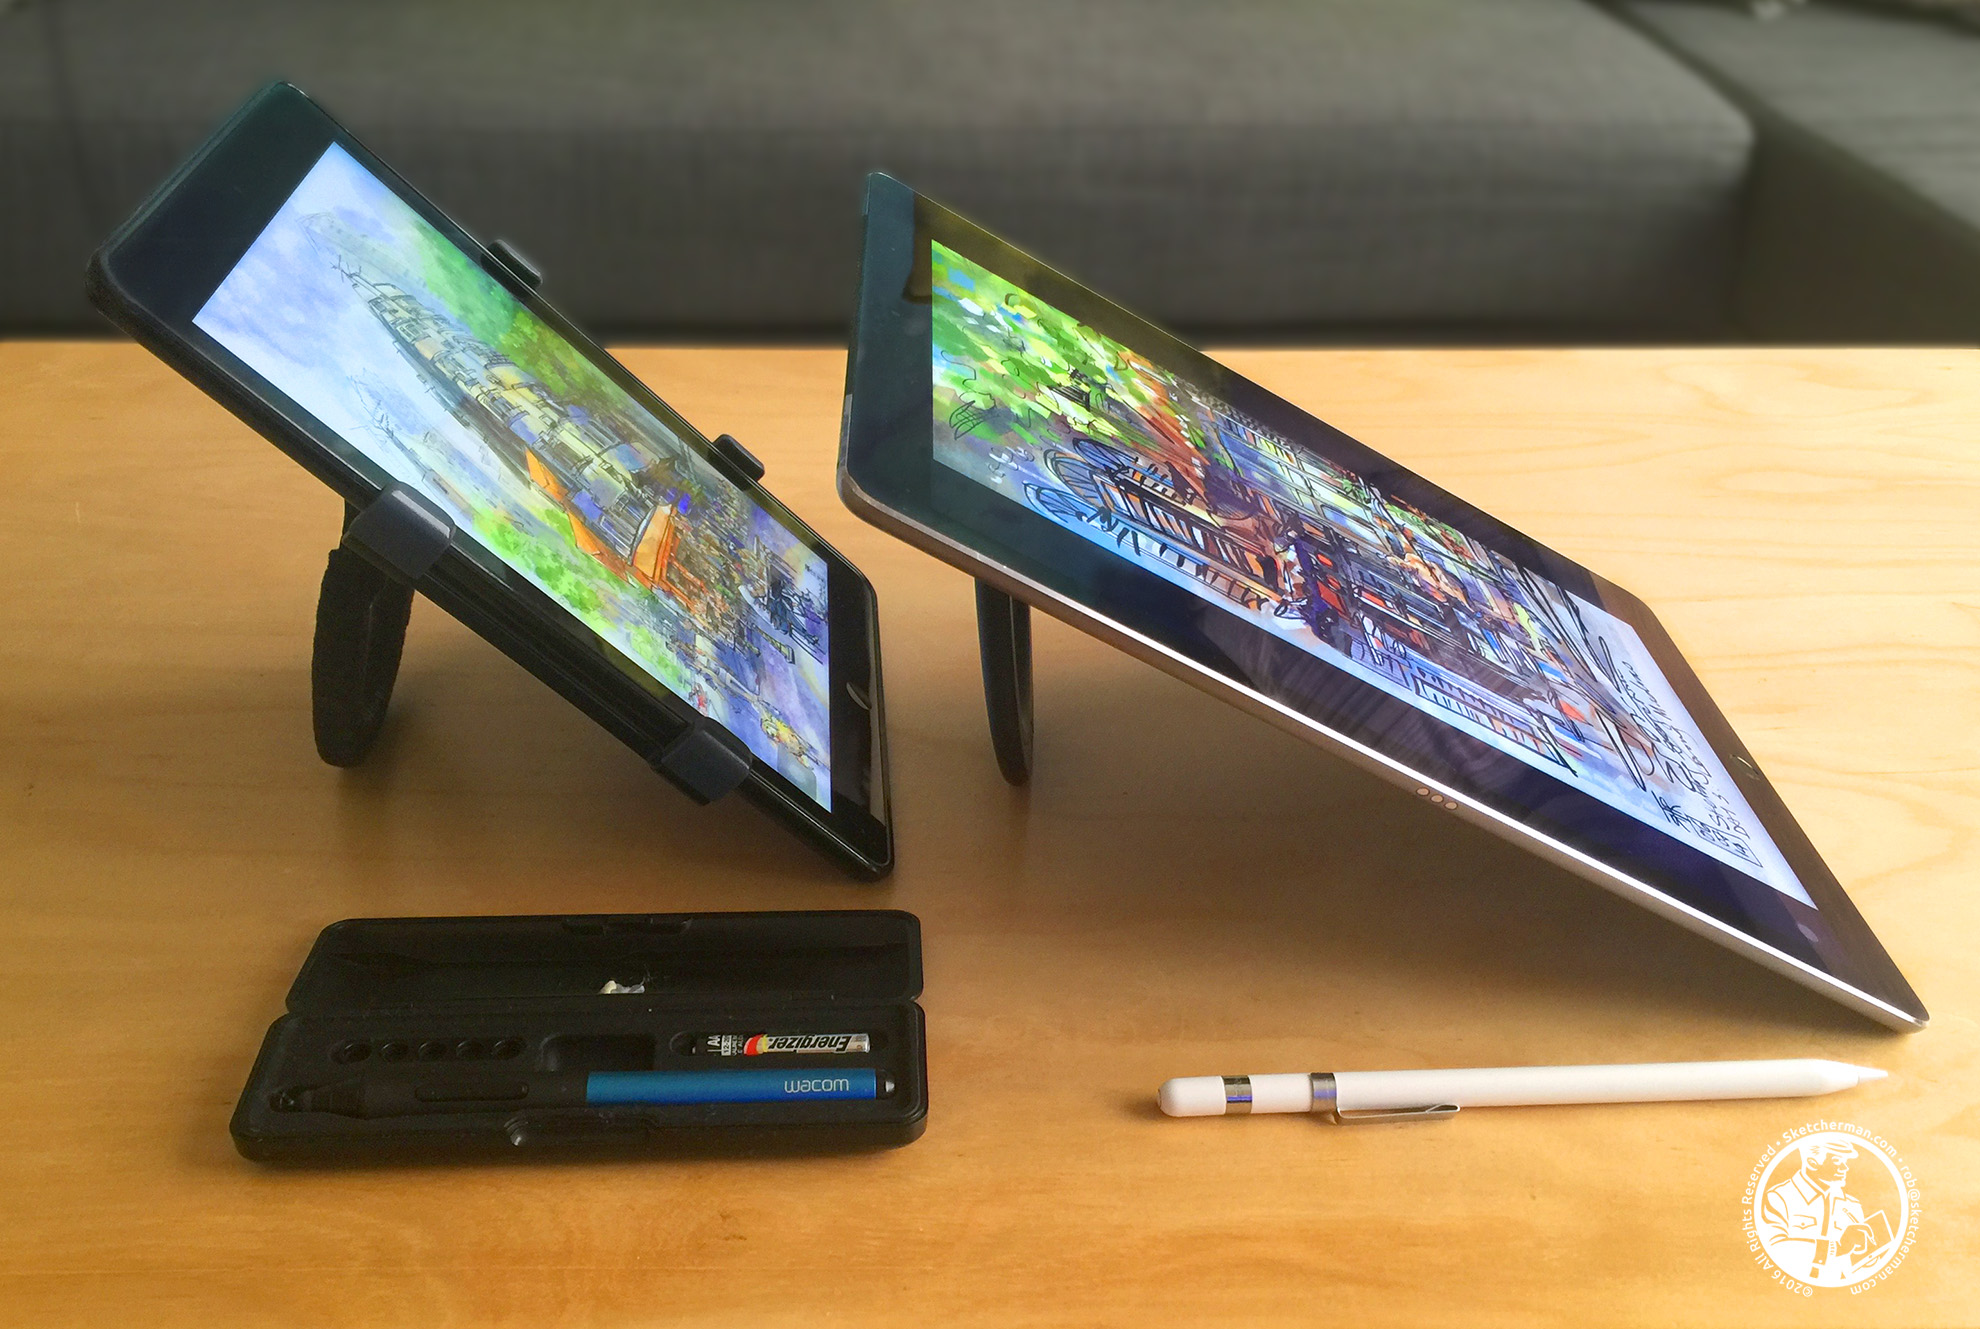
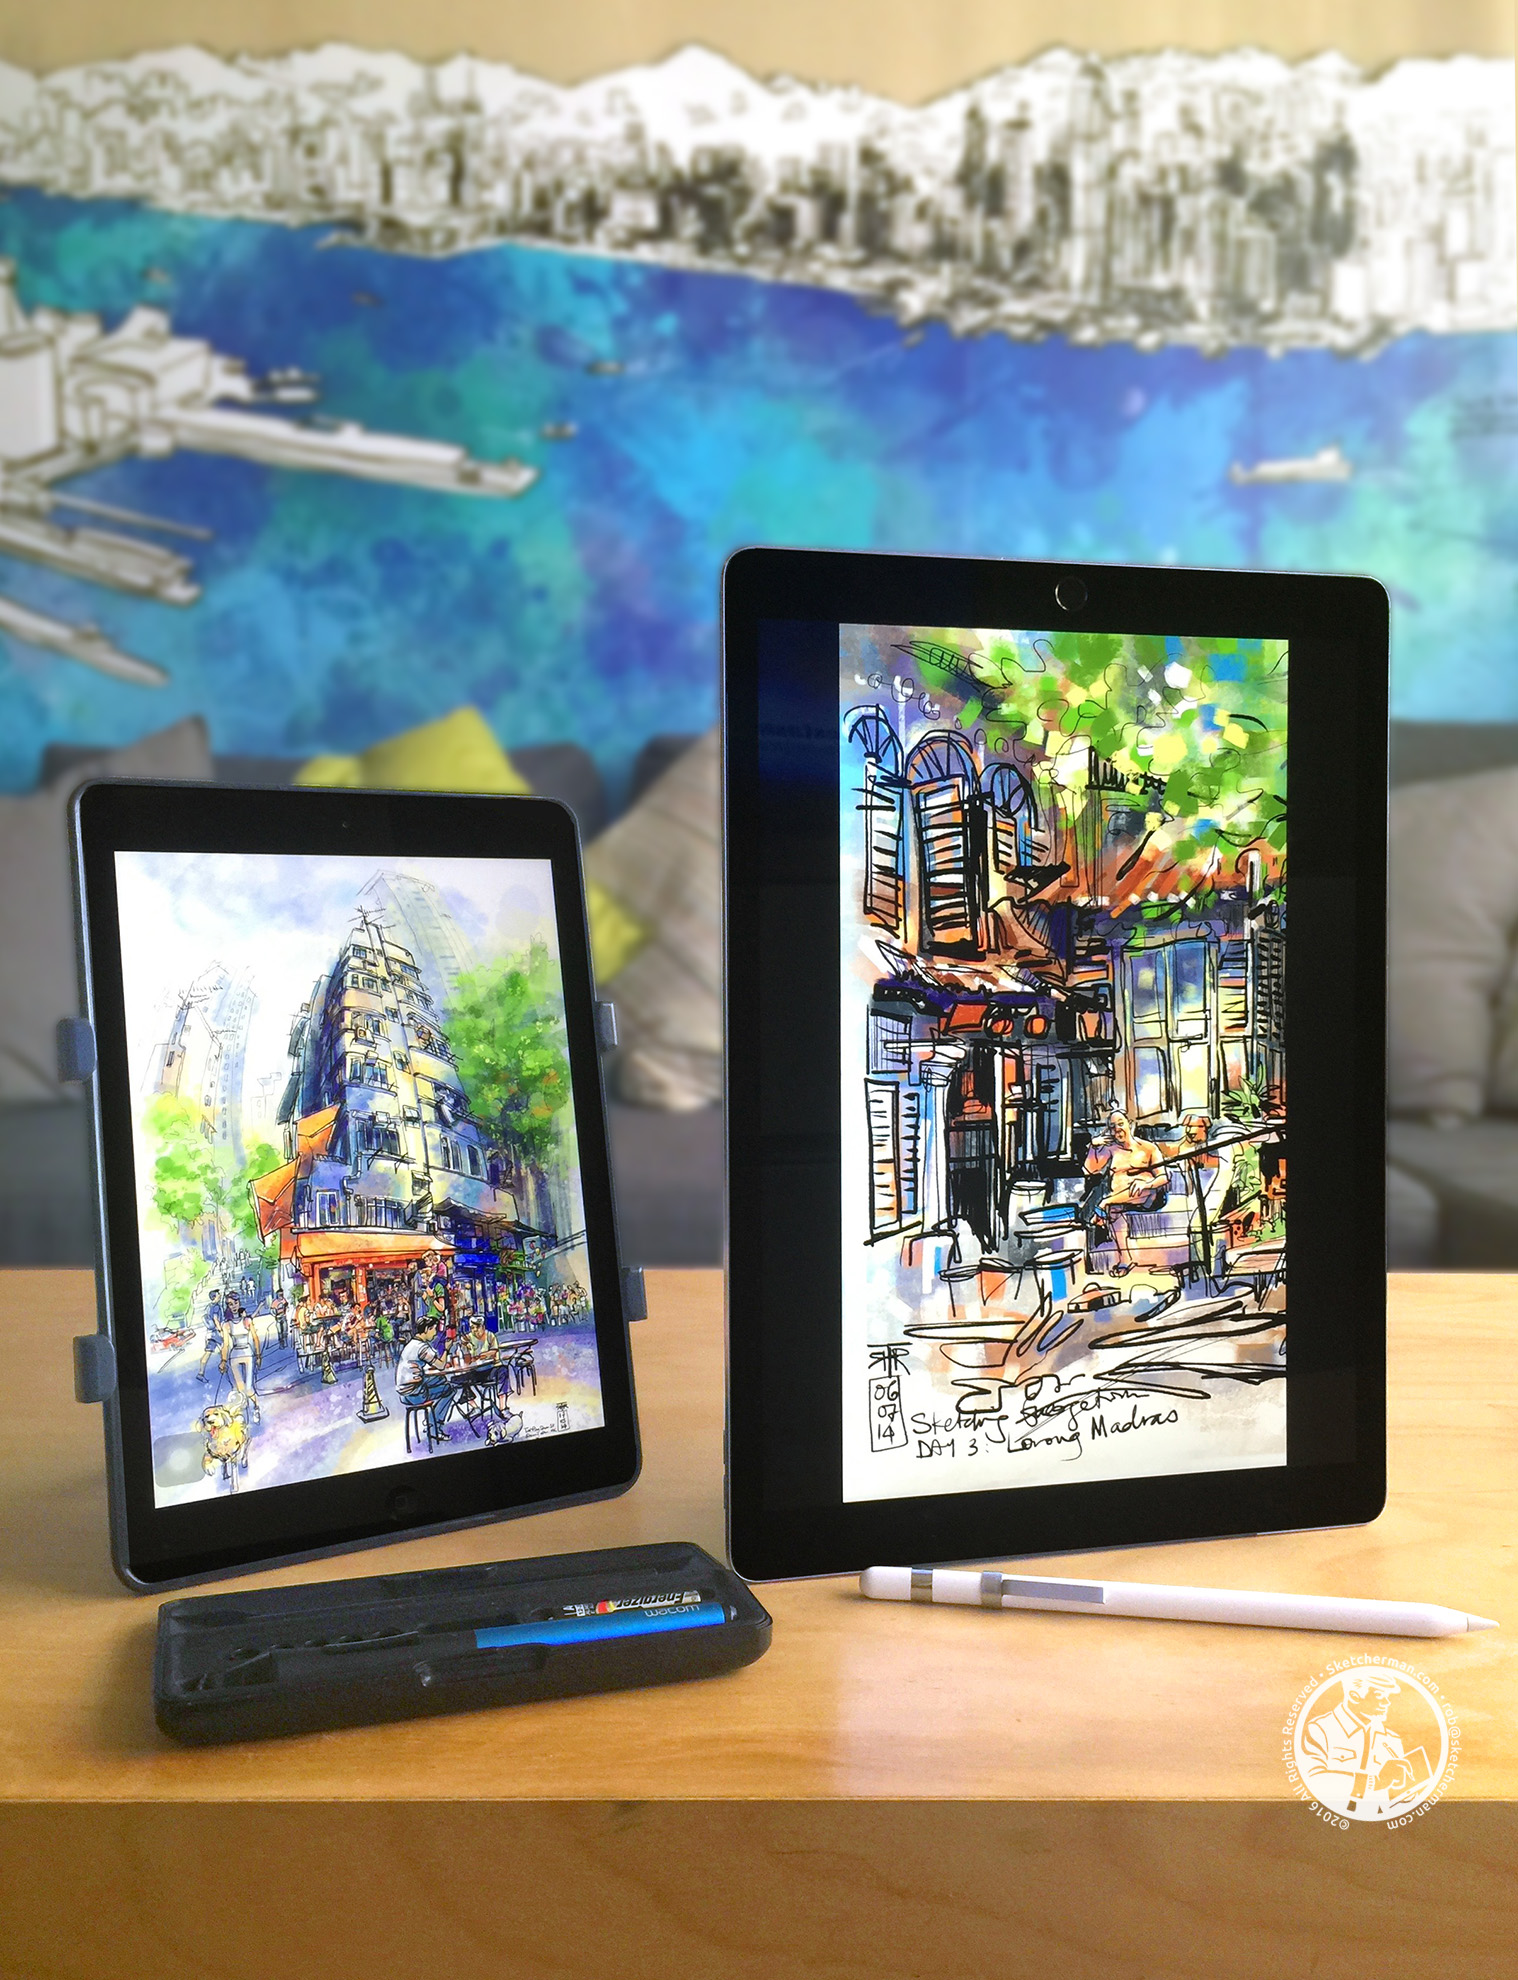
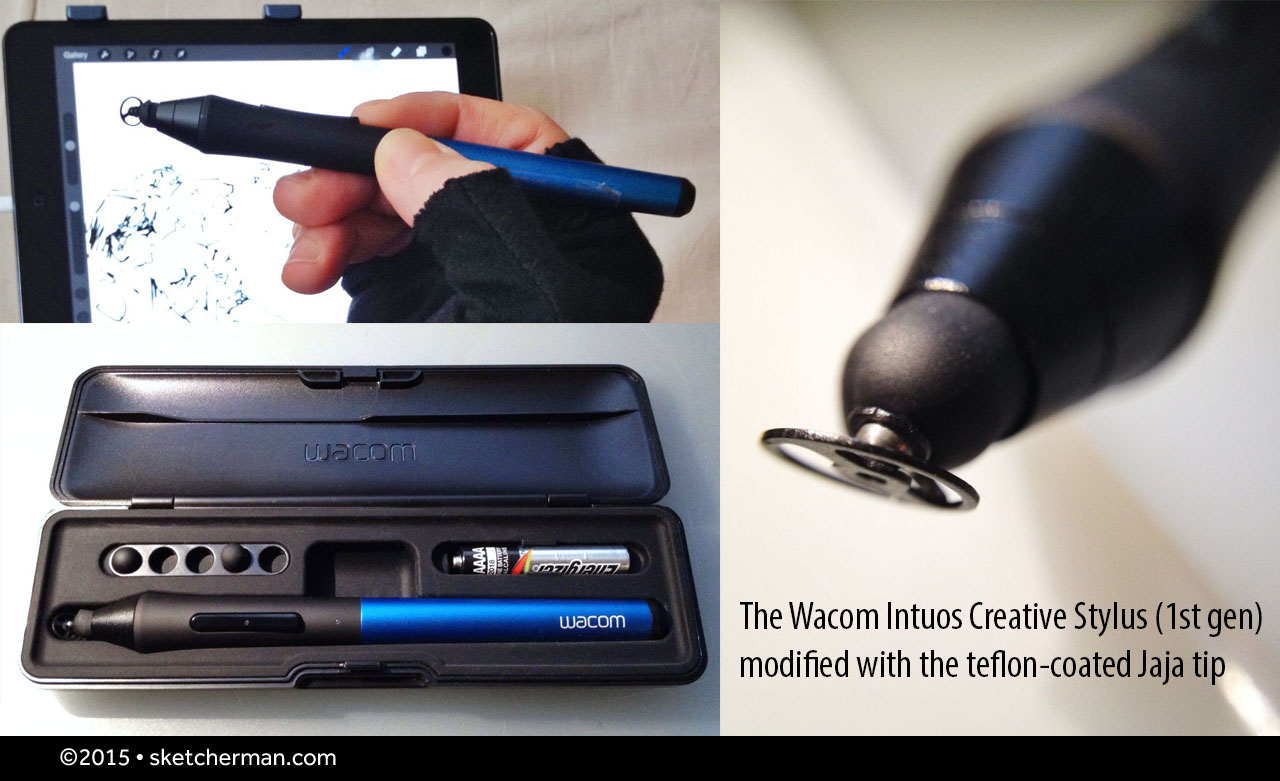
Various generations of pressure-sensitive styli I've used over the last 4 years. Top down: Apple Pencil, Adonit Pixel Pressure Sensitive, Adonit Jot Touch with Pixelpoint, Wacom Intuos Creative Stylus (1st gen, with modified Jaja teflon tip)

Various generations of pressure-sensitive styli I've used over the last 4 years. Top down: Apple Pencil, Adonit Pixel Pressure Sensitive, Adonit Jot Touch with Pixelpoint, Wacom Intuos Creative Stylus (1st gen, with modified Jaja teflon tip)

Styli for older iPads

If you're serious about trying digital sketching, I highly recommend testing your iPad with Procreate and a pressure-sensitive stylus. If you don't, you won't get what the fuss is about. Yes, there are iPad artists who are perfectly happy using their fingers. Whatever Steve Jobs said, I hated that experience. Don't know about you, but my hand blocks the screen when I try, and it's tiring to hover over any screen for hours.

Click the chart to enlarge and zoom in

One of the wonders of using a pressure-sensitive stylus is the joy of playing with lines of varying width. I never get enough of being able to start with really fine lines, then transitioning to bold juicy ones by applying just a touch more pressure. Working this way also requires a lot less effort than the traditional media equivalent, which means ergonomic advantages that I can certainly attest to. (And I never have to buy ink nor clean a pen ever again!)

Do note however, that to enjoy pressure sensitivity, your iPad has to be 3rd generation and newer, or released from 2012. You might be squinting or frowning right now trying to remember when you got that iPad that has been lying around. The chart on the left might help. Turn your iPad over and check its model number (those tiny numbers below the word 'iPad') against the chart to see which iPad model you own. If you see a tick, you're in!

BUT...you should also be aware that while your iPad can talk to newer pressure-sensitive styli, it might not run the latest apps very well. The difference in power and performance between the first iPad and the latest is HUGH; day and night difference, really. As developers take advantage of all the power available to them, older iPads may stutter and faint from the effort of trying to keep up. I'll venture to say your digital sketching experience could be frustrating on anything older than the first iPad Air.

I can't talk about styli for older iPads without a quick mention of the one I used, loved and took everywhere for 3 years; my (modified) 1st gen Wacom Intuos Creative Stylus which I used with an iPad Air. I've written extensively here about the hows and whys of adding a teflon tip to the rubber end, but cannot recommend this solution any longer as those teflon tips are no longer being sold. And no matter how cheap, do not buy the Wacom ICS2. It's a real lemon. (Impossible to draw decent diagonal lines or circles slowly.)

Adonit's pressure-sensitive styli and their USB charging dongles. The latest Pixel Pressure Sensitive (top) and older Jot Touch with Pixelpoint (below). Be sure to take the charging dongle with you so you're not stuck with a dead stylus!

Adonit's pressure-sensitive styli and their USB charging dongles. The latest Pixel Pressure Sensitive (top) and older Jot Touch with Pixelpoint (below). Be sure to take the charging dongle with you so you're not stuck with a dead stylus!

With that out of the way, if you have want a pressure-sensitive stylus for that older iPad, these are what I now recommend: 

I bought the Adonit Jot Touch with Pixelpoint when it was released but found it just okay... the tip was very hard and didn't feel good against the screen. A couple months ago, I picked up the latest iteration from Adonit, the Adonit Pixel Pressure Sensitive, which is quite an improvement over its predecessor.

Adonit obviously put a fair bit of thought into the Pixel Pressure Sensitive. It's longer, slimmer, a little lighter, and feels better balanced to me. Most significantly, the tip is finer, has a little give, and feels much more natural gliding across the screen. They've also added a touch of resistance which almost makes it feel like you're drawing on paper (unlike the unyielding weirdness with their earlier iteration). 

Some things to keep in mind about both Adonit's pressure-sensitive styli:

  • Adonit pressure-sensitive styli only work with certain apps. You'll have to refer to Adonit's site for which ones, so please check before you buy. [Note: This is not Adonit's fault. Apple provided a way for third-party styli manufacturers to work with iPads, but it's a software solution, not hardware like Pencil to Pro. Styli manufacturers provide SDK (software development kits) which allow their styli to be integrated into apps. App developers then have to make the effort of adding the SDK, testing styli, killing bugs etc. Good developers and their apps support the most popular styli, which is my first litmus test when buying creative apps.]
  • Getting the stylus to work requires Bluetooth pairing with individual apps, one by one, usually in the app's preference settings. Make sure Bluetooth is turned on!
  • The styli are rechargeable via the little USB dongle-like accessory that's provided.
  • Take the dongle with you when you're out and about, should you need to charge on the fly. And keep it safe! It's small and easy to misplace.
  • There's no way to easily check battery status, so top up your charge every now and then to be sure. (Some apps, like Procreate, allow you to check stylus battery level, usually in the app's settings.)
  • If the battery is flat, the stylus is pretty useless and won't even function as a dumb stylus (those rubber-tipped ones with no pressure sensitivity).
  • A full charge takes 1-1.5hours.
  • You'll get between 15-20 hours of use with each charge

Get the Adonit PPS: Amazon.com | Amazon.co.uk | Amazon.ca | Amazon.de | Amazon.fr

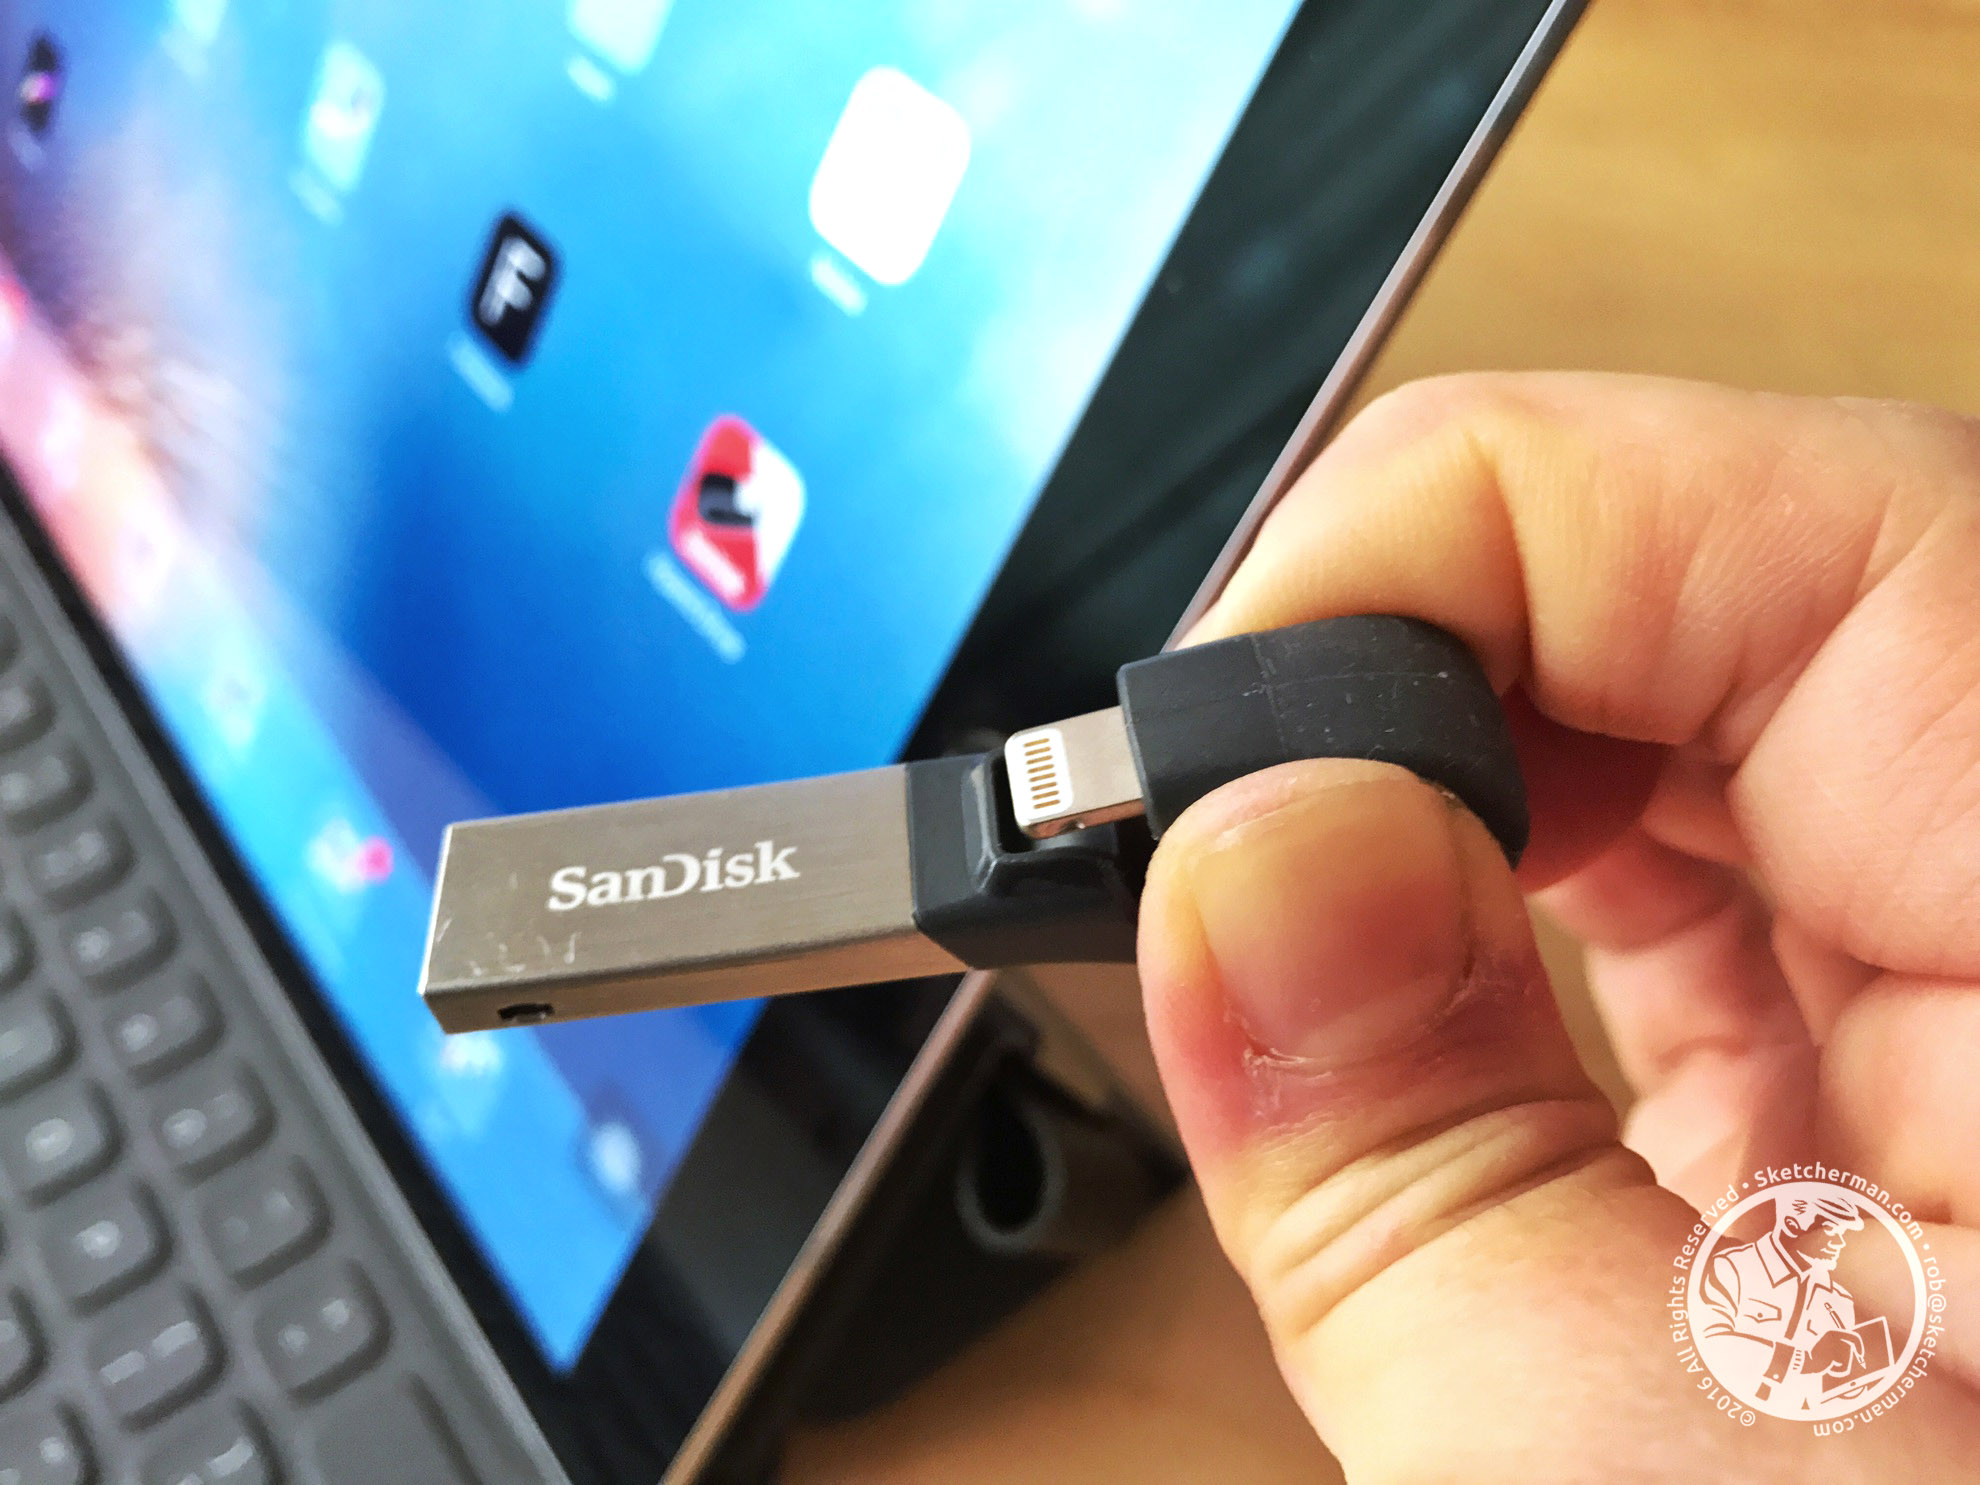
The USB stick for iPads and iPhones

A couple of weeks ago, I had a graphic recording commission (aka sketchnoting/making visual notes). I was to sketch on my iPad Pro and hand off animations and images quickly to the waiting video team, who would then project my work on the livestream or on displays around the conference area. Before the event, we went over many options to do this efficiently. I first thought "Airdrop!", but the tech team said they find it occasionally unreliable. I then said, "How about using cloud services? Google Drive? Dropbox?" Email? The videos were all under 10MB anyway. But tech said they weren't sure of wifi speed and wanted a fail-proof solution. I thought I'd have to bring my Macbook Pro just in case I needed to transfer and copy files.

"Can your iPad just copy files to a USB stick?" I was asked, leaving me somewhat flustered for a bit, because as fas as I knew, the answer was "No". Or not reliably, in my experience, as I've seen and tested so-called USB sticks for iPhones and iPads and have been so appalled at results I never looked again. Or had to. Until now.

A quick Google search brought up a brand I recognized and trusted: Sandisk! And they've been making a great solution for the past 2-3 years! I admit - I felt embarrassed at being ignorant about such a crucial answer to 2 problems every iPhone and iPad user must have come across at some point or other: offline, untethered file transfer and emergency shortage of space.

So dear readers, if you haven't already heard of it, I am so pleased to be able to introduce you to the Sandisk iXpand. Forget the wonky- name knock offs online. I tried them and they were cheaper, yes, but total duds and a waste of time and money. If getting data off your iPhone / iPad without wifi or a data connection is important to you, so is a reliable, dependable way to do this, and after pushing the iXpand hard over the last few weeks, I give it a huge thumbs-up. It now travels in my mobile kit everywhere because you just never know.

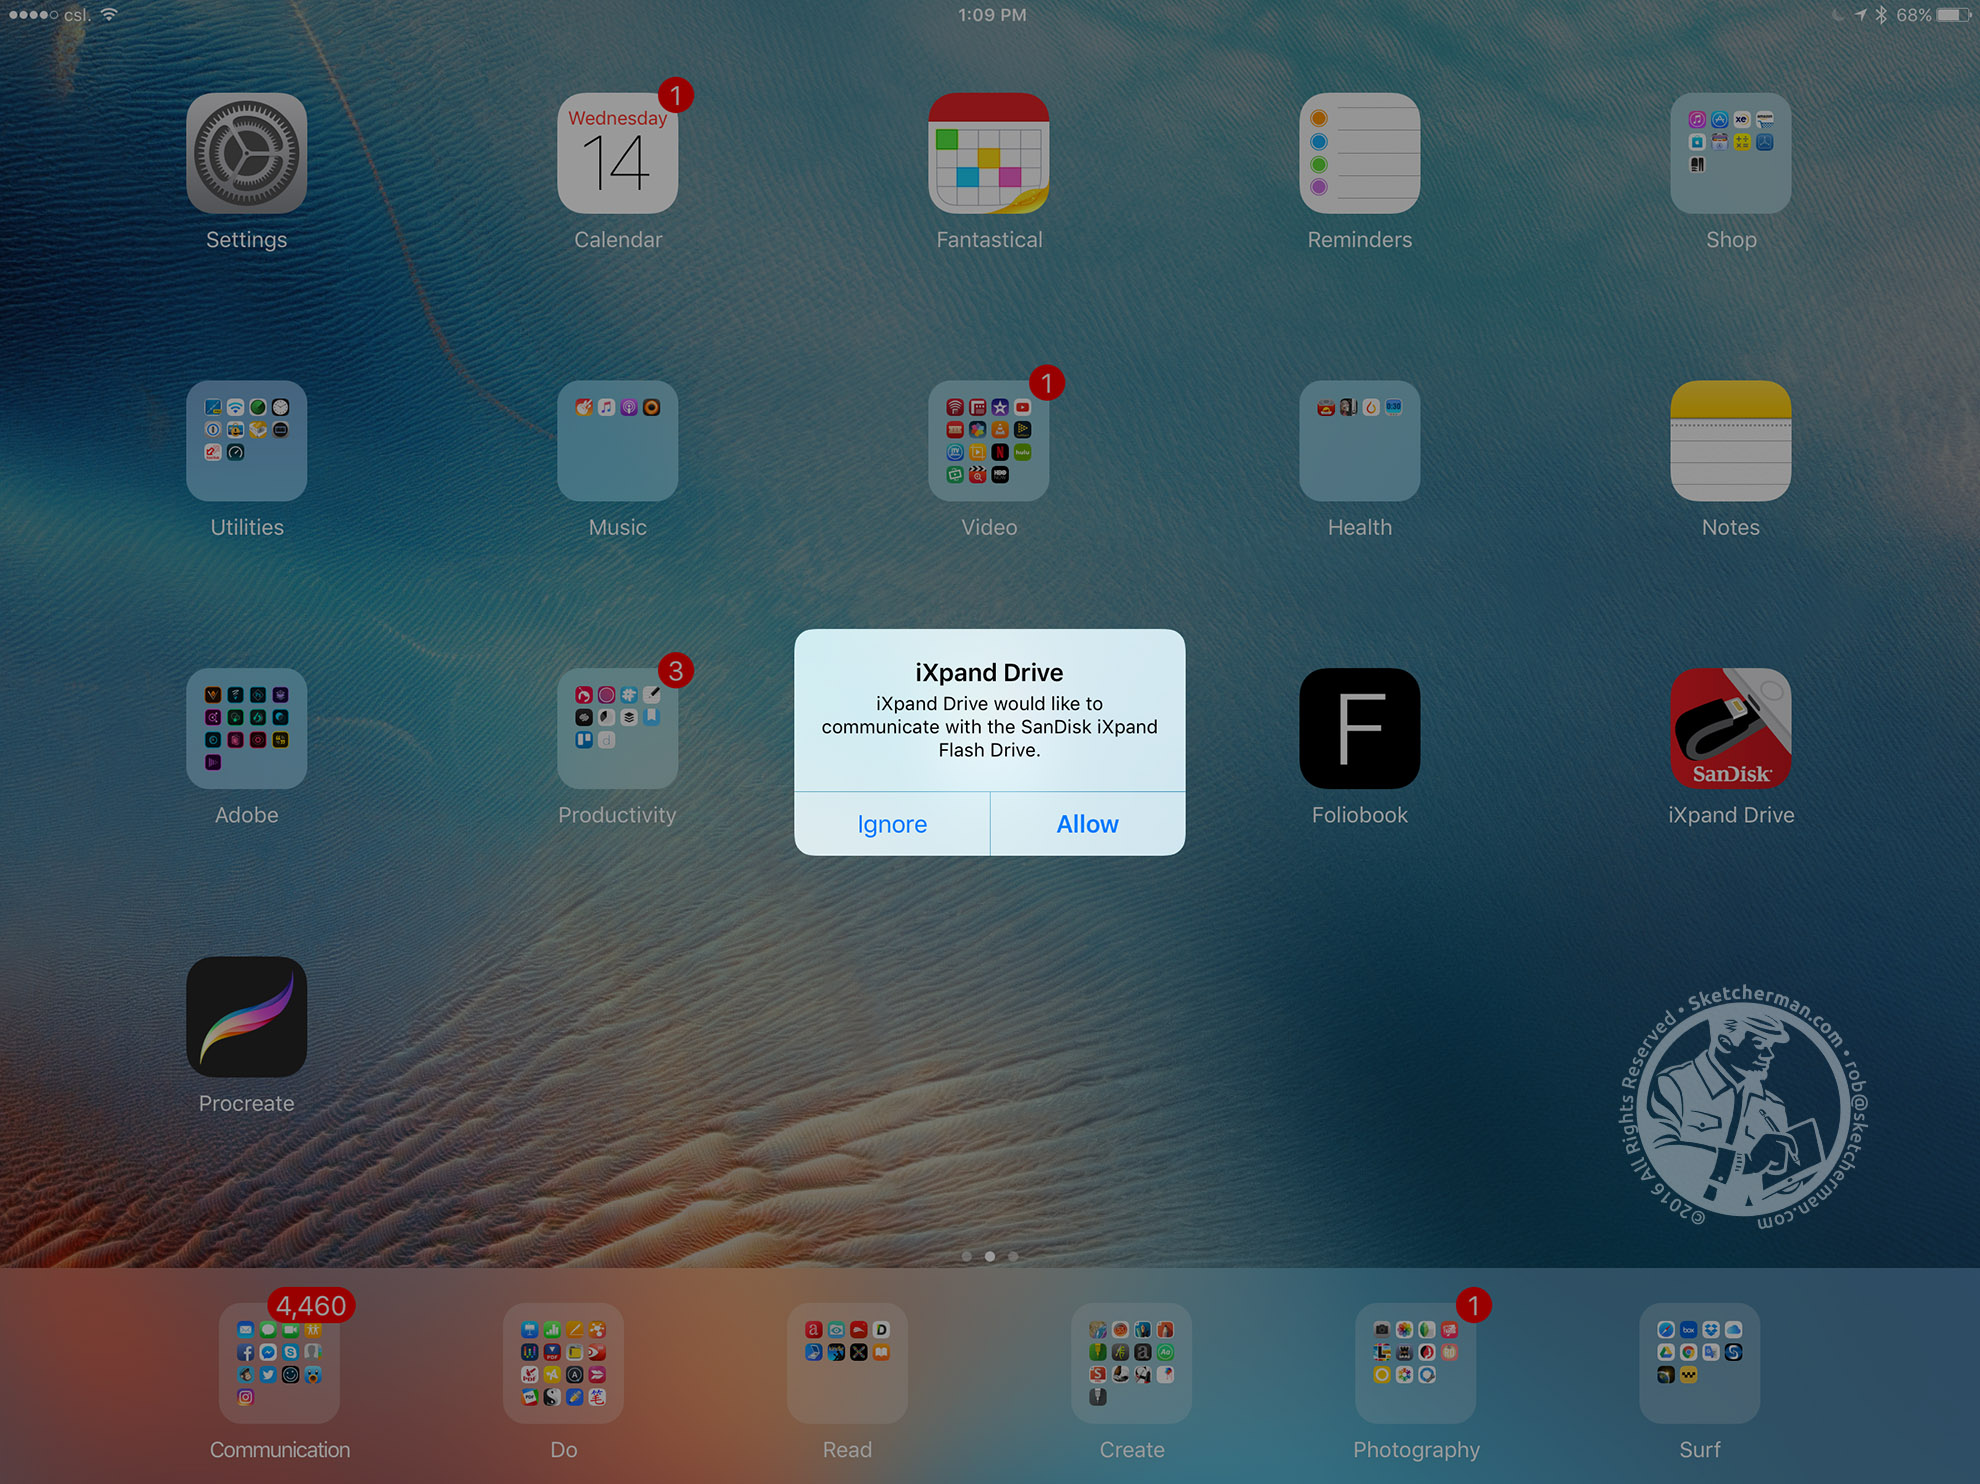
The dark curved part ends in a lightning plug that plugs right into you iPad. When the correct app is installed, it will recognize your iXpand drive and ask fro permission to access it. Follow the prompts from there to view files on you drive or copy files from iPad to iXpand. I thought the design a little odd until I plugged the iXpand in. The curve hugs your iPad with the USB end curling around the back of your device. This also means you don't have a fragile bit sticking out of your lightning port (yes, I'm looking at you, Apple Pencil). Clever!

Between meetings one day, I was able to easily back up all my original Procreate files and clear 10GB off my iPad Pro hard disk; no more wondering what to delete in a pinch! If you get the larger capacity iXpand drive, it might also be a handy back-up on vacations when your iPhone fills with photos and videos. I got the 128GB version so I can back up files from both iPhone and iPad Pro if needed.

Do note: the iXpand I recommend is the latest version, which uses USB 3 transfer speeds for supported iPads (at this point, Pros only). There is an older iXpand, which uses USB 2 speeds. the image below shows the different versions.

Get the SanDisk iXpand USB stick:  Amazon.com | Amazon.co.uk | Amazon.ca | Amazon.de | Amazon.fr

Old SanDisk iXpand on the left and the latest iXpand on the right.

The iXpand app has earned its place on my home screen. Make sure you download the right app!

The iXpand app has earned its place on my home screen. Make sure you download the right app!

More on the SanDisk iXpand:

  • The Sandisk iXpand comes in 4 sizes: 16GB/ 32GB / 64GB / 128GB.
  • USB 3 transfer speeds for devices that support it! (iPad Pros support USB 3. Older devices default to USB 2 speeds)
  • You need to download the free Sandisk iXpand app for iOS for file transfer. Be careful - Sandisk makes a few apps for various USB stick models. The old and new iXpand drives use different apps. Make sure you download the right one and test it before you need to rely on it for an important event!
  • Originally made to only copy and back-up photos and videos from your device's Camera Roll, recent iOS updates now allow you to enable the iXpand app extension, allowing you to copy and back up files from any app (all apps I tested anyway, including original Procreate file formats, PDFs, 4K video files from the Documents app).
  • You can even rename files once they've been copied to the iXpand. Seems trivial, but I have hunted a long time for the ability to change image names from my Camera Roll before handing them off to a client.
  • It's small, light, and a little weird-looking. Some people complain that there's no cap for the ends, but I haven't yet found that to be a problem.

Should I Upgrade My iPad?

Finally, we come to the question I am often asked : do I upgrade or not?

I talked about this at length with participants from various workshops I've run, and will state this again here for those who are toying with the idea. This may come as a surprise, but I do not simply urge "Upgrade!" for everyone with an older iPad. Needs vary, and forking out for an iPad Pro is a major investment for many, requiring thought and planning before arriving at a decision.

I've made a list of considerations which may help you decide.

You probably don't need to upgrade your iPad if

  • You're a light user of your current iPad (email, web surfing and reading only)
  • You have an iPad Air (original, or Air 2)
  • You're not sure if you want to sketch digitally, but are a little curious.

I then suggest playing around with what you've got to see if digital sketching works for you before plunking money down for the latest and greatest. Maybe invest or borrow a compatible pressure-sensitive stylus, dabble with Procreate and see how the whole experience feels for you.

Consider upgrading your iPad if

  • Your iPad is 2nd generation and older (released 2011 or earlier) or lately, e..v..e..r..y..t..h..i..n..g... feels painfully slow with apps crashing a lot. (As hardware becomes more powerful, app developers make great stuff that take advantage of all the horsepower. Consequently, older iPad models struggle and apps quit unexpectedly every now and then from the workload.) 
  • You've tried it and are now serious about diving in digital sketching.
  • You're a heavy iPad user and feel like your current model is getting really slow, so Santa should probably bring a new one anyway.
  • You use an iPad a lot for work and want more processing power.
  • Money is no object and you really want a Pro!
  • BUT....unless you're in a super hurry, maybe hang onto your wallet a little longer until the announcement of new models in Q1 2017! Rumor mills tout the release of 3 sizes, with a 10.5" version in the mix. (I don't know about you, but I hate spending a good chunk of money on something precious, only to find it's the latest and greatest for a few months. But that's just me.)

Whatever your case may be, at least borrow a more recent model for testing if you can. If possible, get your hands on an iPad Air (1 or 2) for a whirl. Those are still pretty good models and I still have mine. If you're considering an iPad Pro, please... pop into an Apple Store if you can to spend some time testing along with the Apple Pencil. If you do, expect to be very tempted to hand your wallet over, but seasonal sales might net you a deal that's worth the purchase!

Ok - that's my list! If there's something handy you use that I didn't talk about, I'd love to hear about it!

Get a 9.7" iPad Pro:  Amazon.com | Amazon.co.uk | Amazon.ca | Amazon.de | Amazon.fr
The Best iPad Case / Holder / Support for iPad Artists: My 2016 Sketching Gear List Pt.1

Demo Time during the Urban Sketcher Symposium 2016 in Manchester over the summer! 

Demo Time during the Urban Sketcher Symposium 2016 in Manchester over the summer! 

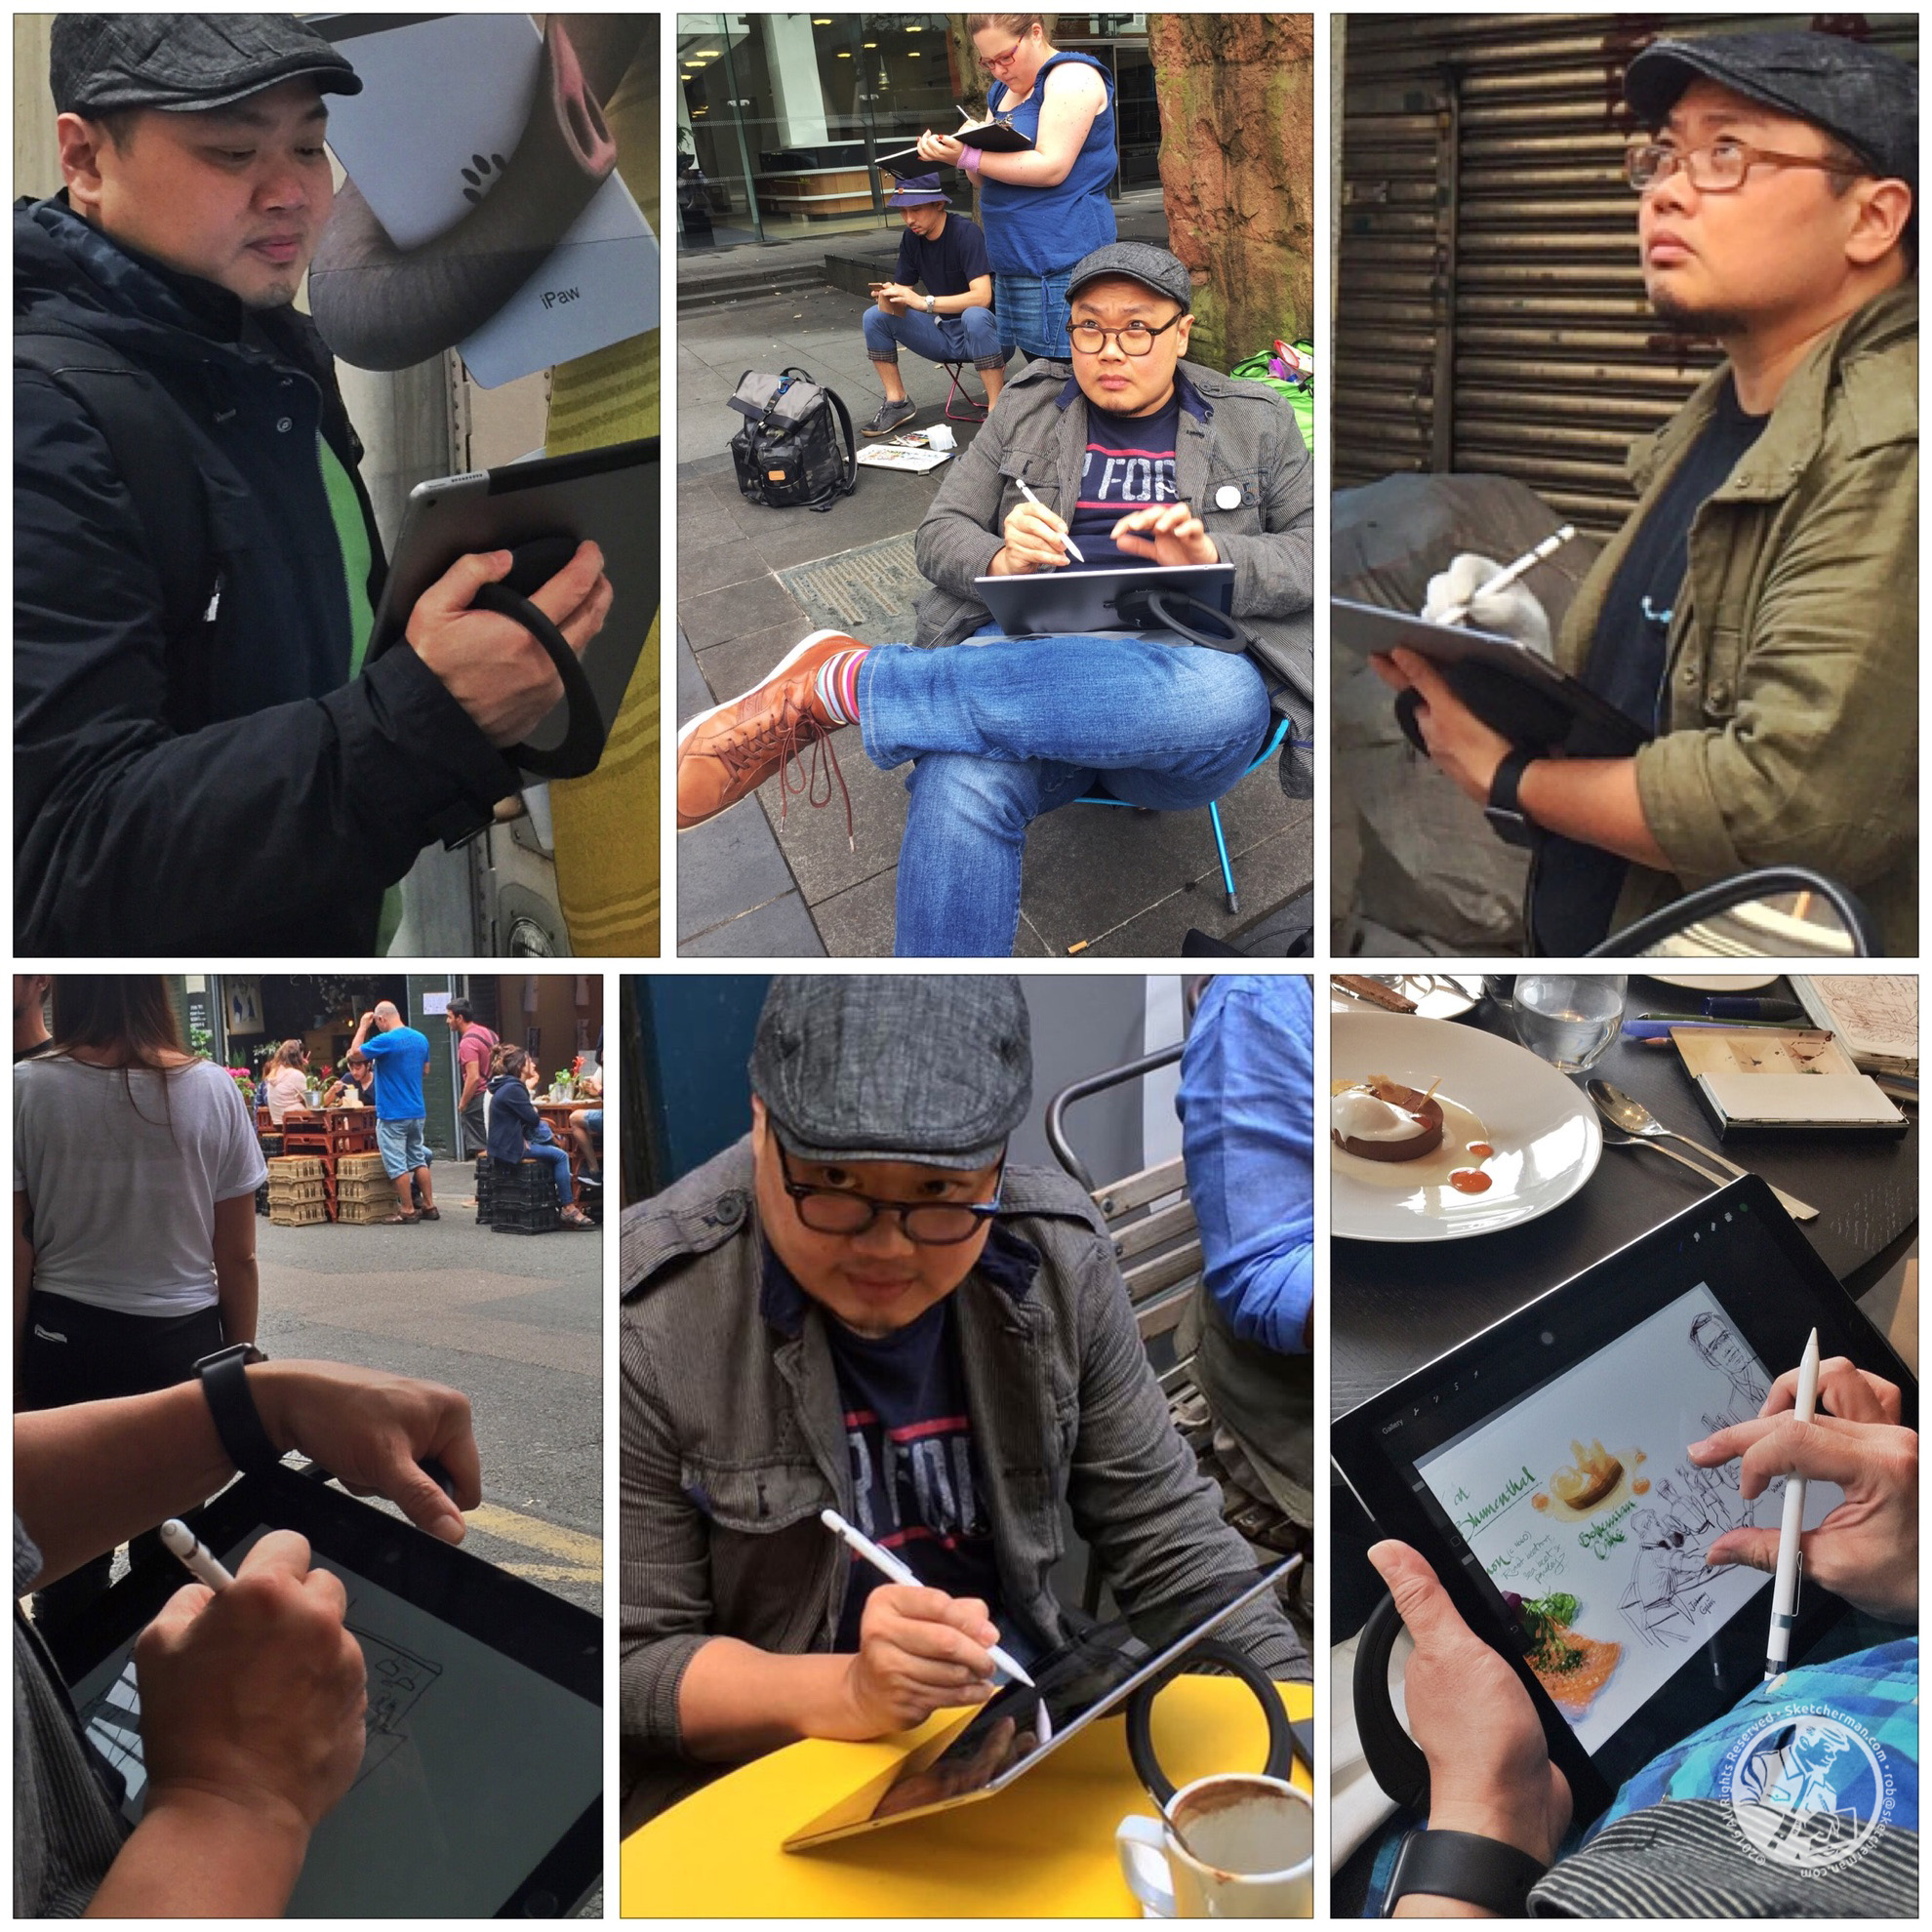
Over the summer, I had a fantastic time in the UK, the main focus being the delivery of my workshop, Sketching on iPads with Procreate at the Urban Sketcher Symposium in Manchester. In particular, I wanted to list the equipment I use, discuss and recommend all the time.

After having used the iPad Pro (12.9") and Apple Pencil from Day One of their release (about a year now!), I can say first, that I absolutely love both, and second, certain accessories make the total experience so much better, especially when urban sketching. Illustrators who use iPads and iPad artists who want to be mobile might also find my list useful.

Apart from the stylus that makes every iPad Pro magical, there is another must-have accessory that has drawn a lot of curiosity whenever it's been spotted with me. Everywhere I go, people want to know about the 'handle' I use with my iPad Pro. Ever since I got what I occasionally (affectionately) call my Jumbo Pro, I've been on the hunt for the perfect case/holder/support. If you've read my previous posts, you'll know I loved my Twist360 with my iPad Air, (and I still highly recommend it for anyone using 9.7" iPads, be they Pro or not). 

As soon as I got my iPad Pro, I emailed Bracketron, the company that makes the Twist360, to see if they planned on making a bigger Twist360 for larger tablets, and was most disappointed when they said they had no such plans. With a grimace, off I went to look for something that could take its place.

How many ways can you hold / place your iPad? With the SpinPadGrip- plenty! 

After extensive google searches and several iPad Pro case/holder/support tests later, I finally found my current favorite solution, and here it is...the SpinPadGrip! It's originally made by a French company and now sold under various names, depending where you look. The logo on the back of mine says PowerSpin, which explains why I couldn't find it again for a while. Finally tracked down the original manufacturer!

Now, I have to say that I'm not a big fan of the name. 'SpinPadGrip' doesn't quite roll off the tongue, does it? Although it says what it does, it's not a name that sticks in my head, and I've had to constantly hunt for the name to repeat it when people ask me where I got it. I’ve also found that it may not always be on Amazon, but seems to be more consistently sold now. I do love the product though, and for those interested, I've linked it for you. (Thanks for your support if you buy through my affiliate link!) Those of you not in the US can also purchase SpinPadGrip from its website.

Get the SpinPadGrip: Amazon.com | Amazon.co.uk | Amazon.de | Amazon.fr 

Technically, the SpinPadGrip is not a case. It's essentially a powerful suction cup with a rotating handle attached to it. This can be used on any smooth-backed tablet, which makes it generation-proof! I'm always a fan of not having to change case/handle options with every upgrade -especially when I love the current solution and manufacturers haven't updated it for the latest hardware! 

Most importantly, I love that the SpinPadGrip has the same functionality I loved in my old Twist360.

Likes:

  • the ability to stand your iPad up at almost any angle
  • a handle for carrying, and most importantly, sketching on the go
  • allows you to hang your iPad onto a hook to watch from or refer to 
  • tilt the screen at any angle for easy presenting 
  • reading comfort, especially in bed
  • no need for a front cover / screen protector (I’ll elaborate on that later)

Dislikes:

  • I'm reluctant to disengage suction to reposition the handle when I've got it right. It's not hard to do, but I don't want to risk it.
  • Can't use any kind of back cover with it (but it looks like I don't need one).
  • For sketching comfort on the Jumbo Pro, I've placed the handle off-center… but that means it's lopsided when hung on a hook.
  • It's not possible to stand the iPad Pro completely vertically. The power button gets depressed, turning my Jumbo off. The solution for vertical viewing is to turn the iPad 180° so no buttons are in the way, with the SpinPadGrip positioned to provide lower viewing angles. Still, this is not a big deal. When I have to show something completely vertically, I just hold the iPad Pro up by the handy handle!
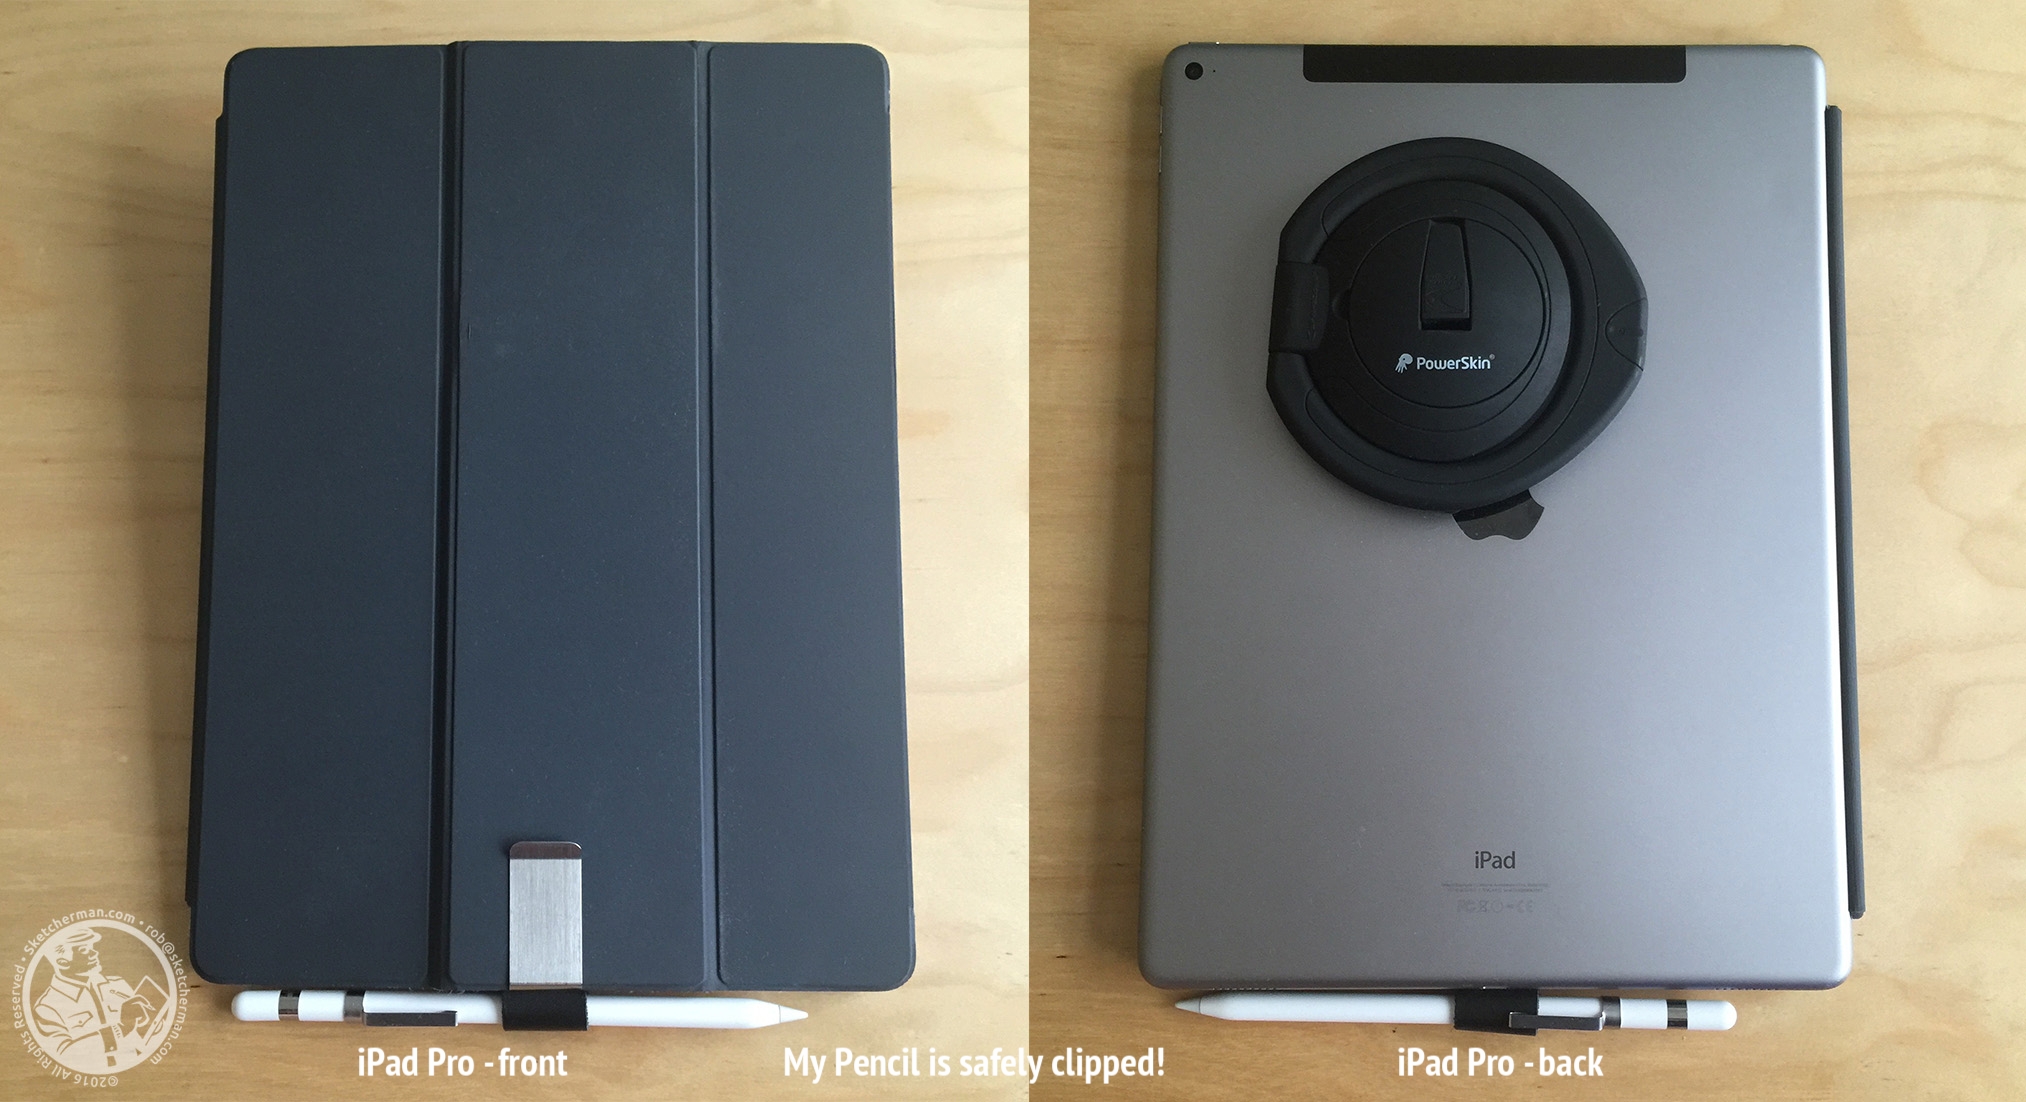
The handle of the SpinPadGrip at the back lets me easily pick my kit up, and my Pencil is always within easy reach, resting in the pen holder clip attached to my Apple keyboard-cover.

The handle of the SpinPadGrip at the back lets me easily pick my kit up, and my Pencil is always within easy reach, resting in the pen holder clip attached to my Apple keyboard-cover.

Photos will best describe how I use my gear, so here are some. This is my standard configuration. My Apple Keyboard for iPad Pro snaps onto the front to protect my Jumbo's screen. The SpinPadGrip is always attached, and I've found no need for either a back cover/case nor a screen protector, as my iPad Pro travels in a nice padded compartment of my backpack when I'm out and about.

Get the Smart Keyboard: Amazon.com | Amazon.ca | Amazon.co.ukAmazon.de | Amazon.fr

I sense raised eyebrows among you, and saw many more when showing my kit… and I'll tell you, I admit - I was very concerned and skeptical when first testing the SpinPadGrip. We've all had hairy experiences with stuff attached to bathroom walls on suction cups falling unexpectedly, and the idea of a pricey device crashing to the floor is a heart attack no one wants to contemplate. 

When I first tried the SpinPadGrip, I held my iPad about a foot over the sofa and felt my heart lurch as the suction lost its grip a few times. I should add that I initially tried attaching the cup to the basic, smooth case I was then using, but it refused to stick to plastic or silicone. I was about to throw the SpinPadGrip away, then thought I'd try again, this time removing the case and wetting the bare back of my iPad just a little, like you'd do for any suction cup to make it stick better. That, along with following all enclosed instructions to the letter, did the trick. Suctioning the handle directly onto the back of the iPad Pro is really a great solution and now, 9 months later, I can happily declare that the SpinPadGrip has handled every situation I've used it in with aplomb, and most importantly, has not budged at all. That being said, if you get it, please test throughly to ensure that you've attached the SpinPadGrip correctly before using, especially before taking it and your iPad out into the wild. (A note to the adventurous: I do advise against flinging/swinging your iPad freely by the Handle. The suction will probably hold, but that's just unnecessary risk.) 

For those who do use 9.7” iPads, the following are your best handle/support options.

An oldie but goodie, my Bracketron Twist 360 is 4 years old, has survived a lot of abuse and is still going strong. Best for 8-10" tablets.

An oldie but goodie, my Bracketron Twist 360 is 4 years old, has survived a lot of abuse and is still going strong. Best for 8-10" tablets.

Click image to buy from Amazon.uk

Click image to buy from Amazon.uk

The Bracketron Twist360 was what I used for my iPad Air, and is a great, versatile tablet holder for all generations of 9.7" iPads. Its spring-loaded grip allows it to expand, and Bracketron says it "works with most tablets between 7-10". (Note: Mine was too big for my wife's old iPad Mini, and people with 10.1" Android tablets said it was too small.) Some people find it bulky, and yes, if you look at how sleek an iPad is, this seems bulky by comparison, but I got it for practical reasons, not because it was particularly pretty. For mobile digital artists, hey - you don't have to carry a lot of kit anymore. What's a case that adds a bit of bulk but gives you lots of versatile functionality?

Get a Twist360: Amazon.ca | Amazon.co.uk | Amazon.de | Amazon.fr

Likes:

  • Comfortable handle design that improves leverage
  • Great build (mine has lasted 4 years)
  • Very affordable
  • Handle rotates 360° and holds firmly at all angles (Knock-off versions may only lock at 6-8 angles)
  • Spring-loaded jaws hold iPad securely
  • Can be used with slimmer back cases

Dislikes:

  • It only fits variations of 9.7" iPads, not the Mini or the Jumbo Pro (I don't know the Android universe. Some tablets will fit, but few of its users would be reading this post!)
  • The rubbery material on the loop handle gets sticky after some time in a humid environment. (I eventually wrapped mine in fabric for a better feel)
  • A little bulky
For those on a budget, here's an option for the 7-10" tablet category. (A little bulky though!)

For those on a budget, here's an option for the 7-10" tablet category. (A little bulky though!)

This tablet holder by Aduro is a nifty, cheaper option, and one I got for my wife's iPad Mini. The manufacturer says it can accommodate tablets up to 10", but I don't have anything that size to test.

Likes:

  • Wider grip range than the Twist360.
  • Fits 9.7" and Mini iPads (but not the Jumbo Pro).
  • Clever handle design with thumb grip hole that improves leverage.
  • Great value for money.
  • Can be used with slimmer back cases.

Dislikes:

  • If the silver button on top is accidentally depressed, the Aduro's grip can loosen with heart-stopping effect.
  • Handle clicks to lock at 45° (but that's not a big deal).
  • A little bulkier than the Twist360.

Last but not least, it’s not possible to sing the praises of the iPad Pro without mentioning the accessory you MUST absolutely get if you’re forking out for an iPad Pro. The Apple Pencil is the hands-down best stylus for the iPad Pro…and many of you already know that it only works with iPad Pros. With a groan and eye-roll, many generations of iPad users lament that fact. Sorry people - the price of progress. Please don't email me with Apple rants. I don't work for them.

Get the Aduro tablet holder: Amazon.com | Amazon.ca

Some Apple Pencil benefits to consider:

  • No pairing required. In supported apps, it just works. (Some apps have not optimized themselves to work with the Pencil, but any app worth its salt has done so.)
  • The battery lasts about 12-15 hours of usage.
  • A full charge from your iPad takes about 20min if your iPad Pro's battery is full. (Longer if not)
  • Delightfully intuitive pressure-sensitivity
  • Auto palm-rejection means you can rest your hand on your iPad as you work
  • Fun fact: It's faster to charge the Apple Pencil via your iPad Pro than plugged into the wall!

There are a few more accessories that I find super handy and highly recommended. I didn't want this post to be too long, so check back with me next week for the update! Thanks for reading and please share other essential iPad accessories in the comments :)

Get an Apple Pencil: Amazon.com | Amazon.ca | Amazon.co.uk | Amazon.de | Amazon.fr

Get an iPad Pro:  Amazon.com | Amazon.ca | Amazon.co.uk | Amazon.de | Amazon.fr

The Best iPad Sketching Equipment for Your Mobile Digital Sketching Studio
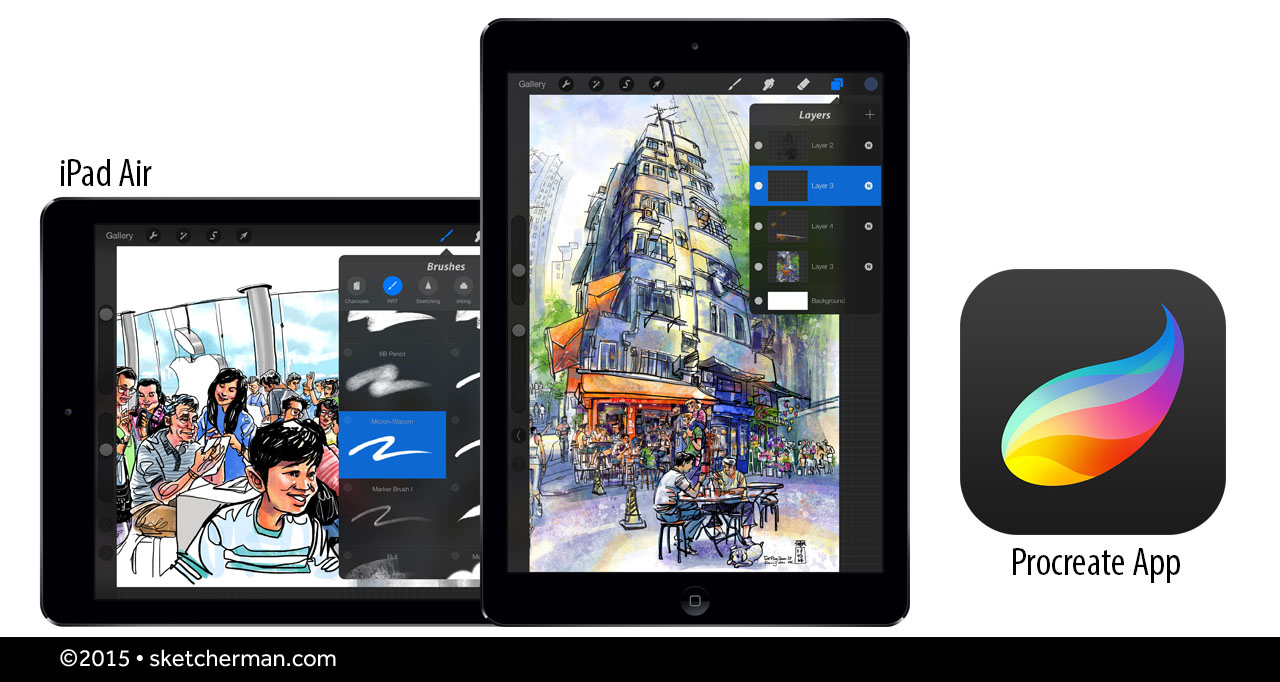
I've been sketching exclusively with an iPad for the last year and a half. I've also conducted a few workshops on the subject now (just did one for an Apple Store last Friday), and been asked many, many times about the equipment I use. While I have written about some items before, I thought I'd do a post that summarizes my top-recommended gear and accessories for easy reference.

The core of the Ultimate Mobile Digital Sketching Studio: An iPad and the app, Procreate

The core of the Ultimate Mobile Digital Sketching Studio: An iPad and the app, Procreate

iPad

I'm still using the original iPad Air and love it. The iPad Air 2 was released in October 2014, and is even lighter, and more powerful. If you're serious about sketching on the iPad, I'd suggest you get the latest model, with the largest capacity you can afford (Tip: don't buy 16GB iPads - you'll be wasting a ton of time trying to manage space). This will future-proof you for at least 2-3 years. 

If you have an older iPad and wonder whether you'll still be able to use it, the oldest you can use with a good pressure-sensitive stylus is the 3rd generation iPad, released in 2012. Apple started using Bluetooth 4.0 technology then, and this is the standard for all the best styli on the market now.

Guess what the pros use to create? After testing multiple art/sketching apps, I can confidently say that there's nothing like Procreate. Simple yet highly customizable, it stays out of your way while ensuring that all the tools you need are easily accessible in a clean UI.

Still my favorite stylus! Remember that the nib is modified though.

Still my favorite stylus! Remember that the nib is modified though.

Stylus

After testing many (detailed reviews coming in the following weeks), my top favorite is still my old Wacom Intuos Creative Stylus. This is the first generation model, released late 2013. I have tested the 2nd generation model, and unfortunately cannot recommend it until Wacom fixes some of its serious bugs. The good news for you guys is that the old model is now considerably cheaper! The not so great news is that for best results, you should modify it with the Jaja nibs by Hex3 that I listed in my previous post. Fortunately, once you have the tips in hand, the modification is quick and very easy. (You could do it in 15 minutes tops.)

I have also tested the latest Adonit Jot Touch with Pixelpoint (what a mouthful!) and that's what I recommend if you'd like to get a good pressure sensitive stylus without needing to modify anything. This is a new release and is pretty good. Full review coming up in the following weeks.

This tablet holder takes sketching on the iPad to a whole new level. Absolute awesomeness!

This tablet holder takes sketching on the iPad to a whole new level. Absolute awesomeness!

iPad/Tablet Holder

This one raises eyebrows wherever I go, and after using it every day for hours on end, I can also highly, highly recommend it. The Twist 360 is an extremely versatile universal tablet holder. I love that it can accommodate most larger tablets (sorry, 7" tablets - Kindles, iPad Minis - don't fit, but I'm testing one that does and will post that later). The Twist 360 is a wonder that allows me to hold my iPad in a myriad ways, stand it horizontally or vertically, with any degree of tilt I desire, even hang it. It takes sketching on the iPad to a totally different level and I'm totally dependent on it!

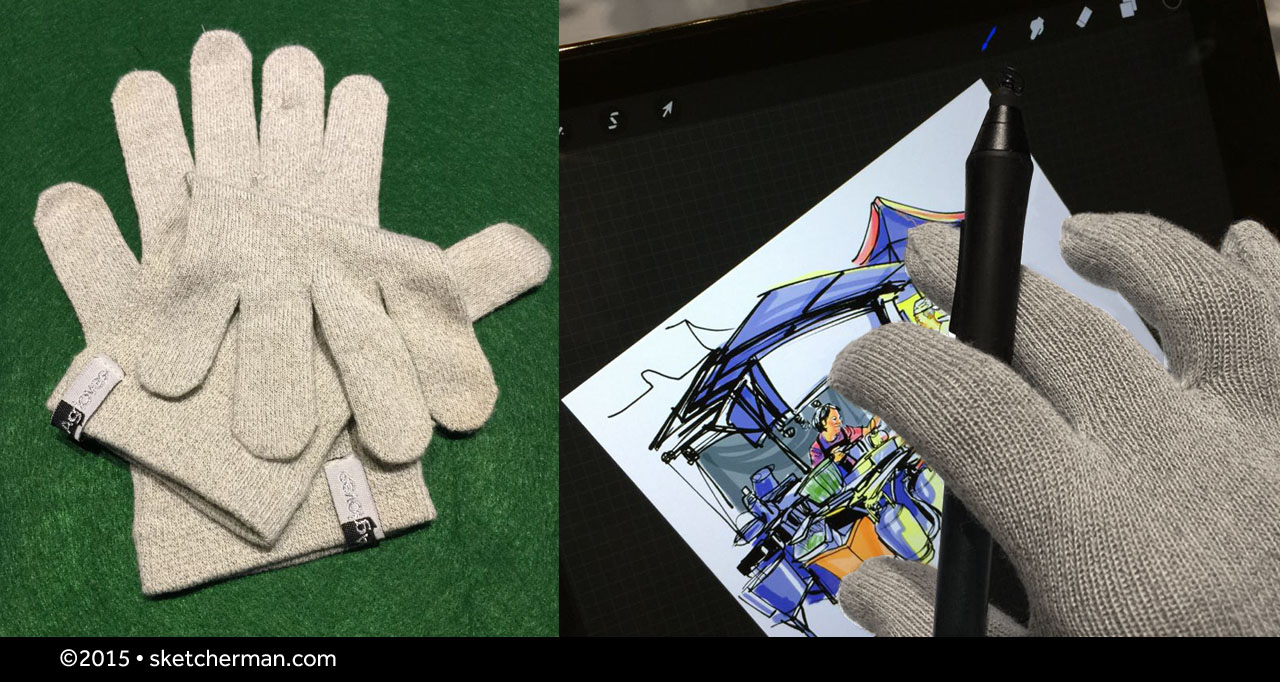
Sketcherman-agloves_capactive_gloves.jpg

Capacitive Gloves

I have hunted high and low for a pair I like and tested several that I didn't. These gloves from Agloves are awesome. Woven through with conductive silver in bamboo fabric, they're really comfortable and allow me to to use multi-finger gestures on my iPad while serving 2 purposes: keeping my hands warm in cold weather, as well as erasing smudges on the screen! haha! I like that the entire glove is capacitive, not just the tips. These are very light and pretty thin (exactly what I was looking for) and so may not be sufficient for you if your winters are very cold. Agloves has thicker, warmer versions for that.

Sketcherman-Helinox_walkstool.jpg

Great Seating on the Go

I've being doing a lot of urban sketching, and when you're out and about, good, solid, ergonomic seating is paramount. While evaluating my options, I decided that what I purchased had to fulfill 4 important criteria:

  1. my choice had to be as light as possible 
  2. had to be really well-made and last me at least 10 years 
  3. pack really small
  4. support my lower back! 

Here are my favorite options, ticking all the boxes and working better in slightly different situations. The Helinox One Camp Chair was my first purchase. It's really quick and pretty idiot-proof to set up, and packs to about the size of a sneaker. Weighing in at under 1kg and under 2lbs, I can pick it up with my little finger. This beauty is also so comfortable to sit in, and yet is strong enough to take 350lbs! It leans back a bit, and is probably not for those who like to be very upright. (I do find that slipping a jacket behind me is an easy fix for that when i do want to sit up straighter.) Another plus: the curve of the fabric cups my elbow, thus supporting my arm for the hours I spend outdoors sketching. When it's time to kick back, have a drink and swap sketching stories under the trees, wow- this is the absolute best chair to stretch out and relax in!

The Helinox One has a larger footprint and takes about 20-30 seconds to set up however. When I know that I won't have much space (think museum interiors and narrow sidewalks) and want almost instant setup and takedown, my seating of choice is the Walkstool 55 XL. It comes with its own handy mesh bag that you can sling over a shoulder. I really wanted something that would fit into any of my backpacks, however. Telescoped, it's a compact 14" long, and love that this stool can be used at 2 lengths: short and fully extended. There are several sizes, so you can pick one that suits your build. The seat is large and comfy, and I was delighted to find that (in addition to lightning fast setup) I automatically sit up straight when I use it. Slouching takes effort when I'm on it, so my posture instantly improves!

Neither of the 2 seating options is particularly cheap, but pick any up and you'll feel instantly that they're built to last. I've used a lot of bargain basement clunkers that were either bad for the back or heavy as hell. Truly, you get what you pay for, and as sketching outdoors is something I do so much, I realized I should just invest in solid, dependable options. These are light, strong, very durable and ergonomic to boot! I figured if I got 10 years out of them, these would each only cost me about $10 a year. When you look at it like that, they're no brainers, really.

Do you have other equipment to recommend? I'm always on the lookout for gear that improves my on location sketching experience. Please add your suggestions in the comments! :)

Mod your Wacom Intuos Creative Stylus for Durability and Accuracy

Rubber nib or see-through tip? I decided to go for an option that saves me nibs and gives me accuracy!

Rubber nib or see-through tip? I decided to go for an option that saves me nibs and gives me accuracy!

If you read my previous post, reviewing the Wacom Intuos Creative Stylus, you'll know that I love it but was unhappy about how the little rubber nibs don't last very long. I had resigned myself to having to buy more every now and then, the way I used to replenish stocks of paper, pens and paint before.

While exploring the Procreate Forum, I found a thread by Germ770 explaining his brilliant idea for a simple modification that makes the Wacom ICS more accurate. (Some users don't like the rubber nib at the end and prefer to see exactly where stylus tip meets screen.)

I couldn't find clear step-by-step pictures of the process anywhere, so after successfully modifying my own stylus, I thought I'd post clear instructions here for the benefit of anyone looking for a similar solution.

It's really quite simple. Hex3 makes a stylus called the Jaja. (I haven't used the Hex3 Jaja so can't say how it works.) Its tips are metal, teflon-coated discs that allow you to see the point at which your stylus touches the screen. If you find it difficult to be accurate with rubber nibs, you'll like this.

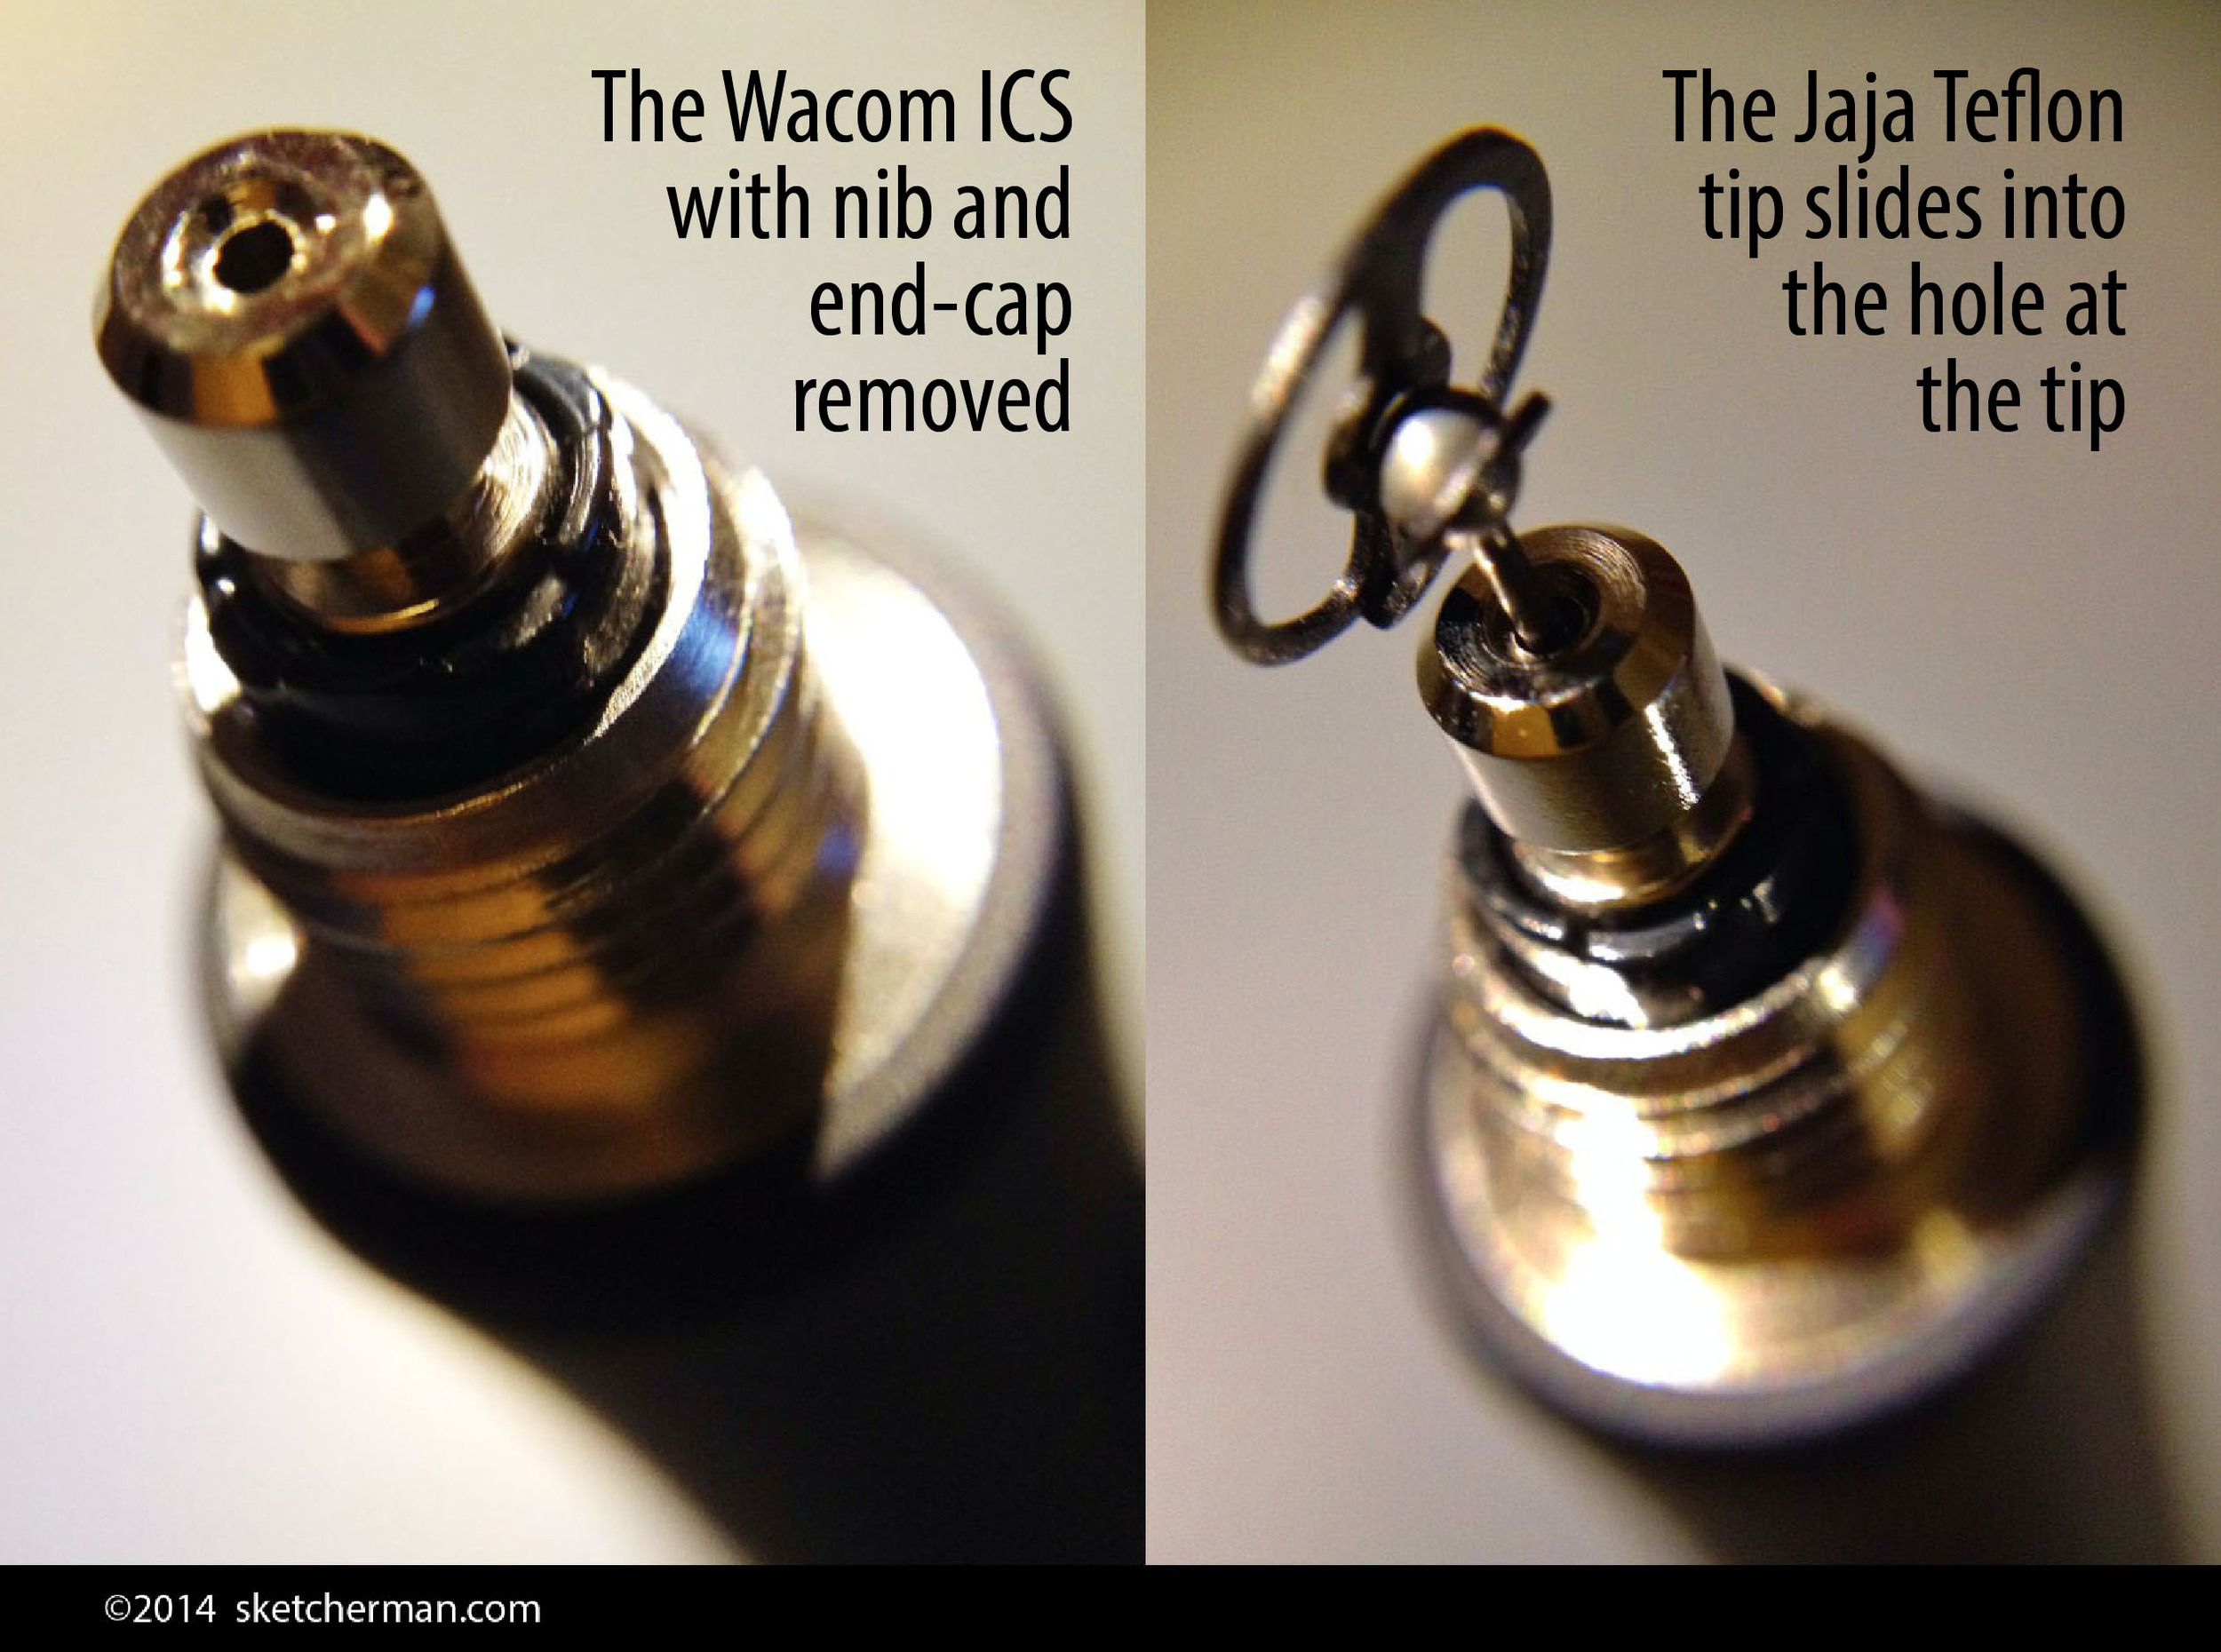
The shaft of the Jaja tip goes into that little hole at the tip of the Wacom ICS. The hole is almost a perfect size for the shaft. The images above are only meant to show you where the hole is. The right way to fit everything is illustrated in …

The shaft of the Jaja tip goes into that little hole at the tip of the Wacom ICS. The hole is almost a perfect size for the shaft. The images above are only meant to show you where the hole is. The right way to fit everything is illustrated in the images below.

Hex3 has also made it possible for users to buy only those teflon tips for US$14.95 a pair (they ship internationally). These in turn can be inserted into the tip of a 0.7 metal-bodied mechanical pencil, creating an instant stylus. The result doesn't have pressure sensitivity, but the following mod will give you that and accuracy.

On top of that, I've found, like other users of this mod, that I don't need to buy Wacom nibs so often anymore because these teflon disks are really long-lasting! I'll update this post when I finally replace the first disk. (The great thing is, I have a spare because these tips come in pairs!)

Once you've received your Hex3 Jaja Teflon nibs, here's what to do:

Here are the steps to modifying your Wacom Intuos Creative Stylus with a Jaja Teflon tip. Easy!

Here are the steps to modifying your Wacom Intuos Creative Stylus with a Jaja Teflon tip. Easy!

Just in case, here are some accompanying notes for the images above:

1. Cut a Jaja Teflon tip to size to 1cm from the top - this length allows it to sit perfectly in your Wacom stylus case when finished. (Updated edit: I now cut my tips to 1cm. Longer than that results in easier breakage. Be careful not to cut off too much, but make sure the metal tip doesn't stick out too much either. The tip should be flush to the rubber nib.)

2. Position the Teflon tip shaft in the center of the Wacom rubber nib and push it through slowly,  (you might want to use a torn nib so you don't need to damage a new one) then slide it it carefully into that little hole in the center. The shaft of the Jaja nib sits almost perfectly in the little hole at the tip of the Wacom ICS's metal tip. 

That’s it! The rubber nib holds the Teflon tip perfectly in place. Having used this solution for about a month, I have to say I'm really happy with it.

When done correctly, your stylus will fit perfectly in its case, even with your new nib.

When done correctly, your stylus will fit perfectly in its case, even with your new nib.

How has my Wacom ICS improved?

• I don't wear rubber nibs down anymore (I did buy some spares before getting the Jaja tips). 

• Users who've done this hack say they've been happy with this solution for months - nothing is wearing down, and I'll update this post when mine finally need replacement.

• The Teflon metal tips should last for months if not longer, and your initial purchase consists of 2, so you have a spare! 

• And no, these tips do not scratch your iPad's screen. (The iPad's screen is made with Gorilla Glass, which is harder than most metals.) In fact, I don't use a screen protector at all. I used to think they were necessary, but read that the iPad Air's screen is extremely strong and scratch resistant. 4 months into ownership of my iPad Air, I can say it's fantastic.

I will say that being careful is always a good thing. You should be aware of the environment in which you're sketching, especially outdoors. Both iPad and stylus are valuable equipment that need to be treated sensibly. Before use, check that nothing is trapped under the Teflon disk. In an environment that may be very dirty and gritty, I suggest being really careful not to get any gritty bits under the disk which might scratch the screen as you slide it across the glass. 

Personally, I clean my screen frequently. I often wear a glove, cut of the tips of the thumb, index and middle finger, and this cleans my screen while allowing me to rest my hand now and then. I haven't experienced any problems at all, and I've done plenty of sketching outdoors on windy days.

Hope that helps and please let me know if you've tried this or have questions!

*UPDATE *

I've used the Hex3 tips with my Wacom ICS for about 6 months now, and I thought I'd add an update on how things are going.

1. I've never had any tips wear out on me yet. They all glide smoothly and work great. 

2. My biggest issue has been tips breaking, although it's no fault of the tip. The first time, my arm was extended, stylus in hand as I was about to position myself to sketch standing up. A kid ran into me and the impact snapped the head of the tip. I subsequently began carrying spares. (A spot of Blue Tack or similar cradles my spare in my Wacom ICS case)

3. I also had another tip break when I slipped my stylus into the pocket of my cargoes, and forgot it was there. By the time I got home, the tip had also broken off. Now my stylus goes right back into it's case immediately after use, and the case rides safely in my cargoes.

4. I once lost a tip because it fell out and landed in grass. I didn't realize the tip had fallen out, and combing areas of the lawn I'd been on drew a blank. (Surprise, surprise) That issue is now solved by using a teeny bit of blue tack in the inside of the rubber nib as I insert the tip. That little bit of stickiness has prevented the tip from slipping out of place.


Wacom Intuos Creative Stylus review

My favorite sketching setup: iPad Air + Procreate app + Wacom Intuos Creative Stylus

My favorite sketching setup: iPad Air + Procreate app + Wacom Intuos Creative Stylus

I've been using this particular set up for a few months now: iPad Air + Procreate app + Wacom Intuos Creative Stylus. I love it. To me, it feels like technology has finally closed the gap and made sketching digitally on the go, totally seamless.

Procreate's app logo

Procreate's app logo

Please note that when I discuss the Wacom ICS in use, I'm specifically referring to how it works with Procreate. I've tested it with other apps, and it's fine on some, but for true awesomeness, you need to try it with Procreate.

Pressure sensitivity is not built into the iPad, so how well a stylus behaves really depends upon the app you use, and the ability to tweak settings to your liking. Therefore, the developer team behind your app of choice is very important.

The Wacom Intuos Creative Stylus uses Bluetooth 4.0 to talk to the iPad. In other words, it's compatible with all iPads except the iPad 1 and 2.

This is what you get when you order the Wacom Intuos Creative Stylus. The sleek, solid case houses the stylus itself, along with 2 extra nibs, slots for extra nibs, as well as a spot for a spare AAAA battery.

This is what you get when you order the Wacom Intuos Creative Stylus. The sleek, solid case houses the stylus itself, along with 2 extra nibs, slots for extra nibs, as well as a spot for a spare AAAA battery.

First, here's what I love about the Wacom Intuos Creative Stylus:

• It looks great! I have the black and blue version. The metal body is slim yet solid, with a matte grippy end. Build quality feels excellent; like something that will last and last for ages.

• It's well balanced and doesn't feel awkward or tiring to use, even after many, many hours a day (I've used it for up to 9 almost non-stop) 

The Wacom ICS comes in a beautiful case which gets my thumbs up. Slim and sleek, it's solid and well-built without being bulky or heavy, and has special slots for storing an extra battery and spare nibs. To protect my stylus and prevent it from accidentally being turned on, I've made it a habit to transport it in its case.

• The Bluetooth 4.0 connection is fast, very lower power and for me so far, absolutely reliable.

• The stylus doesn't use much power and the battery lasts for ages. After heavy usage in the last 4 months, its single AAAA battery is at 55% right now, which means I should get a few more months of use!

• Most importantly, the pressure sensitivity of the Wacom ICS on my iPad Air is amazing! I literally use feather touches sometimes and they register perfectly. The ability to go from hairline to fat, juicy mark in a single stroke is creative heaven!

• The stylus uses a replaceable rubber nib, and comes with 2 spare soft nibs. Your mileage on those will vary greatly, depending on your style of usage and how much pressure you use when drawing. People who hate rubber-nibbled stylii because they feel these aren't sufficiently accurate may shudder at trying the Wacom ICS, but I didn't have a problem with it at all. The rubber nib is also smaller than that of other stylii, and I found a modification tip on the Procreate community forum that solves this issue very satisfactorily. Details in the this post about modifying your Wacom ICS.

• The stylus is made by Wacom, so you can expect great quality and decent customer service when you need it. This may depend on where you reside though. Read on for details of my experience with Wacom customer service in the next section.

• There are 2 buttons on the stylus. Some apps allow you to program them. In Procreate, I've set them to Redo and Undo.

Now let's talk about what I don't like about the Wacom Intuos Creative Stylus, along with what I've done to overcome these issues: 

•  It uses an AAAA sized battery, which can be hard to find in retail stores and even online, in many countries. (I solved the problem by getting a 6-pack on Amazon when I bought my stylus, and carry a spare in its case, just in case.)

• I  like to use rechargeable batteries where possible, and there aren't any rechargeable AAAA batteries available...yet. Good thing these last a long time.

No palm rejection. This is not a deal-breaker for me however, and I've taken to wearing a glove when using my stylus. This cleans my iPad's screen while I work, and let's me rest my hand on the iPad sometimes without any accidental strokes sweeping across my sketch.

After 3 weeks of use, this is what my first nib looked like :(

After 3 weeks of use, this is what my first nib looked like :(

• My biggest concern has been that the rubber nibs that come with the Wacom a Intuos Creative Stylus tear very easily! The nib that was preinstalled lasted me maybe 3 weeks. The next one developed a tear in about one week! I'm not sure if it's a manufacturing defect or a necessary evil to get the required sensitivity. The stylus is under warranty for a year, but does not include the rubber nibs, which are categorized as 'expendable parts'.

After my initial chagrin, I chalked this up to an expense on expendables; pens run out of ink, pencils get worn down and paint and paper eventually run out too, so fine. I'd need to order more now and then. At only US$4.99 for a 3-pack from the Wacom site, I thought ok, it's reasonable. When I tried to figure out exactly which nib to buy though, I couldn't find official information anywhere, which was pretty shocking! And that leads me to my next issue: customer service out of the US.

• The nib issue had me most concerned as they are not currently available in Hong Kong. Down to my final one, I called Wacom Hong Kong to ask where I could get more. They were very nice, but they couldn't speak decent English, and were not at all knowledgable about the product. I had to ask my other half to speak to them in Cantonese. The ladies at Wacom HK were very apologetic, stating that this product was very new to them. I was then informed that I'd have to wait months for them to receive stock of nibs. When asked about the nib model number, Wacom Hong Kong gave me a model number that turned out to be that of the stylus! 

Packaging for the Wacom Intuos Creative Stylus replacement nibs. These are for the soft nibs (ACK-20501). The firm nibs are ACK-20601

Packaging for the Wacom Intuos Creative Stylus replacement nibs. These are for the soft nibs (ACK-20501). The firm nibs are ACK-20601

Tired of the runaround, I called Wacom USA where I was attended to quickly and efficiently. They also offered to send me one replacement nib to my US address. (Well, they said they would, but it never arrived.) The most economical solution for me was ordering via Amazon Prime in the US, getting them shipped to someone, who then sent them to me. This proved a little cheaper than buying direct from Wacom, which charges in increments of US$5 for shipping!

If you've been searching the net for info about spare nibs for the Wacom Intuos Creative Stylus too, here it is! For some reason or other, neither Wacom sites nor Amazon listings say that these are the correct nibs for the Wacom Intuos Stylus. I've ordered both and can assure you they're correct however. There are 2 types of nibs: Wacom Soft Nibs (ACK20501), which are the same as the ones that came with the stylus, and Wacom Firm Nibs (ACK20601), which are an additional option. 

Wacom USA was sympathetic when I explained that my nibs were wearing down very quickly, then advised me to try the firm option. I ordered a set of both, and after trying soft and hard nibs, can state that I don't like the firm ones. Like many other users, I find I need to press a lot harder for my strokes to register. Maybe they require some tweaking in settings to get them to work well, but I don't want to bother with that. I spent ages getting my brushes in Procreate to work just so, and don't want to tweak any further to accommodate new nibs.

Sketching with the Wacom Intuos Creative Stylus

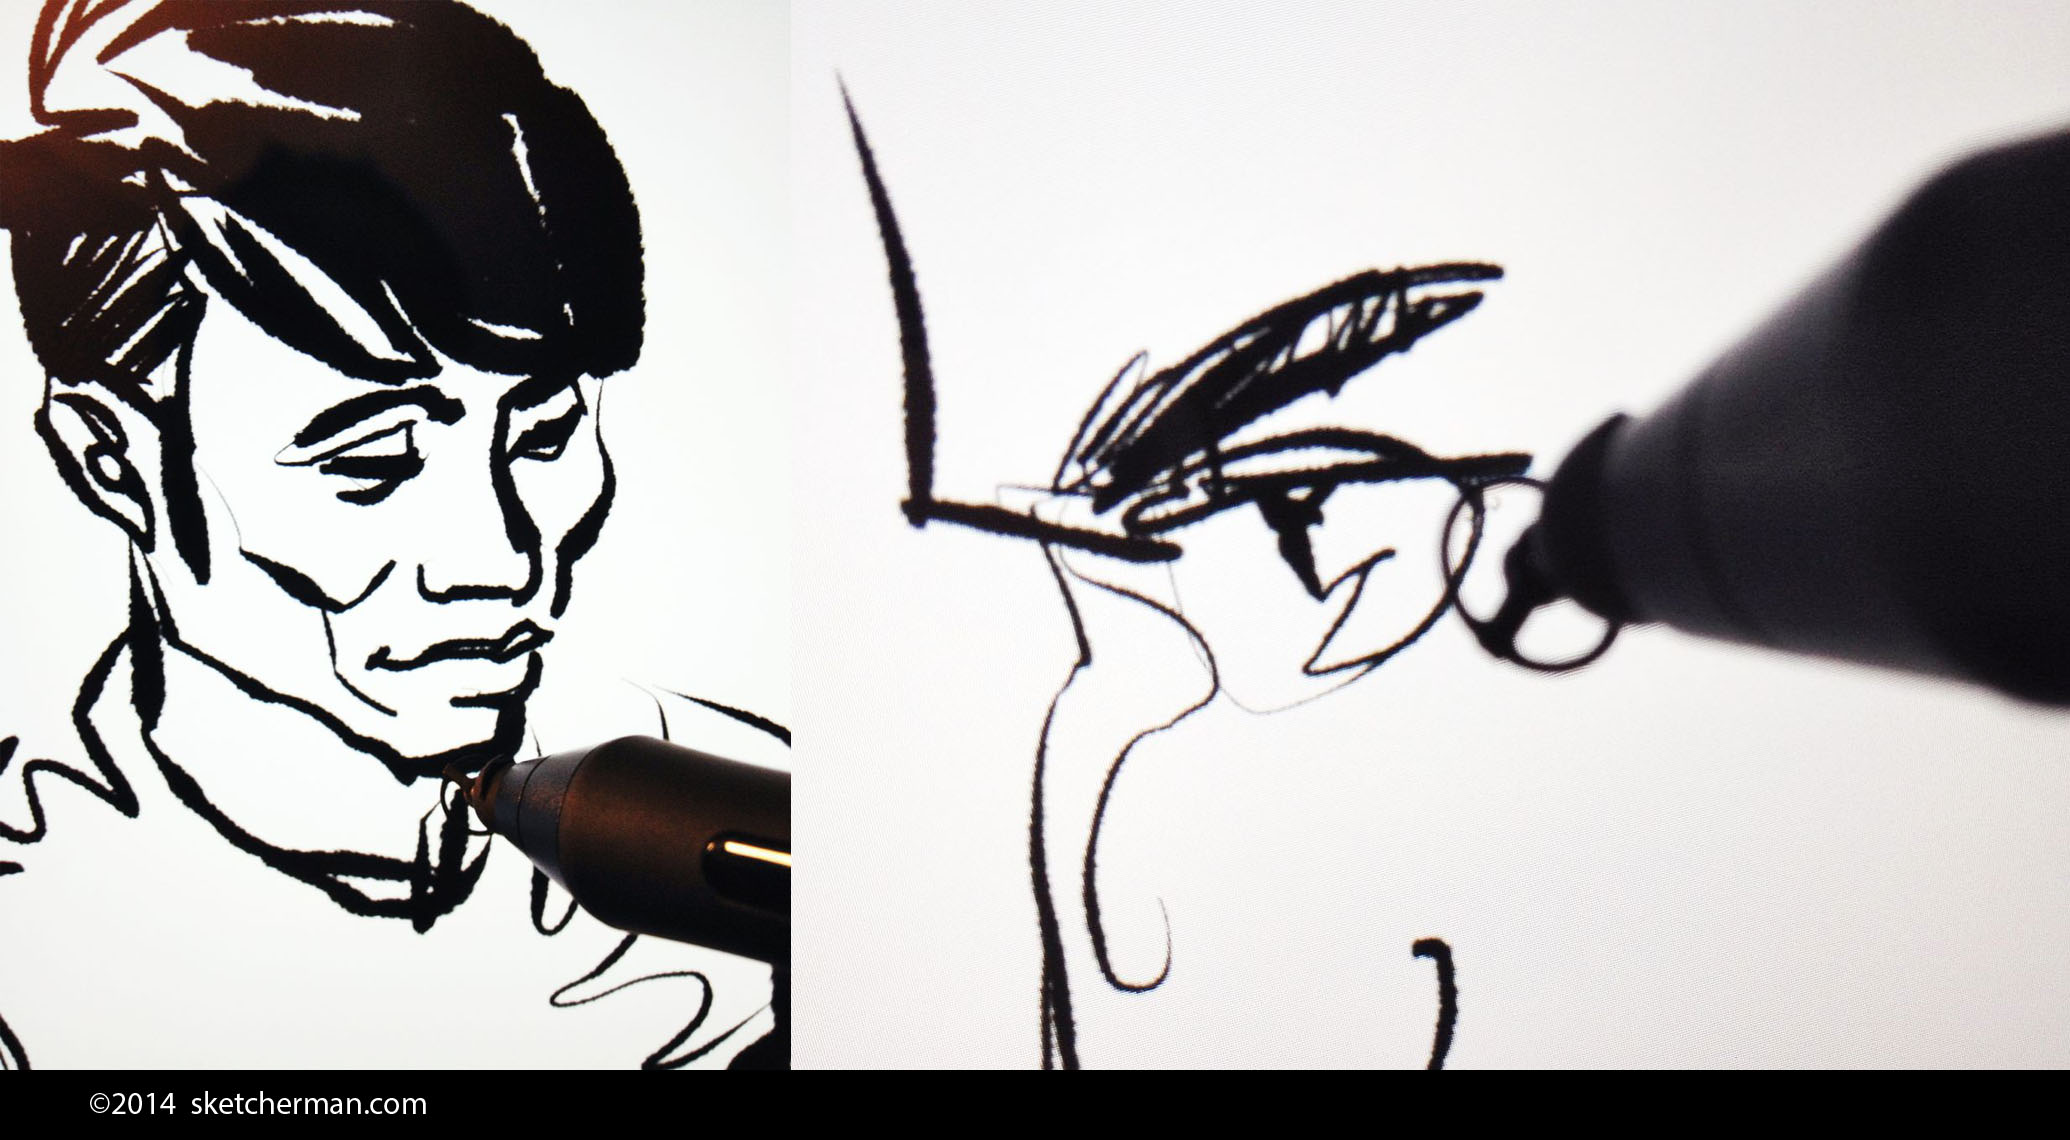
The sketches above give you an idea of what's possible. Tools used: Pencil tool on the left, and Ink Bleed + Water Brush tools on the right. All of them came with Procreate, but I modified the settings to suit my preferences. 

The sketches above give you an idea of what's possible. Tools used: Pencil tool on the left, and Ink Bleed + Water Brush tools on the right. All of them came with Procreate, but I modified the settings to suit my preferences. 

So how does the stylus work? Like a dream. After you get used to the feel of rubber on glass, the process is seamless. Smooth and sensitive, I love going from thin to thick lines in one stroke. 

Here's a sampling of my favorite brushes in Procreate. See what I mean about thin to thick in 1 stroke?

Here's a sampling of my favorite brushes in Procreate. See what I mean about thin to thick in 1 stroke?

Now, after all this, you might think, "Oh this is not good! The Wacom Intuos Creative Stylus sounds great and all, but what if I need more nibs? What a hassle! Especially if I don't live in the US?"

Here's the good news: there's a very easy hack to make your nibs last a LOT longer. If you haven't bought your stylus yet, you might want to read my next post before you do.