Wacom Intuos Creative Stylus

Sketching Disappearing Hong Kong

My last piece of the day. Chinese signage and little bits of line work completed at home after I was chased off by stall owners cleaning up for the day. I've decided to leave this in black and white for now.

The last rooftop rendezvous at Shek Kip Mei from my previous post drew a lot interest among Urban Sketcher friends who missed out last time, so we agreed we’d go again. A date was picked, and on Saturday, 21 March, a whole bunch of them trudged up the dark, smelly staircase to sketch the view…only to find that half the rooftop was now gone!

I didn’t go that morning as I had a stack of work to catch up on, but was quite dismayed when I saw the photo the group shared, of the demolition crew crushing the building. That afternoon, we were due to meet at Graham Street, scene of yet another disappearing act of Hong Kong's oldest sectors.

I had just read about the URA's plans to 'renew' the area, but was really saddened to hear that this 170+ year old market, so unique, so Hong Kong, was slated for demolition by the end of the month! The Sketcher Kee group, also up in arms, had arranged to head down to Graham Street and sketch up a storm in order to preserve anything possible through their artwork. Many of us from Urban Sketchers HK also planned to go, and as soon as I was able, I headed down there as well.

There were many heads bowed before sketchbooks and drawing boards by the time I arrived. I walked up  from Wellington Street drinking in what I could. The narrow street was pedestrians only, and lined by stalls selling meat, vegetables, fruit and a variety of dry goods for completing a meal; noodles and rice, herbs and seaweed and spices. 

I watched the patrons too, and they came from all walks of life. Maids lugged bags of groceries for the evening meal. Tai-tais picked expertly through piles of dried mushrooms for the best morsels. Expat couples living in the area browsed, their shopping bags piled with produce from the various stalls. Locals bought their fruit, regulars traded news with stall owners, and tourists swiveled their heads constantly, eyes glued to viewfinders, or smartphones constantly raised. Click-click for posterity. Good thing too. I was updated by Gui and Alvin after bumping into them later. Apparently, scaffolding would be erected the very next day so demolition works could begin. 

To the right, a wall had been erected, blocking off the construction site that marked a block already torn down earlier. The tattoo of jackhammers filled the air. I guess that's part of the rhythm of Hong kong, like it or not. I couldn't help but feel a welling sadness at the loss of this place though. By 2017, Graham Street would be just another typical commercial-hotel spot.

My view for Sketch No.1 (below)

To the right, a wall had been erected, concealing the construction site that marked a block already torn down earlier. The tattoo of jackhammers filled the air. I guess that's part of the rhythm of Hong kong, like it or not. I couldn't help but feel a welling sadness at the loss of this place though.

I'm going to miss this place

Ben's familiar face was up ahead where the pathway opened up because some stalls had long packed up and closed, knowing their days were numbered. Looking up, I fell in love with the higgledy-piggledy facades of the block in front of me. I've been fascinated by the Kowloon Walled City since hearing about it, and looking, up, imagined that it might have looked a little like this. Balconies jutted at different angles, as did the facades. Different widths, different styles, different metalwork, yet all part of the character of the area; an unmistakeable identity that many of you reading this now, will never see in real life if you haven't already. 

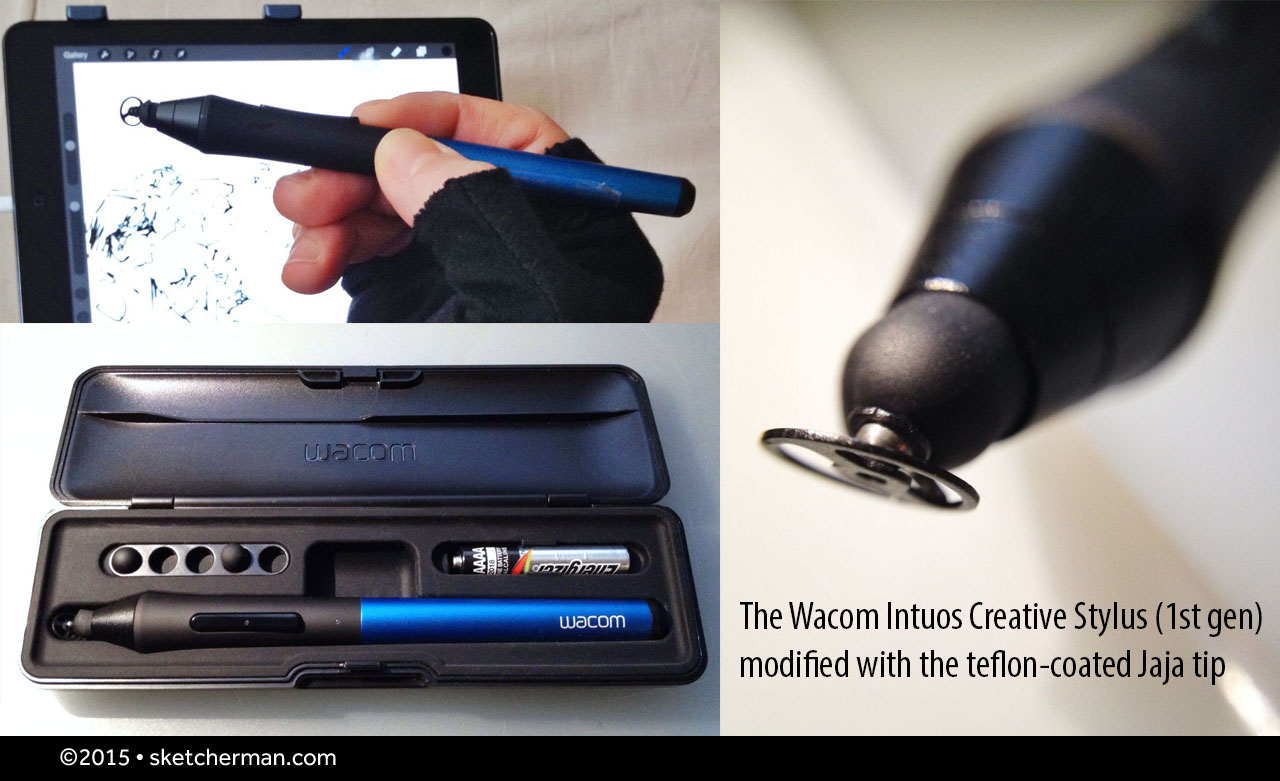
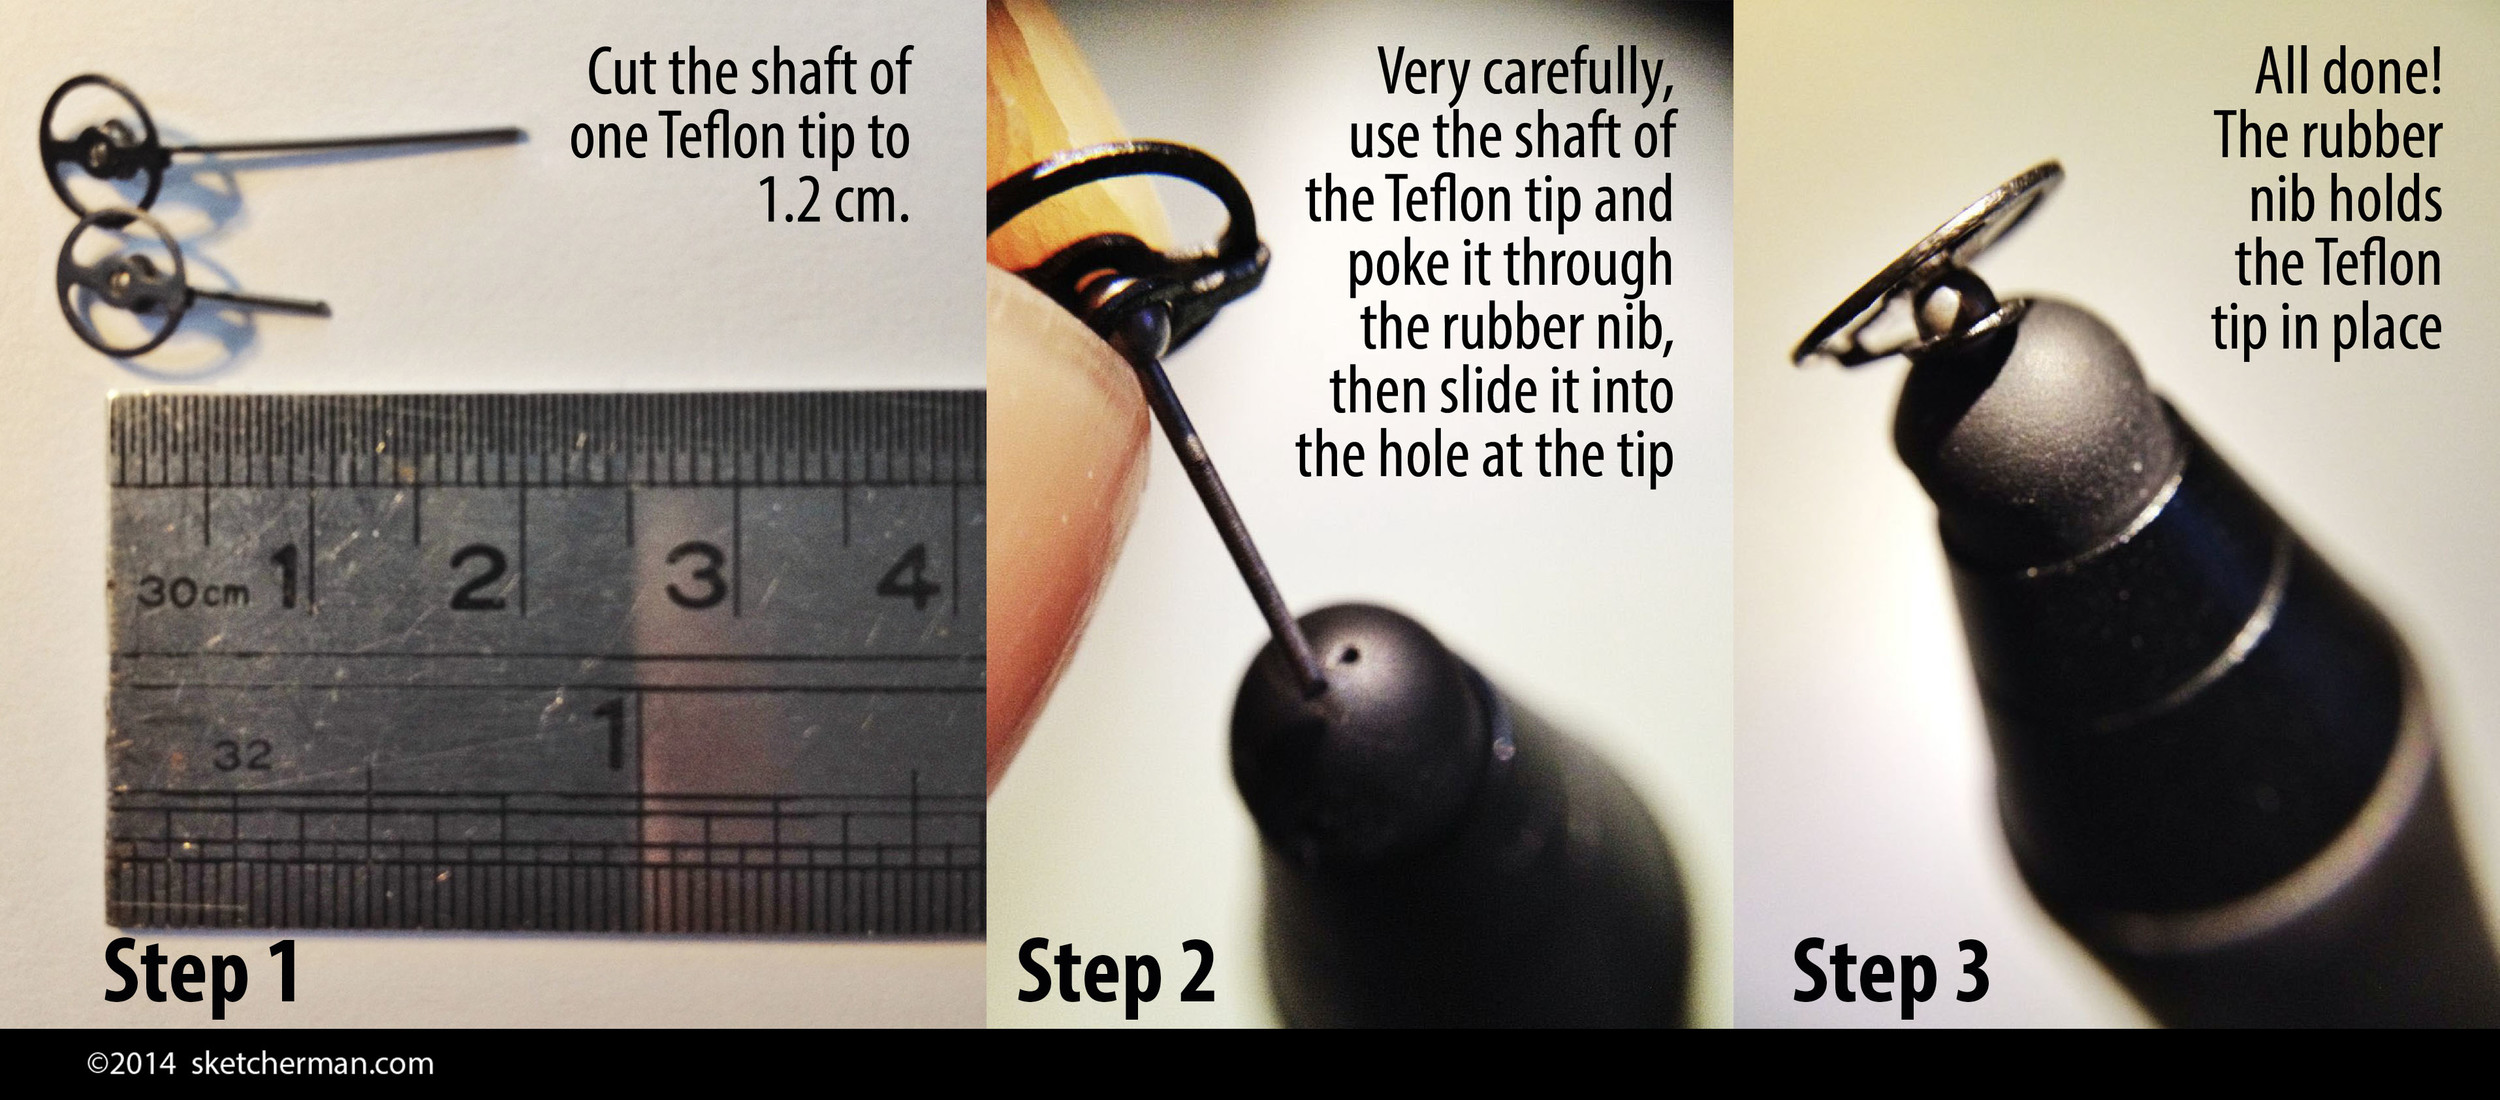
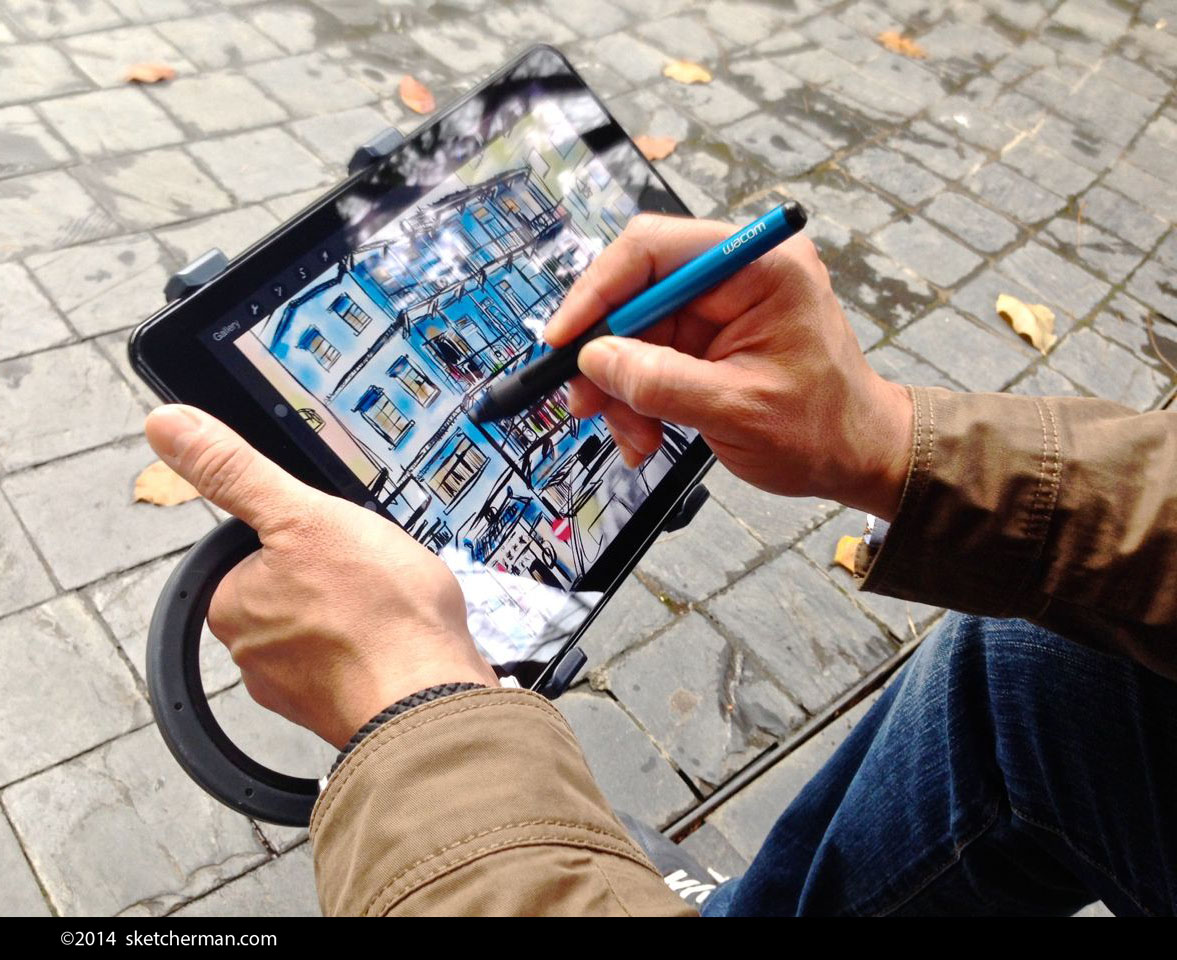
My Walkstool is better than my Helinox One chair in spots like this. Easy to set up and able to squeeze into tight spaces, I set up in a snap, soaked the view in and put stylus to screen. All the line work for this piece was done on location, and color added later at home.

Wanting to make the most of my time, I packed up as soon as I was done, and headed uphill to where Graham Street intersected with Gage Street, taking several reference shots along the way. Up ahead, more sketchers could be seen at various nooks and corners, heads bowing and raising in that particular bird-like way. I had about an hour of daylight left, and eventually decided to spend what remained of that on the edge of Gage Street, in front of a closed up stall. Taxis sometimes whizzed past, honking and missing my knees by inches.

The market on Gage Street closes at 7pm, and it wasn't long before the stalls around me began to pack up for the day. I was ultimately forced to leave when a hoarse voice behind me declared that I'd be soaked if I didn't move. The fishmonger was in the process of hosing down the sidewalk at closing time. Ah well...by then, I'd gotten most of my line work done anyway.

Just before heading off, I took a final look down Graham St. There are upper sections that are also slated for demolition, but maybe not just yet. I know where I'll be sketching whenever I have some time off in the next few months.

The Best iPad Sketching Equipment for Your Mobile Digital Sketching Studio

I've been sketching exclusively with an iPad for the last year and a half. I've also conducted a few workshops on the subject now (just did one for an Apple Store last Friday), and been asked many, many times about the equipment I use. While I have written about some items before, I thought I'd do a post that summarizes my top-recommended gear and accessories for easy reference.

The core of the Ultimate Mobile Digital Sketching Studio: An iPad and the app, Procreate

The core of the Ultimate Mobile Digital Sketching Studio: An iPad and the app, Procreate

iPad

I'm still using the original iPad Air and love it. The iPad Air 2 was released in October 2014, and is even lighter, and more powerful. If you're serious about sketching on the iPad, I'd suggest you get the latest model, with the largest capacity you can afford (Tip: don't buy 16GB iPads - you'll be wasting a ton of time trying to manage space). This will future-proof you for at least 2-3 years. 

If you have an older iPad and wonder whether you'll still be able to use it, the oldest you can use with a good pressure-sensitive stylus is the 3rd generation iPad, released in 2012. Apple started using Bluetooth 4.0 technology then, and this is the standard for all the best styli on the market now.

Guess what the pros use to create? After testing multiple art/sketching apps, I can confidently say that there's nothing like Procreate. Simple yet highly customizable, it stays out of your way while ensuring that all the tools you need are easily accessible in a clean UI.

Still my favorite stylus! Remember that the nib is modified though.

Still my favorite stylus! Remember that the nib is modified though.

Stylus

After testing many (detailed reviews coming in the following weeks), my top favorite is still my old Wacom Intuos Creative Stylus. This is the first generation model, released late 2013. I have tested the 2nd generation model, and unfortunately cannot recommend it until Wacom fixes some of its serious bugs. The good news for you guys is that the old model is now considerably cheaper! The not so great news is that for best results, you should modify it with the Jaja nibs by Hex3 that I listed in my previous post. Fortunately, once you have the tips in hand, the modification is quick and very easy. (You could do it in 15 minutes tops.)

I have also tested the latest Adonit Jot Touch with Pixelpoint (what a mouthful!) and that's what I recommend if you'd like to get a good pressure sensitive stylus without needing to modify anything. This is a new release and is pretty good. Full review coming up in the following weeks.

This tablet holder takes sketching on the iPad to a whole new level. Absolute awesomeness!

This tablet holder takes sketching on the iPad to a whole new level. Absolute awesomeness!

iPad/Tablet Holder

This one raises eyebrows wherever I go, and after using it every day for hours on end, I can also highly, highly recommend it. The Twist 360 is an extremely versatile universal tablet holder. I love that it can accommodate most larger tablets (sorry, 7" tablets - Kindles, iPad Minis - don't fit, but I'm testing one that does and will post that later). The Twist 360 is a wonder that allows me to hold my iPad in a myriad ways, stand it horizontally or vertically, with any degree of tilt I desire, even hang it. It takes sketching on the iPad to a totally different level and I'm totally dependent on it!

Sketcherman-agloves_capactive_gloves.jpg

Capacitive Gloves

I have hunted high and low for a pair I like and tested several that I didn't. These gloves from Agloves are awesome. Woven through with conductive silver in bamboo fabric, they're really comfortable and allow me to to use multi-finger gestures on my iPad while serving 2 purposes: keeping my hands warm in cold weather, as well as erasing smudges on the screen! haha! I like that the entire glove is capacitive, not just the tips. These are very light and pretty thin (exactly what I was looking for) and so may not be sufficient for you if your winters are very cold. Agloves has thicker, warmer versions for that.

Sketcherman-Helinox_walkstool.jpg

Great Seating on the Go

I've being doing a lot of urban sketching, and when you're out and about, good, solid, ergonomic seating is paramount. While evaluating my options, I decided that what I purchased had to fulfill 4 important criteria:

  1. my choice had to be as light as possible 
  2. had to be really well-made and last me at least 10 years 
  3. pack really small
  4. support my lower back! 

Here are my favorite options, ticking all the boxes and working better in slightly different situations. The Helinox One Camp Chair was my first purchase. It's really quick and pretty idiot-proof to set up, and packs to about the size of a sneaker. Weighing in at under 1kg and under 2lbs, I can pick it up with my little finger. This beauty is also so comfortable to sit in, and yet is strong enough to take 350lbs! It leans back a bit, and is probably not for those who like to be very upright. (I do find that slipping a jacket behind me is an easy fix for that when i do want to sit up straighter.) Another plus: the curve of the fabric cups my elbow, thus supporting my arm for the hours I spend outdoors sketching. When it's time to kick back, have a drink and swap sketching stories under the trees, wow- this is the absolute best chair to stretch out and relax in!

The Helinox One has a larger footprint and takes about 20-30 seconds to set up however. When I know that I won't have much space (think museum interiors and narrow sidewalks) and want almost instant setup and takedown, my seating of choice is the Walkstool 55 XL. It comes with its own handy mesh bag that you can sling over a shoulder. I really wanted something that would fit into any of my backpacks, however. Telescoped, it's a compact 14" long, and love that this stool can be used at 2 lengths: short and fully extended. There are several sizes, so you can pick one that suits your build. The seat is large and comfy, and I was delighted to find that (in addition to lightning fast setup) I automatically sit up straight when I use it. Slouching takes effort when I'm on it, so my posture instantly improves!

Neither of the 2 seating options is particularly cheap, but pick any up and you'll feel instantly that they're built to last. I've used a lot of bargain basement clunkers that were either bad for the back or heavy as hell. Truly, you get what you pay for, and as sketching outdoors is something I do so much, I realized I should just invest in solid, dependable options. These are light, strong, very durable and ergonomic to boot! I figured if I got 10 years out of them, these would each only cost me about $10 a year. When you look at it like that, they're no brainers, really.

Do you have other equipment to recommend? I'm always on the lookout for gear that improves my on location sketching experience. Please add your suggestions in the comments! :)

Mod your Wacom Intuos Creative Stylus for Durability and Accuracy

Rubber nib or see-through tip? I decided to go for an option that saves me nibs and gives me accuracy!

Rubber nib or see-through tip? I decided to go for an option that saves me nibs and gives me accuracy!

If you read my previous post, reviewing the Wacom Intuos Creative Stylus, you'll know that I love it but was unhappy about how the little rubber nibs don't last very long. I had resigned myself to having to buy more every now and then, the way I used to replenish stocks of paper, pens and paint before.

While exploring the Procreate Forum, I found a thread by Germ770 explaining his brilliant idea for a simple modification that makes the Wacom ICS more accurate. (Some users don't like the rubber nib at the end and prefer to see exactly where stylus tip meets screen.)

I couldn't find clear step-by-step pictures of the process anywhere, so after successfully modifying my own stylus, I thought I'd post clear instructions here for the benefit of anyone looking for a similar solution.

It's really quite simple. Hex3 makes a stylus called the Jaja. (I haven't used the Hex3 Jaja so can't say how it works.) Its tips are metal, teflon-coated discs that allow you to see the point at which your stylus touches the screen. If you find it difficult to be accurate with rubber nibs, you'll like this.

The shaft of the Jaja tip goes into that little hole at the tip of the Wacom ICS. The hole is almost a perfect size for the shaft. The images above are only meant to show you where the hole is. The right way to fit everything is illustrated in …

The shaft of the Jaja tip goes into that little hole at the tip of the Wacom ICS. The hole is almost a perfect size for the shaft. The images above are only meant to show you where the hole is. The right way to fit everything is illustrated in the images below.

Hex3 has also made it possible for users to buy only those teflon tips for US$14.95 a pair (they ship internationally). These in turn can be inserted into the tip of a 0.7 metal-bodied mechanical pencil, creating an instant stylus. The result doesn't have pressure sensitivity, but the following mod will give you that and accuracy.

On top of that, I've found, like other users of this mod, that I don't need to buy Wacom nibs so often anymore because these teflon disks are really long-lasting! I'll update this post when I finally replace the first disk. (The great thing is, I have a spare because these tips come in pairs!)

Once you've received your Hex3 Jaja Teflon nibs, here's what to do:

Here are the steps to modifying your Wacom Intuos Creative Stylus with a Jaja Teflon tip. Easy!

Here are the steps to modifying your Wacom Intuos Creative Stylus with a Jaja Teflon tip. Easy!

Just in case, here are some accompanying notes for the images above:

1. Cut a Jaja Teflon tip to size to 1cm from the top - this length allows it to sit perfectly in your Wacom stylus case when finished. (Updated edit: I now cut my tips to 1cm. Longer than that results in easier breakage. Be careful not to cut off too much, but make sure the metal tip doesn't stick out too much either. The tip should be flush to the rubber nib.)

2. Position the Teflon tip shaft in the center of the Wacom rubber nib and push it through slowly,  (you might want to use a torn nib so you don't need to damage a new one) then slide it it carefully into that little hole in the center. The shaft of the Jaja nib sits almost perfectly in the little hole at the tip of the Wacom ICS's metal tip. 

That’s it! The rubber nib holds the Teflon tip perfectly in place. Having used this solution for about a month, I have to say I'm really happy with it.

When done correctly, your stylus will fit perfectly in its case, even with your new nib.

When done correctly, your stylus will fit perfectly in its case, even with your new nib.

How has my Wacom ICS improved?

• I don't wear rubber nibs down anymore (I did buy some spares before getting the Jaja tips). 

• Users who've done this hack say they've been happy with this solution for months - nothing is wearing down, and I'll update this post when mine finally need replacement.

• The Teflon metal tips should last for months if not longer, and your initial purchase consists of 2, so you have a spare! 

• And no, these tips do not scratch your iPad's screen. (The iPad's screen is made with Gorilla Glass, which is harder than most metals.) In fact, I don't use a screen protector at all. I used to think they were necessary, but read that the iPad Air's screen is extremely strong and scratch resistant. 4 months into ownership of my iPad Air, I can say it's fantastic.

I will say that being careful is always a good thing. You should be aware of the environment in which you're sketching, especially outdoors. Both iPad and stylus are valuable equipment that need to be treated sensibly. Before use, check that nothing is trapped under the Teflon disk. In an environment that may be very dirty and gritty, I suggest being really careful not to get any gritty bits under the disk which might scratch the screen as you slide it across the glass. 

Personally, I clean my screen frequently. I often wear a glove, cut of the tips of the thumb, index and middle finger, and this cleans my screen while allowing me to rest my hand now and then. I haven't experienced any problems at all, and I've done plenty of sketching outdoors on windy days.

Hope that helps and please let me know if you've tried this or have questions!

*UPDATE *

I've used the Hex3 tips with my Wacom ICS for about 6 months now, and I thought I'd add an update on how things are going.

1. I've never had any tips wear out on me yet. They all glide smoothly and work great. 

2. My biggest issue has been tips breaking, although it's no fault of the tip. The first time, my arm was extended, stylus in hand as I was about to position myself to sketch standing up. A kid ran into me and the impact snapped the head of the tip. I subsequently began carrying spares. (A spot of Blue Tack or similar cradles my spare in my Wacom ICS case)

3. I also had another tip break when I slipped my stylus into the pocket of my cargoes, and forgot it was there. By the time I got home, the tip had also broken off. Now my stylus goes right back into it's case immediately after use, and the case rides safely in my cargoes.

4. I once lost a tip because it fell out and landed in grass. I didn't realize the tip had fallen out, and combing areas of the lawn I'd been on drew a blank. (Surprise, surprise) That issue is now solved by using a teeny bit of blue tack in the inside of the rubber nib as I insert the tip. That little bit of stickiness has prevented the tip from slipping out of place.


Wacom Intuos Creative Stylus review

My favorite sketching setup: iPad Air + Procreate app + Wacom Intuos Creative Stylus

My favorite sketching setup: iPad Air + Procreate app + Wacom Intuos Creative Stylus

I've been using this particular set up for a few months now: iPad Air + Procreate app + Wacom Intuos Creative Stylus. I love it. To me, it feels like technology has finally closed the gap and made sketching digitally on the go, totally seamless.

Procreate's app logo

Procreate's app logo

Please note that when I discuss the Wacom ICS in use, I'm specifically referring to how it works with Procreate. I've tested it with other apps, and it's fine on some, but for true awesomeness, you need to try it with Procreate.

Pressure sensitivity is not built into the iPad, so how well a stylus behaves really depends upon the app you use, and the ability to tweak settings to your liking. Therefore, the developer team behind your app of choice is very important.

The Wacom Intuos Creative Stylus uses Bluetooth 4.0 to talk to the iPad. In other words, it's compatible with all iPads except the iPad 1 and 2.

This is what you get when you order the Wacom Intuos Creative Stylus. The sleek, solid case houses the stylus itself, along with 2 extra nibs, slots for extra nibs, as well as a spot for a spare AAAA battery.

This is what you get when you order the Wacom Intuos Creative Stylus. The sleek, solid case houses the stylus itself, along with 2 extra nibs, slots for extra nibs, as well as a spot for a spare AAAA battery.

First, here's what I love about the Wacom Intuos Creative Stylus:

• It looks great! I have the black and blue version. The metal body is slim yet solid, with a matte grippy end. Build quality feels excellent; like something that will last and last for ages.

• It's well balanced and doesn't feel awkward or tiring to use, even after many, many hours a day (I've used it for up to 9 almost non-stop) 

The Wacom ICS comes in a beautiful case which gets my thumbs up. Slim and sleek, it's solid and well-built without being bulky or heavy, and has special slots for storing an extra battery and spare nibs. To protect my stylus and prevent it from accidentally being turned on, I've made it a habit to transport it in its case.

• The Bluetooth 4.0 connection is fast, very lower power and for me so far, absolutely reliable.

• The stylus doesn't use much power and the battery lasts for ages. After heavy usage in the last 4 months, its single AAAA battery is at 55% right now, which means I should get a few more months of use!

• Most importantly, the pressure sensitivity of the Wacom ICS on my iPad Air is amazing! I literally use feather touches sometimes and they register perfectly. The ability to go from hairline to fat, juicy mark in a single stroke is creative heaven!

• The stylus uses a replaceable rubber nib, and comes with 2 spare soft nibs. Your mileage on those will vary greatly, depending on your style of usage and how much pressure you use when drawing. People who hate rubber-nibbled stylii because they feel these aren't sufficiently accurate may shudder at trying the Wacom ICS, but I didn't have a problem with it at all. The rubber nib is also smaller than that of other stylii, and I found a modification tip on the Procreate community forum that solves this issue very satisfactorily. Details in the this post about modifying your Wacom ICS.

• The stylus is made by Wacom, so you can expect great quality and decent customer service when you need it. This may depend on where you reside though. Read on for details of my experience with Wacom customer service in the next section.

• There are 2 buttons on the stylus. Some apps allow you to program them. In Procreate, I've set them to Redo and Undo.

Now let's talk about what I don't like about the Wacom Intuos Creative Stylus, along with what I've done to overcome these issues: 

•  It uses an AAAA sized battery, which can be hard to find in retail stores and even online, in many countries. (I solved the problem by getting a 6-pack on Amazon when I bought my stylus, and carry a spare in its case, just in case.)

• I  like to use rechargeable batteries where possible, and there aren't any rechargeable AAAA batteries available...yet. Good thing these last a long time.

No palm rejection. This is not a deal-breaker for me however, and I've taken to wearing a glove when using my stylus. This cleans my iPad's screen while I work, and let's me rest my hand on the iPad sometimes without any accidental strokes sweeping across my sketch.

After 3 weeks of use, this is what my first nib looked like :(

After 3 weeks of use, this is what my first nib looked like :(

• My biggest concern has been that the rubber nibs that come with the Wacom a Intuos Creative Stylus tear very easily! The nib that was preinstalled lasted me maybe 3 weeks. The next one developed a tear in about one week! I'm not sure if it's a manufacturing defect or a necessary evil to get the required sensitivity. The stylus is under warranty for a year, but does not include the rubber nibs, which are categorized as 'expendable parts'.

After my initial chagrin, I chalked this up to an expense on expendables; pens run out of ink, pencils get worn down and paint and paper eventually run out too, so fine. I'd need to order more now and then. At only US$4.99 for a 3-pack from the Wacom site, I thought ok, it's reasonable. When I tried to figure out exactly which nib to buy though, I couldn't find official information anywhere, which was pretty shocking! And that leads me to my next issue: customer service out of the US.

• The nib issue had me most concerned as they are not currently available in Hong Kong. Down to my final one, I called Wacom Hong Kong to ask where I could get more. They were very nice, but they couldn't speak decent English, and were not at all knowledgable about the product. I had to ask my other half to speak to them in Cantonese. The ladies at Wacom HK were very apologetic, stating that this product was very new to them. I was then informed that I'd have to wait months for them to receive stock of nibs. When asked about the nib model number, Wacom Hong Kong gave me a model number that turned out to be that of the stylus! 

Packaging for the Wacom Intuos Creative Stylus replacement nibs. These are for the soft nibs (ACK-20501). The firm nibs are ACK-20601

Packaging for the Wacom Intuos Creative Stylus replacement nibs. These are for the soft nibs (ACK-20501). The firm nibs are ACK-20601

Tired of the runaround, I called Wacom USA where I was attended to quickly and efficiently. They also offered to send me one replacement nib to my US address. (Well, they said they would, but it never arrived.) The most economical solution for me was ordering via Amazon Prime in the US, getting them shipped to someone, who then sent them to me. This proved a little cheaper than buying direct from Wacom, which charges in increments of US$5 for shipping!

If you've been searching the net for info about spare nibs for the Wacom Intuos Creative Stylus too, here it is! For some reason or other, neither Wacom sites nor Amazon listings say that these are the correct nibs for the Wacom Intuos Stylus. I've ordered both and can assure you they're correct however. There are 2 types of nibs: Wacom Soft Nibs (ACK20501), which are the same as the ones that came with the stylus, and Wacom Firm Nibs (ACK20601), which are an additional option. 

Wacom USA was sympathetic when I explained that my nibs were wearing down very quickly, then advised me to try the firm option. I ordered a set of both, and after trying soft and hard nibs, can state that I don't like the firm ones. Like many other users, I find I need to press a lot harder for my strokes to register. Maybe they require some tweaking in settings to get them to work well, but I don't want to bother with that. I spent ages getting my brushes in Procreate to work just so, and don't want to tweak any further to accommodate new nibs.

Sketching with the Wacom Intuos Creative Stylus

The sketches above give you an idea of what's possible. Tools used: Pencil tool on the left, and Ink Bleed + Water Brush tools on the right. All of them came with Procreate, but I modified the settings to suit my preferences. 

The sketches above give you an idea of what's possible. Tools used: Pencil tool on the left, and Ink Bleed + Water Brush tools on the right. All of them came with Procreate, but I modified the settings to suit my preferences. 

So how does the stylus work? Like a dream. After you get used to the feel of rubber on glass, the process is seamless. Smooth and sensitive, I love going from thin to thick lines in one stroke. 

Here's a sampling of my favorite brushes in Procreate. See what I mean about thin to thick in 1 stroke?

Here's a sampling of my favorite brushes in Procreate. See what I mean about thin to thick in 1 stroke?

Now, after all this, you might think, "Oh this is not good! The Wacom Intuos Creative Stylus sounds great and all, but what if I need more nibs? What a hassle! Especially if I don't live in the US?"

Here's the good news: there's a very easy hack to make your nibs last a LOT longer. If you haven't bought your stylus yet, you might want to read my next post before you do.